Connecting Aloware with Salesforce is key to transforming your sales and support efficiency. Not only does it let your team click to call any Salesforce contact, but it logs every customer call and text message directly in the CRM to provide a complete view of account relationships.
With real-time user sync and bi-directional data flow, your reps can work smarter without jumping between platforms. In this post, we’ll walk you through the simple process of integrating your Aloware account with Salesforce, so you can start capturing call and SMS data right in your Salesforce records.
Step 1: Log into your Aloware dashboard
The first step to integrating Salesforce with Aloware is logging into your Aloware dashboard, which is your control center for managing Aloware’s features and integrations.
Here’s how to begin:
- Open your Aloware dashboard: Go to the Aloware platform and log in to your account.
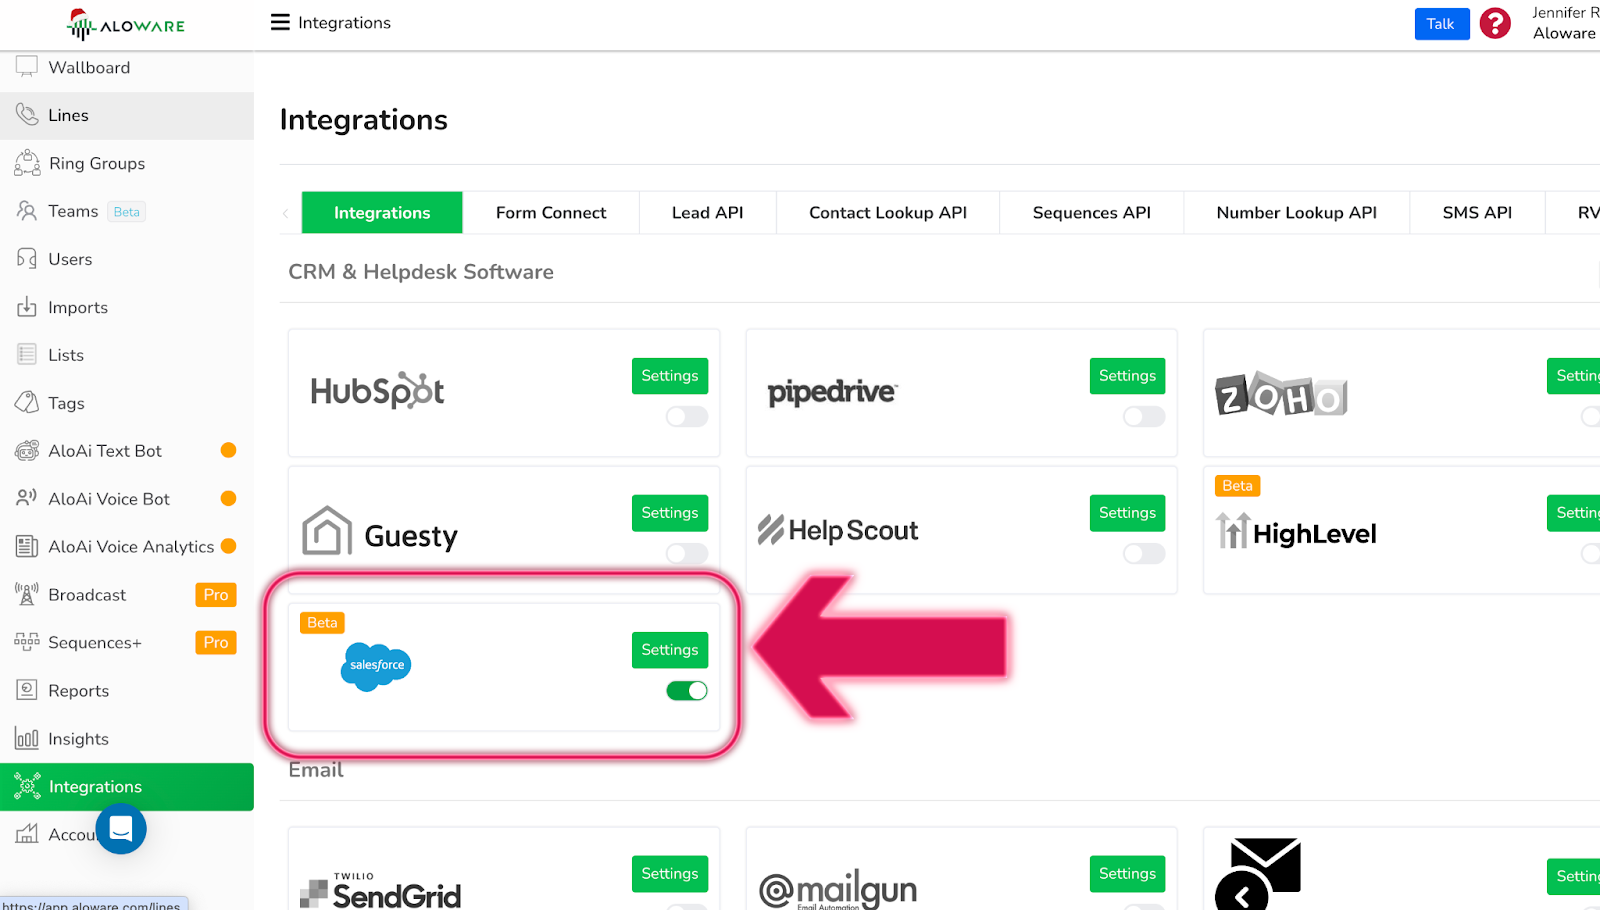
- Navigate to the Integrations tab: Once logged in, look for the Integrations tab on your left-hand menu. Click on it to open your integration options.

Step 2: Select your Salesforce integration button
- After you click on the Integrations tab, you’ll see a list of available integrations.
- Select Salesforce: Scroll down until you find the Salesforce integration button. Once you locate it, click it to begin the setup process.
Step 3: Authenticate your Salesforce connection
Now it’s time to authenticate your Salesforce account with Aloware. This is important to ensure that Aloware has permission to securely access and sync data from your Salesforce CRM.
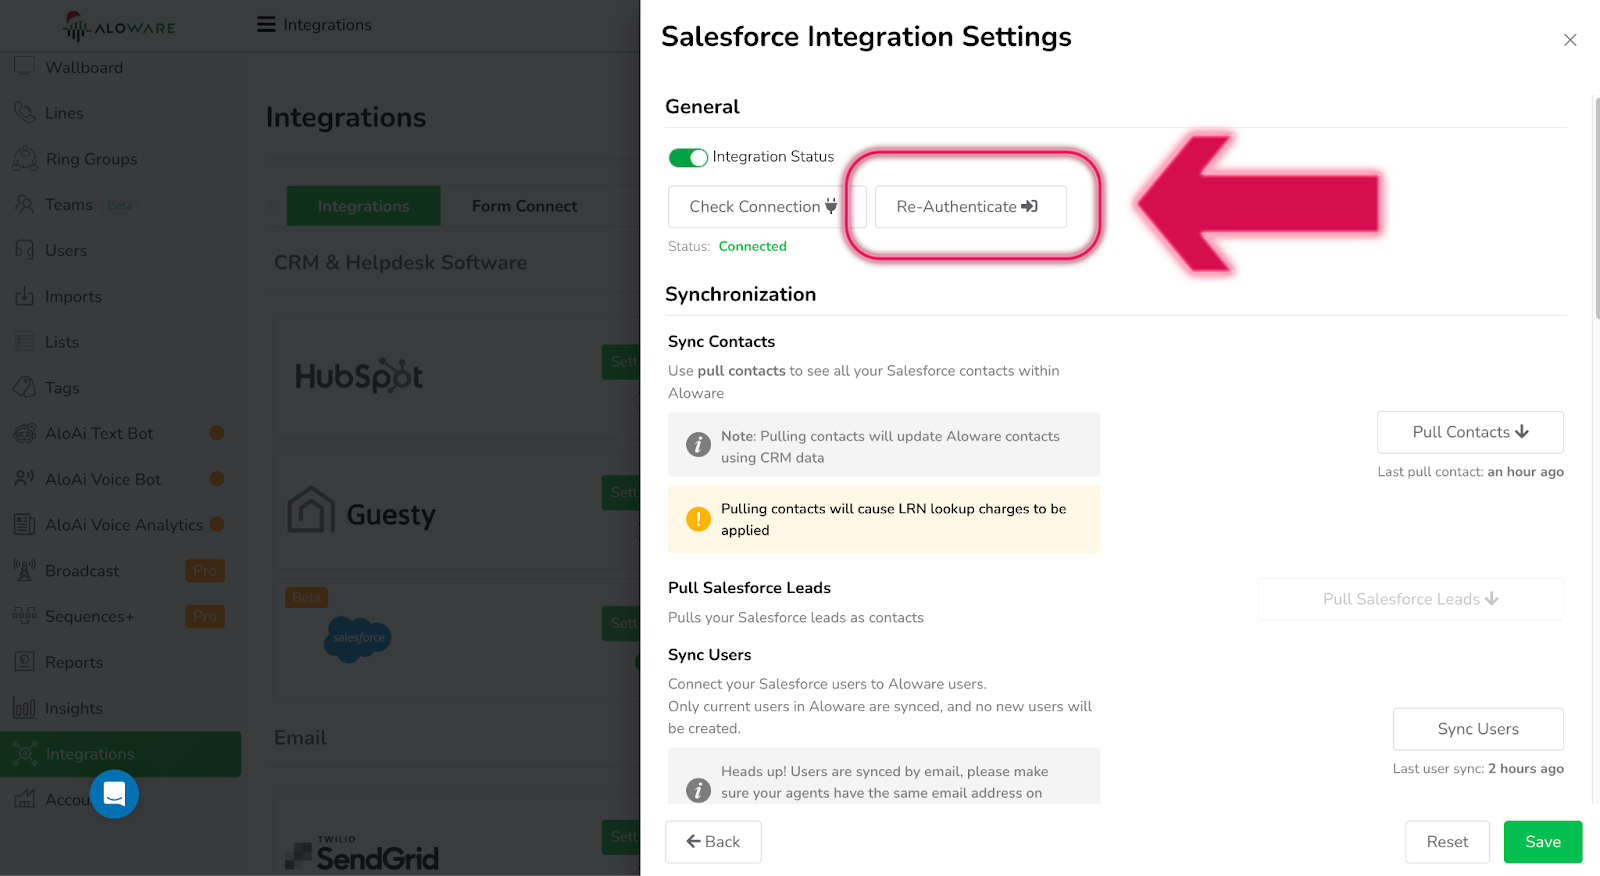
After you complete this step, you can choose between the following options below:
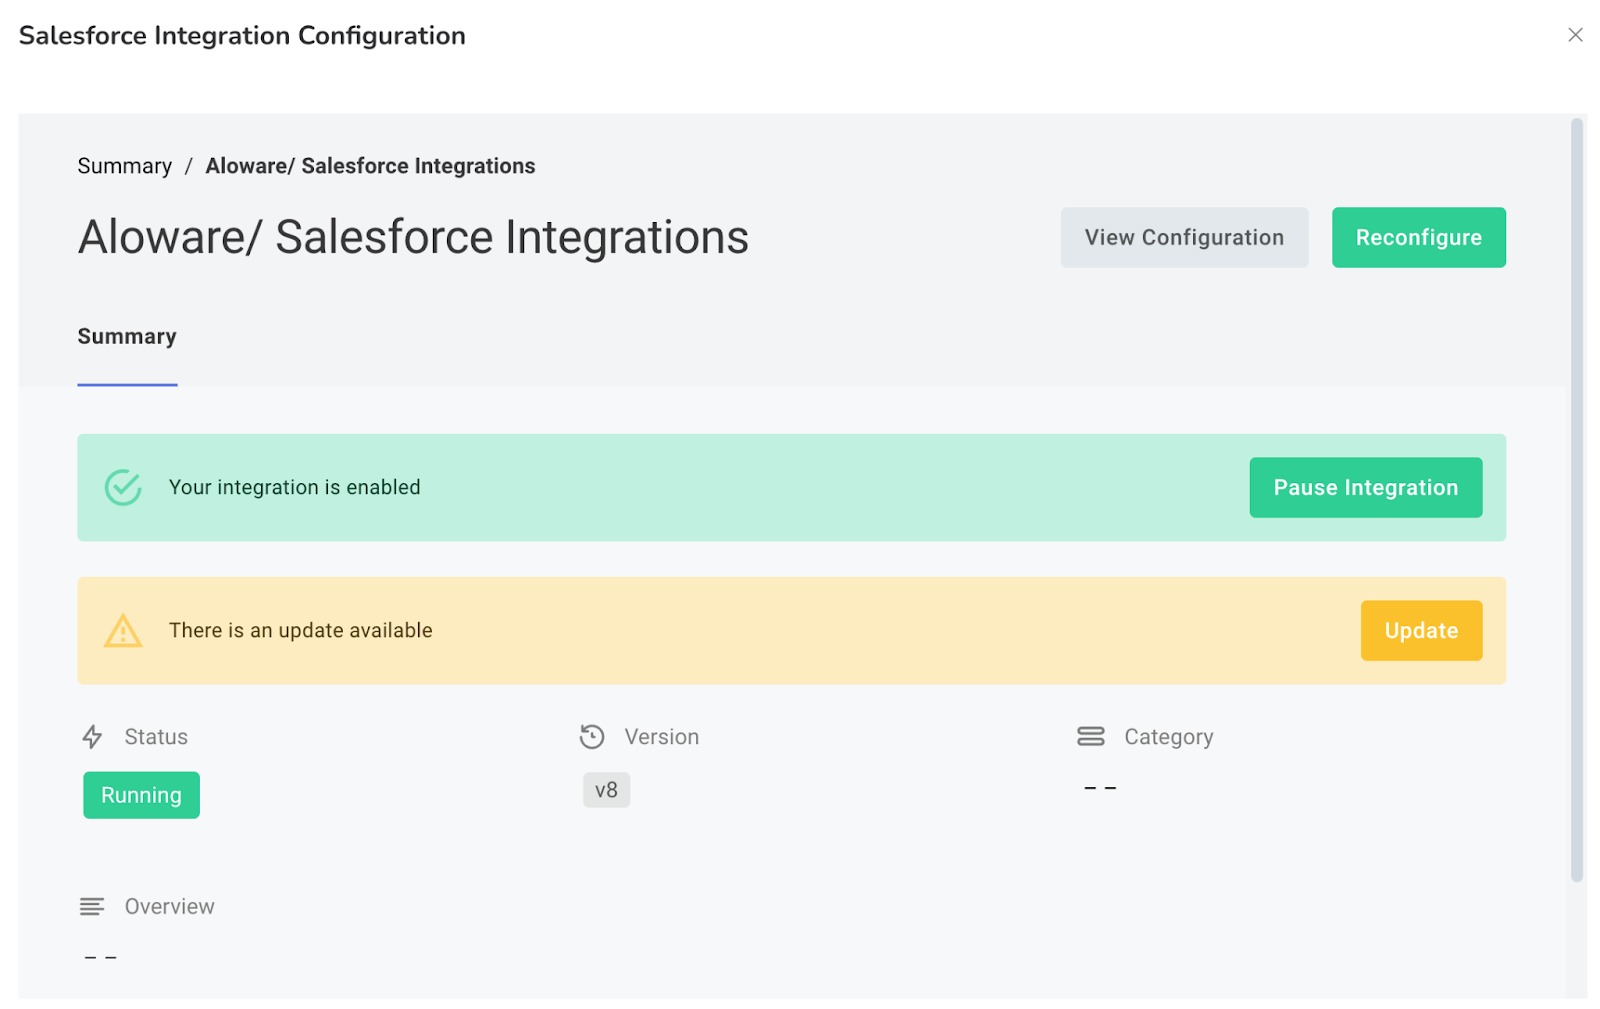
- View your configuration: This screen shows your current integration setup, which you can reconfigure if needed. If everything looks good, move on to the next step.
- Pause integration (optional): If you ever need to pause the integration temporarily, there’s an option to do so here. This can be useful if you need to make adjustments or troubleshoot.
- Deploy updates: Should any integration updates become available, this section allows you to deploy them seamlessly.
Step 4: Sync contacts from Salesforce
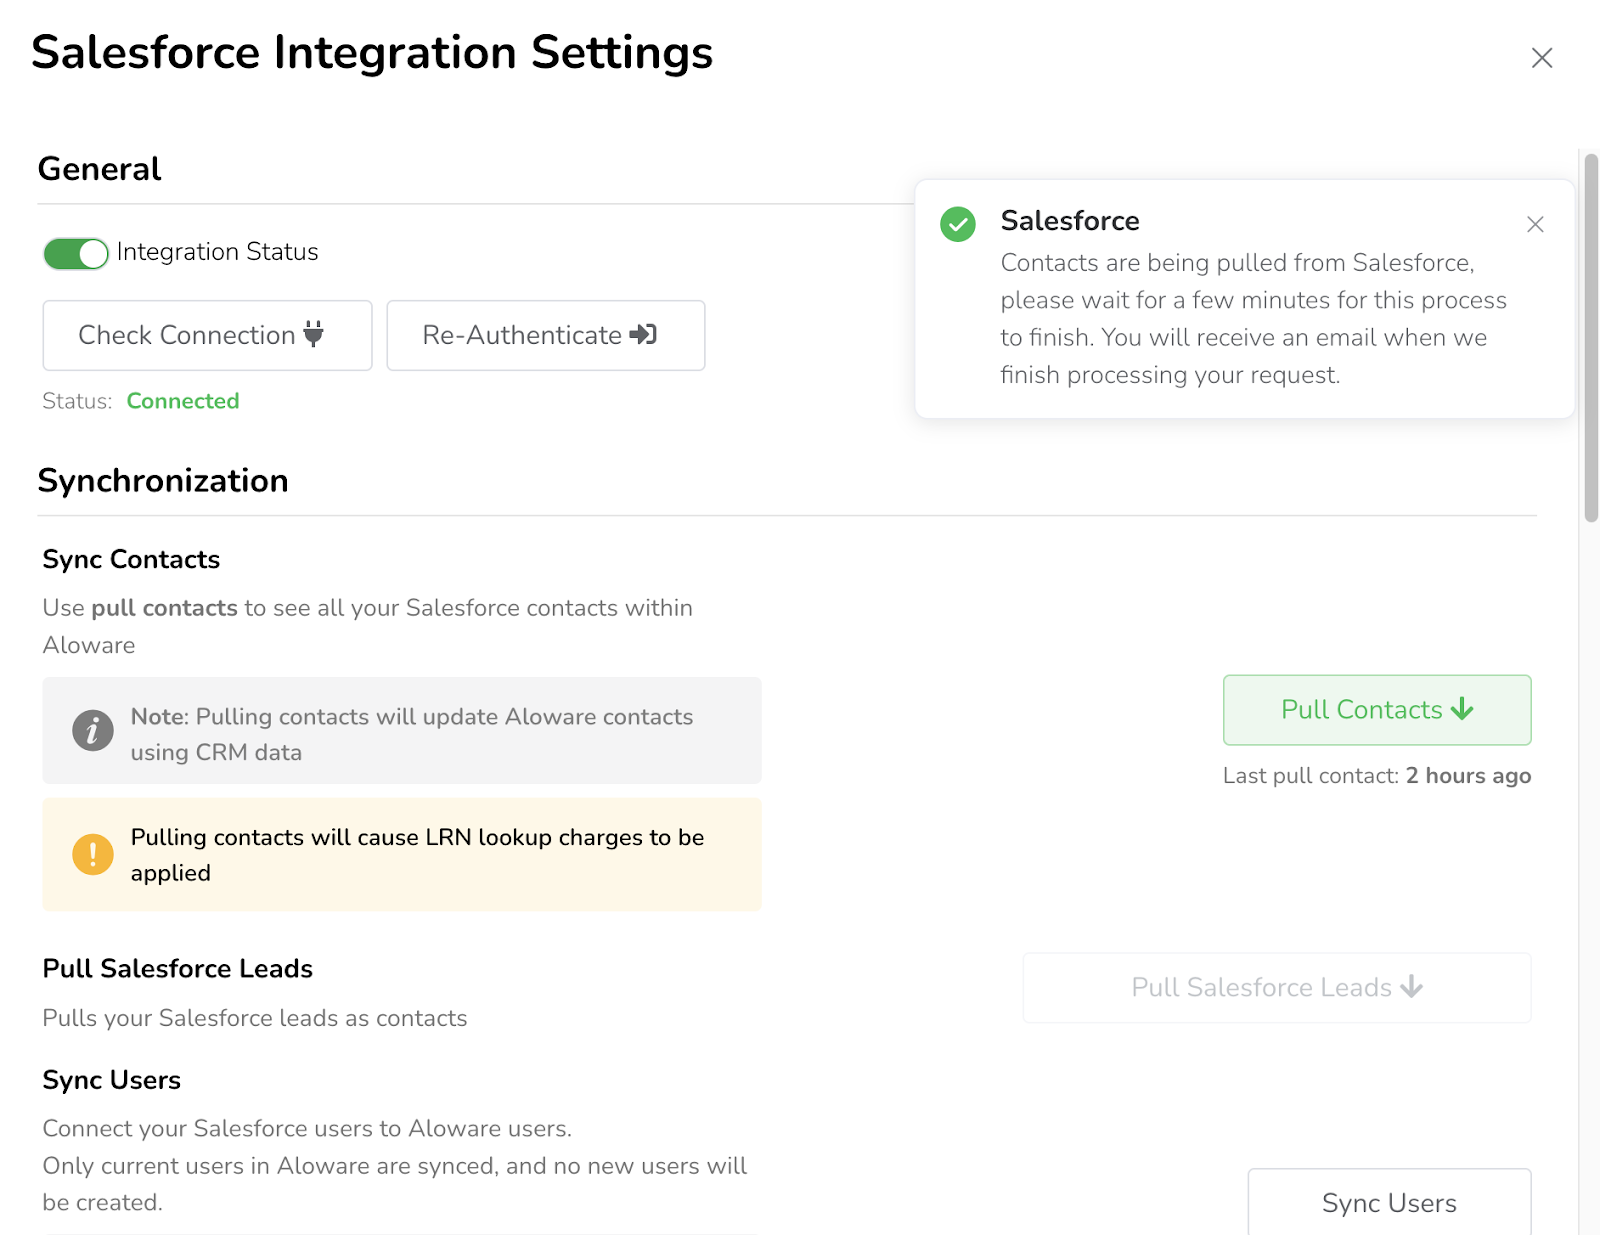
Now that your connection is authenticated, the next step is pulling your contacts from Salesforce into Aloware. This ensures that your customer data is consistent and up-to-date across both platforms.
- Click “Pull Contacts from Salesforce”: This will initiate the process of syncing your contacts from Salesforce to Aloware. Once the sync is complete, you’ll see confirmation. of a successful data import.
Step 5: Sync your users
With your Salesforce contacts now available in Aloware, it’s now time to sync your users between both platforms. This step ensures that any user-related data or account ownership data is also kept consistent across platforms.
- Click the “Sync Users” button: This action will send your user data from Salesforce to Aloware. It ensures that every user in Salesforce is mirrored in Aloware, allowing for seamless collaboration and appropriate access.
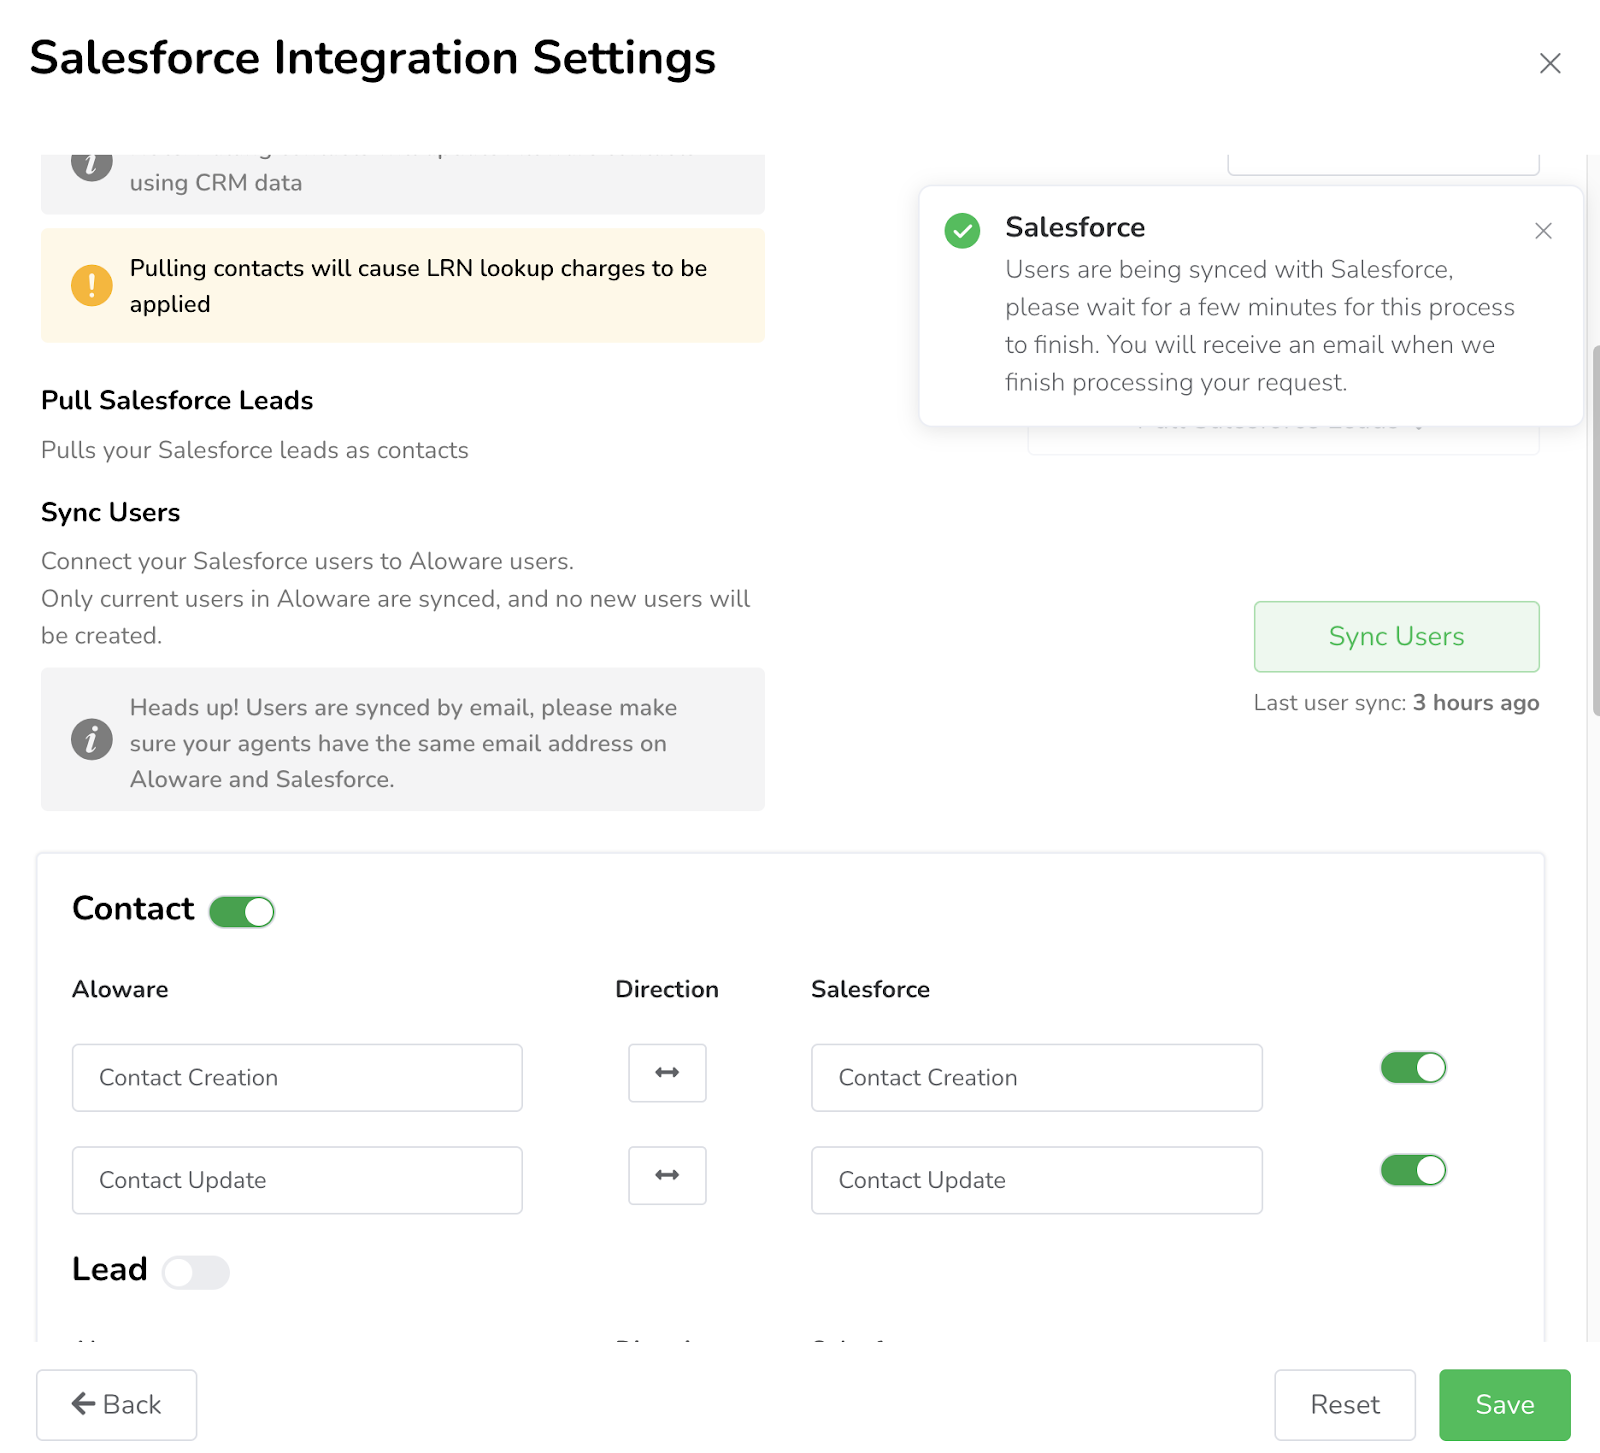
Step 6: Set sync direction (bi-directional or uni-directional)
Another benefit of our integration is choosing how data flows between Aloware and Salesforce. You can select either bi-directionally or uni-directionally depending on your needs.
- Bi-directional sync is the default recommended setting and ensures that lead and contact information flows both ways. This means if you add new information in Salesforce it will automatically appear in Aloware, and that any updates in Aloware will sync back to Salesforce in real time.
- Uni-directional sync: If you only want data to flow one way (from Salesforce to Aloware or vice versa), you can adjust this setting for individual input points by placing the related arrow in the proper direction.
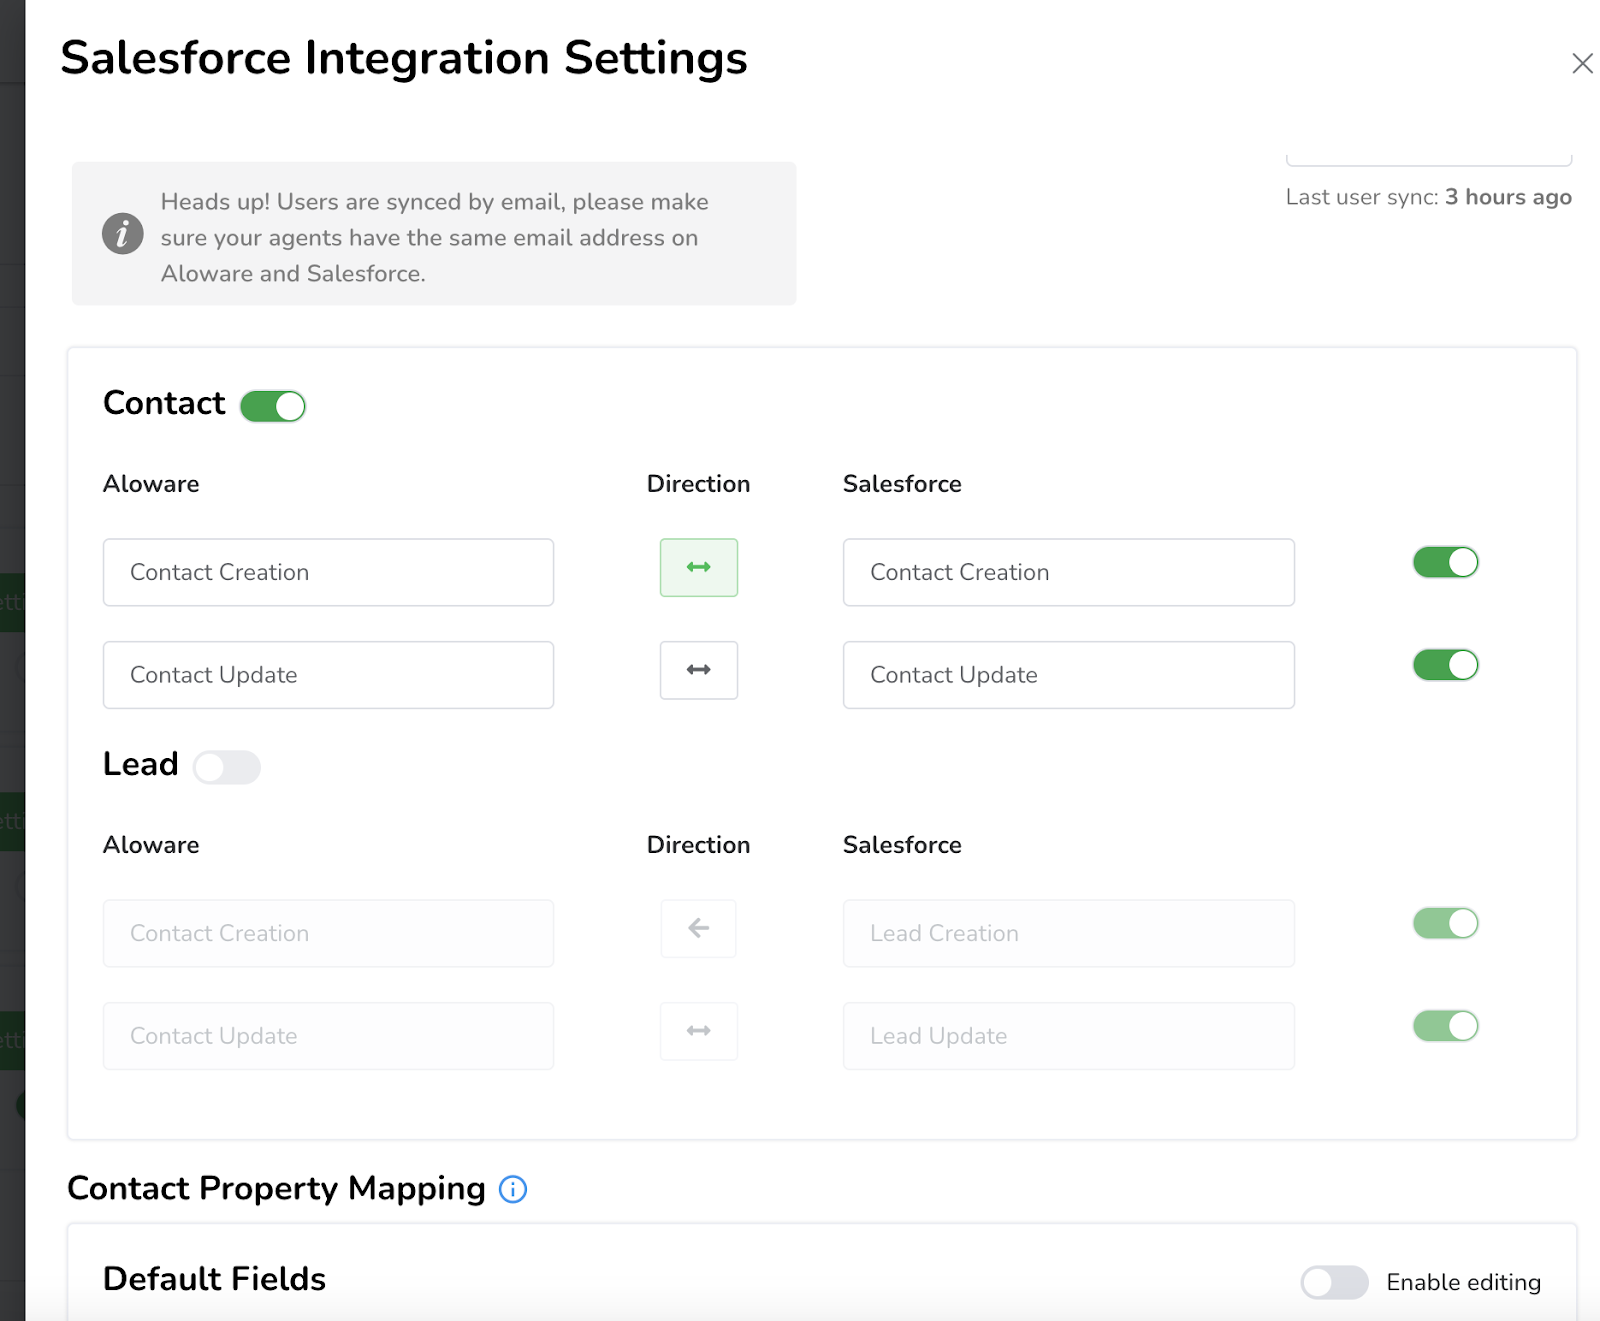
Step 7: Map contact properties
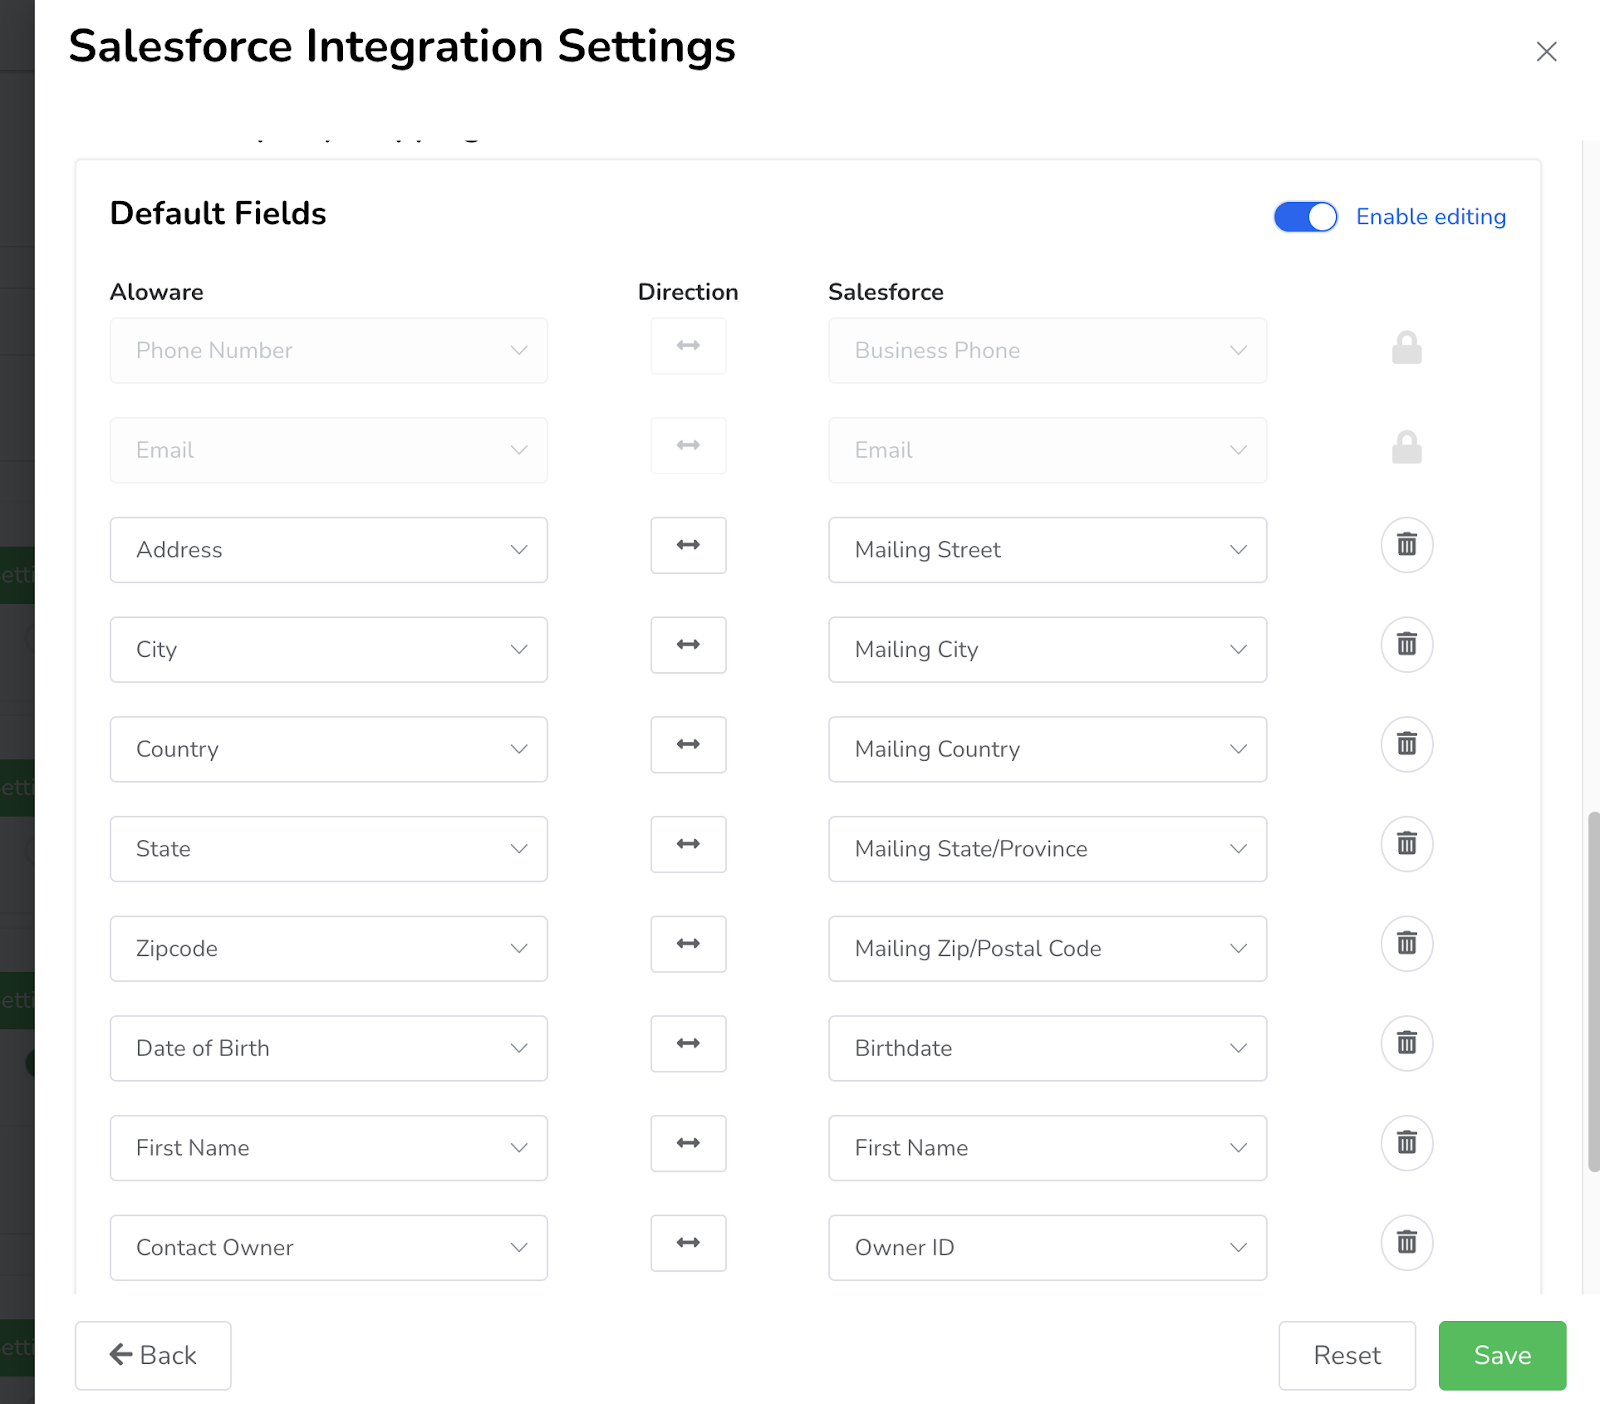
The next step is mapping your contact properties between Salesforce and Aloware. This ensures that information like names, addresses, birthdates, and contact owners are correctly synced between both platforms.
- Enable contact property mapping: To begin, turn on the “Enable Editing” switch under the contact property mapping section. This will open a list of all the fields available for syncing between platforms.
- Review and adjust fields: You’ll see fields like name, address, city, country, and more appear. You can choose to delete any individual field or adjust the sync direction if desired (note the default setting is bi-directional.)
- Note restricted fields: By default, the phone number and email fields have an active, bi-directional sync in order for your Salesforce integration to work properly. They will appear locked in the list and cannot be adjusted.
- Save when done: Once you’re happy with your contact property mappings, click “Save” to lock in your settings.
Step 8: Finalize and test your integration
You’ve now completed the main steps of setting up your Aloware Salesforce integration! To ensure everything is working correctly:
- Test your integration: Make a test call and send a test SMS from Aloware. Then check Salesforce in a few minutes to make sure the call and text both appear in your lead or contact’s activity history.
You’re ready to go
Congratulations on getting your Aloware Salesforce integration up and running! Now you’ll be able to see every call and text in real-time within Salesforce, making it easier than ever to track customer interactions, enforce compliance, and improve overall team productivity.
Say goodbye to scattered data and hello to a streamlined workflow. Leverage the power of full communication tracking and witness your team’s productivity boost.


