Clio Manage via Zapier
Create Clio contacts and matters from Aloware leads.
Connect Aloware to Clio Manage through Zapier so qualified leads become Clio Contacts and Matters automatically. Use it when your intake runs in Aloware and your case management runs in Clio.
After you build it, any lead that meets your qualification rule creates a Contact and a Matter in Clio Manage. Aloware sends the structured intake data across, nobody has to retype it, and Clio only receives qualified cases.
Zapier plan differences
Your Zapier plan changes how you build this.
- Free plan: Zaps are limited to two steps, so you need several Zaps to create a Contact and then a Matter.
- Professional plan: one multi-step Zap can create the Contact, save the Clio Contact ID and create the Matter in a single workflow.
How the sync behaves
Once it's running, everything depends on what happens to the lead in Aloware.
A new lead enters Aloware by call, SMS, web form or referral and stays there during intake. Your intake team, or the AI, gathers the details you need and updates the contact along the way.
The contact disposition is the trigger. Clio Manage only receives leads set to one specific status, for example Signed Retainer. Leads that are unqualified or still incomplete never leave Aloware, so they never create Clio records.
When the disposition changes to that status, Zapier creates the Clio contact first, then creates a Matter linked to it. Every intake value you mapped, such as notes, email and custom fields, travels with it.
The result: Clio holds only active, qualified cases, Aloware keeps owning intake and lead management, manual entry drops, and each Matter opens with complete, consistent data.
Prerequisites
Finish these settings in Aloware and Clio Manage before you build any Zap. They shape the data and decide when the automation fires.
1. Accounts and access
You need an Aloware account with admin permissions, a Clio Manage account allowed to create Contacts and Matters, and a Zapier account.
To keep everything in one workflow, use a Professional Zapier plan, because that plan supports multi-step Zaps.
2. Contact dispositions in Aloware
Contact Dispositions decide when the automation fires, so set them up first.
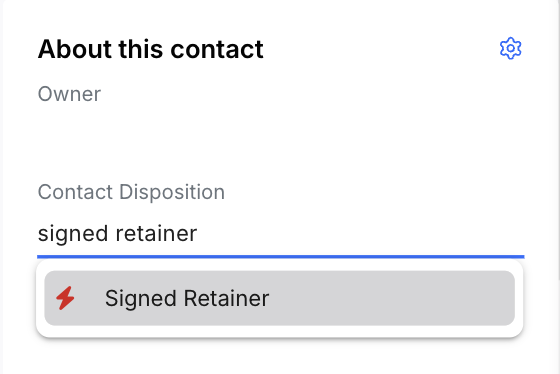
Open Account Settings → Contact Dispositions and add statuses like New, Contacted, Qualified, Retainer Sent, and Signed Retainer. Signed Retainer is the one that fires the integration, so apply it only to fully qualified leads.
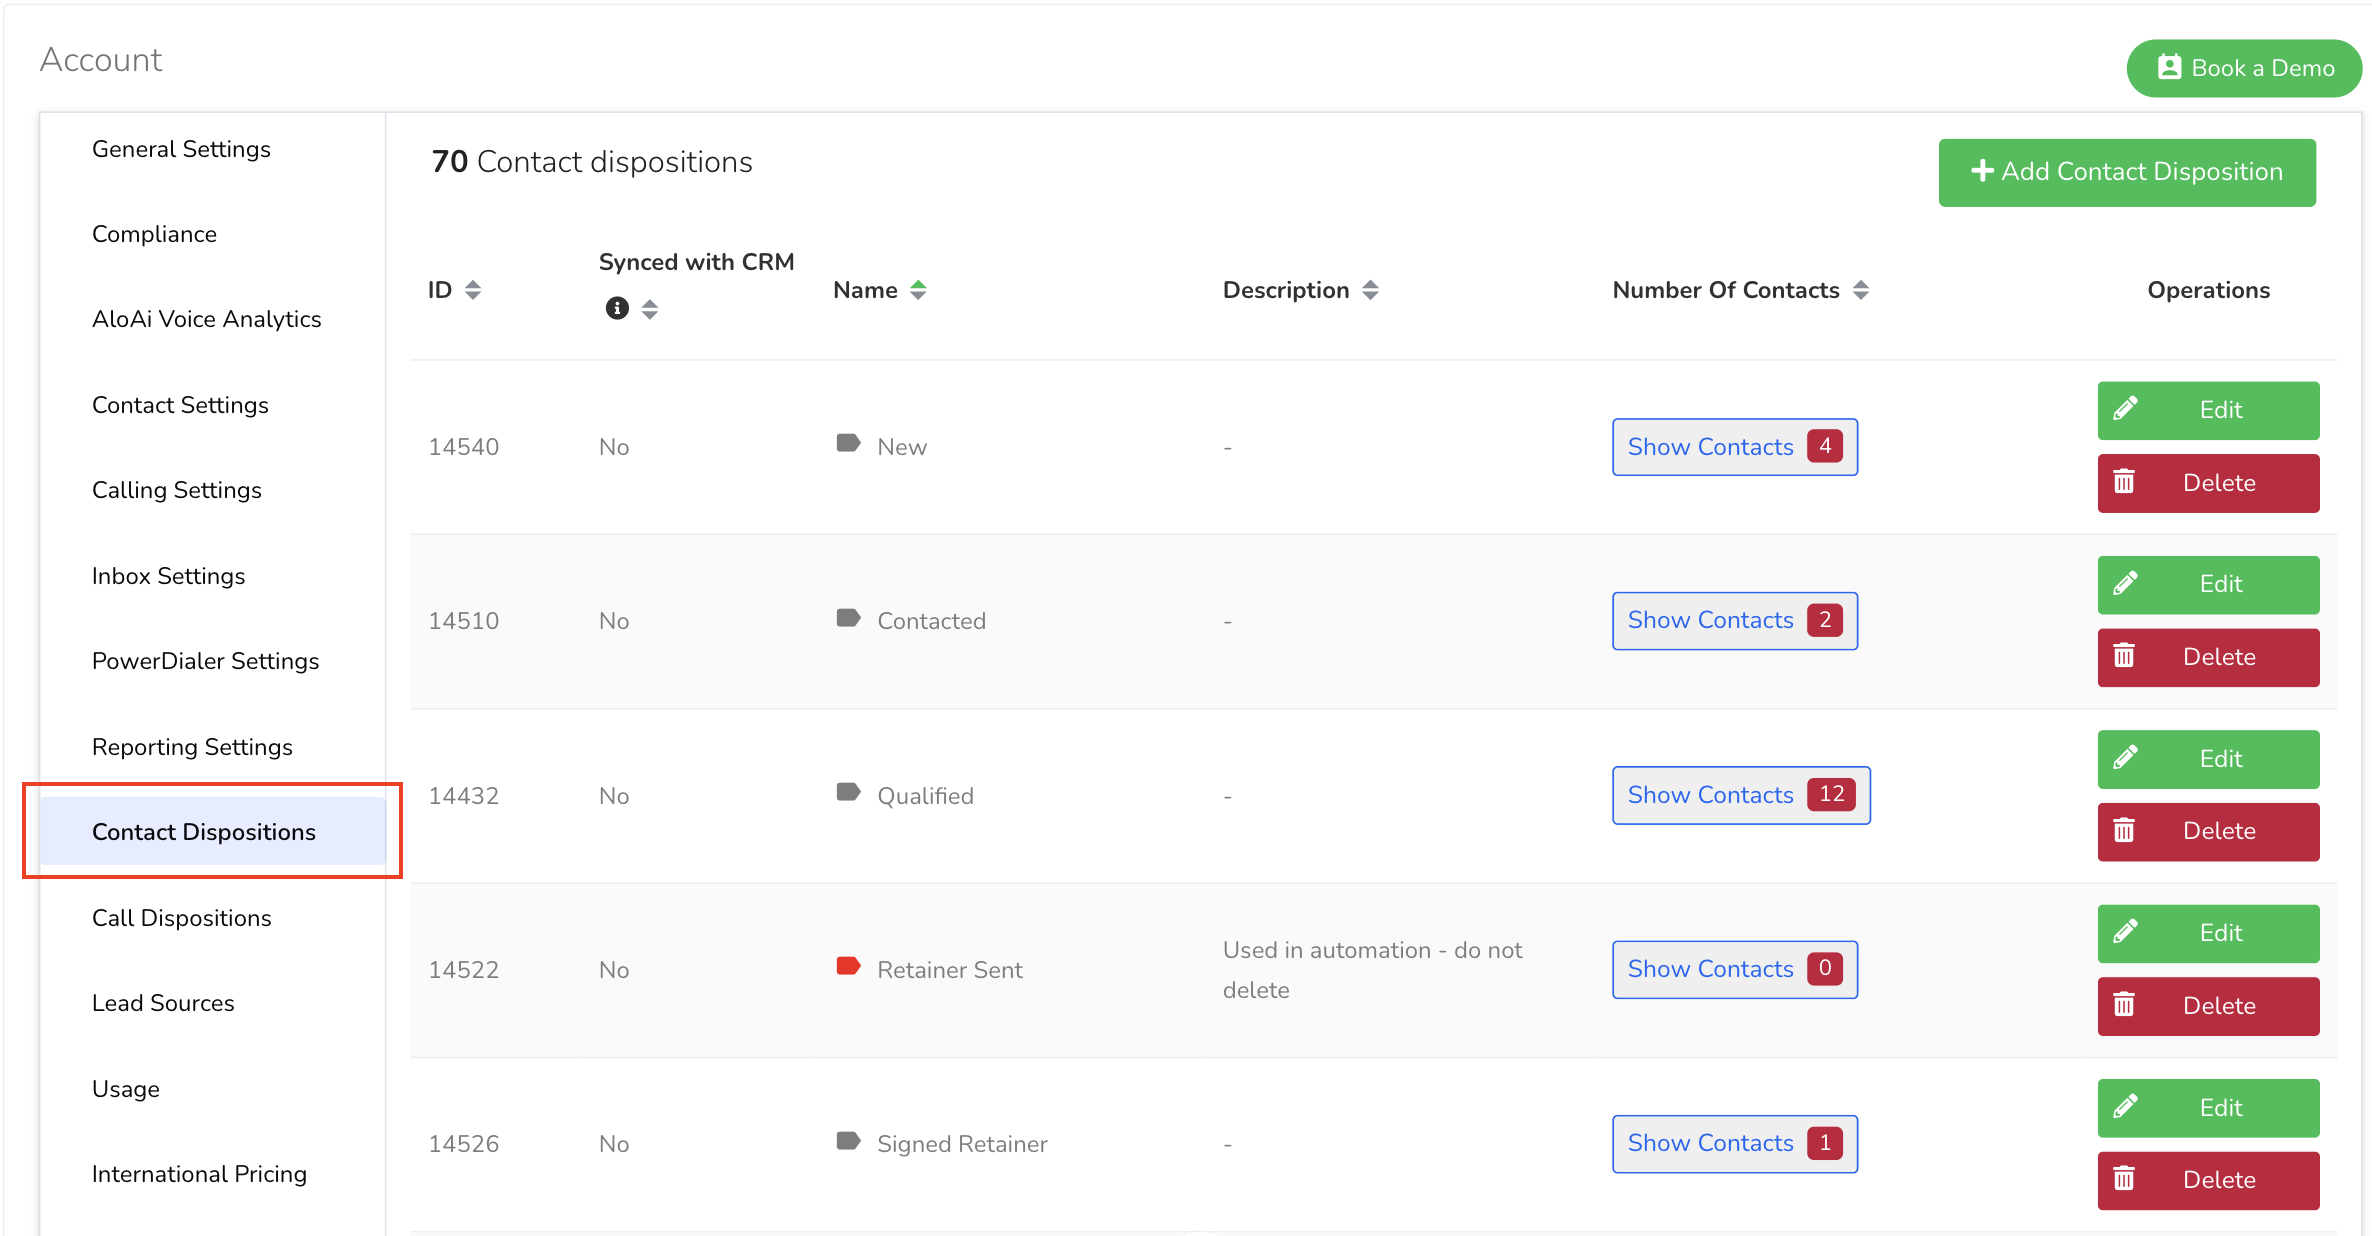
Make sure every intake agent knows when to use that status, or Clio will collect records you don't want.
3. Custom intake fields in Aloware
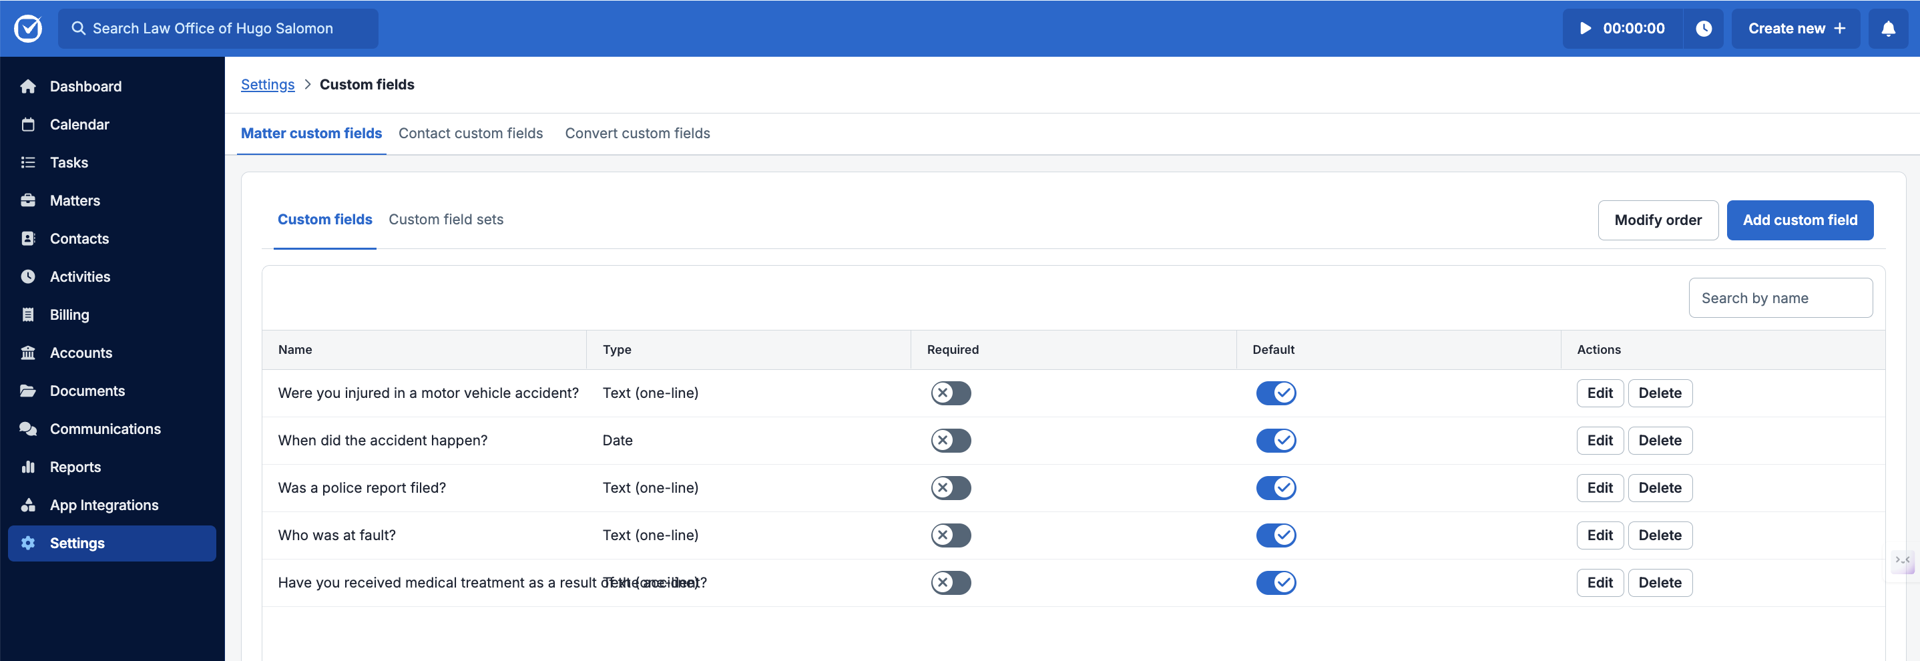
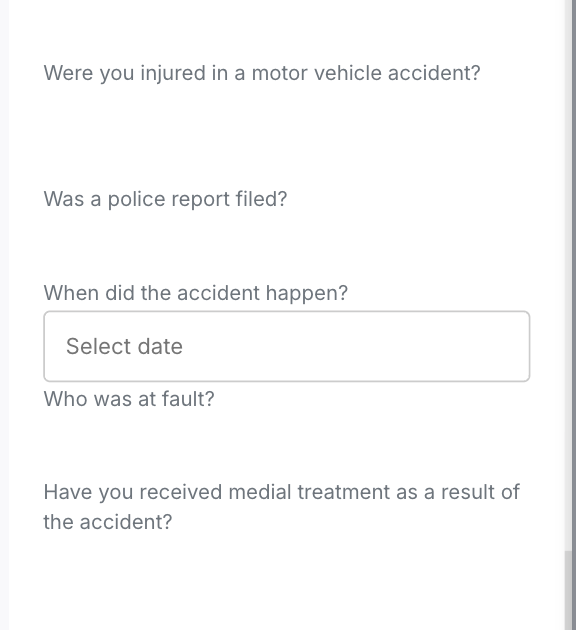
Create custom intake fields in Aloware to hold the data Clio will receive.
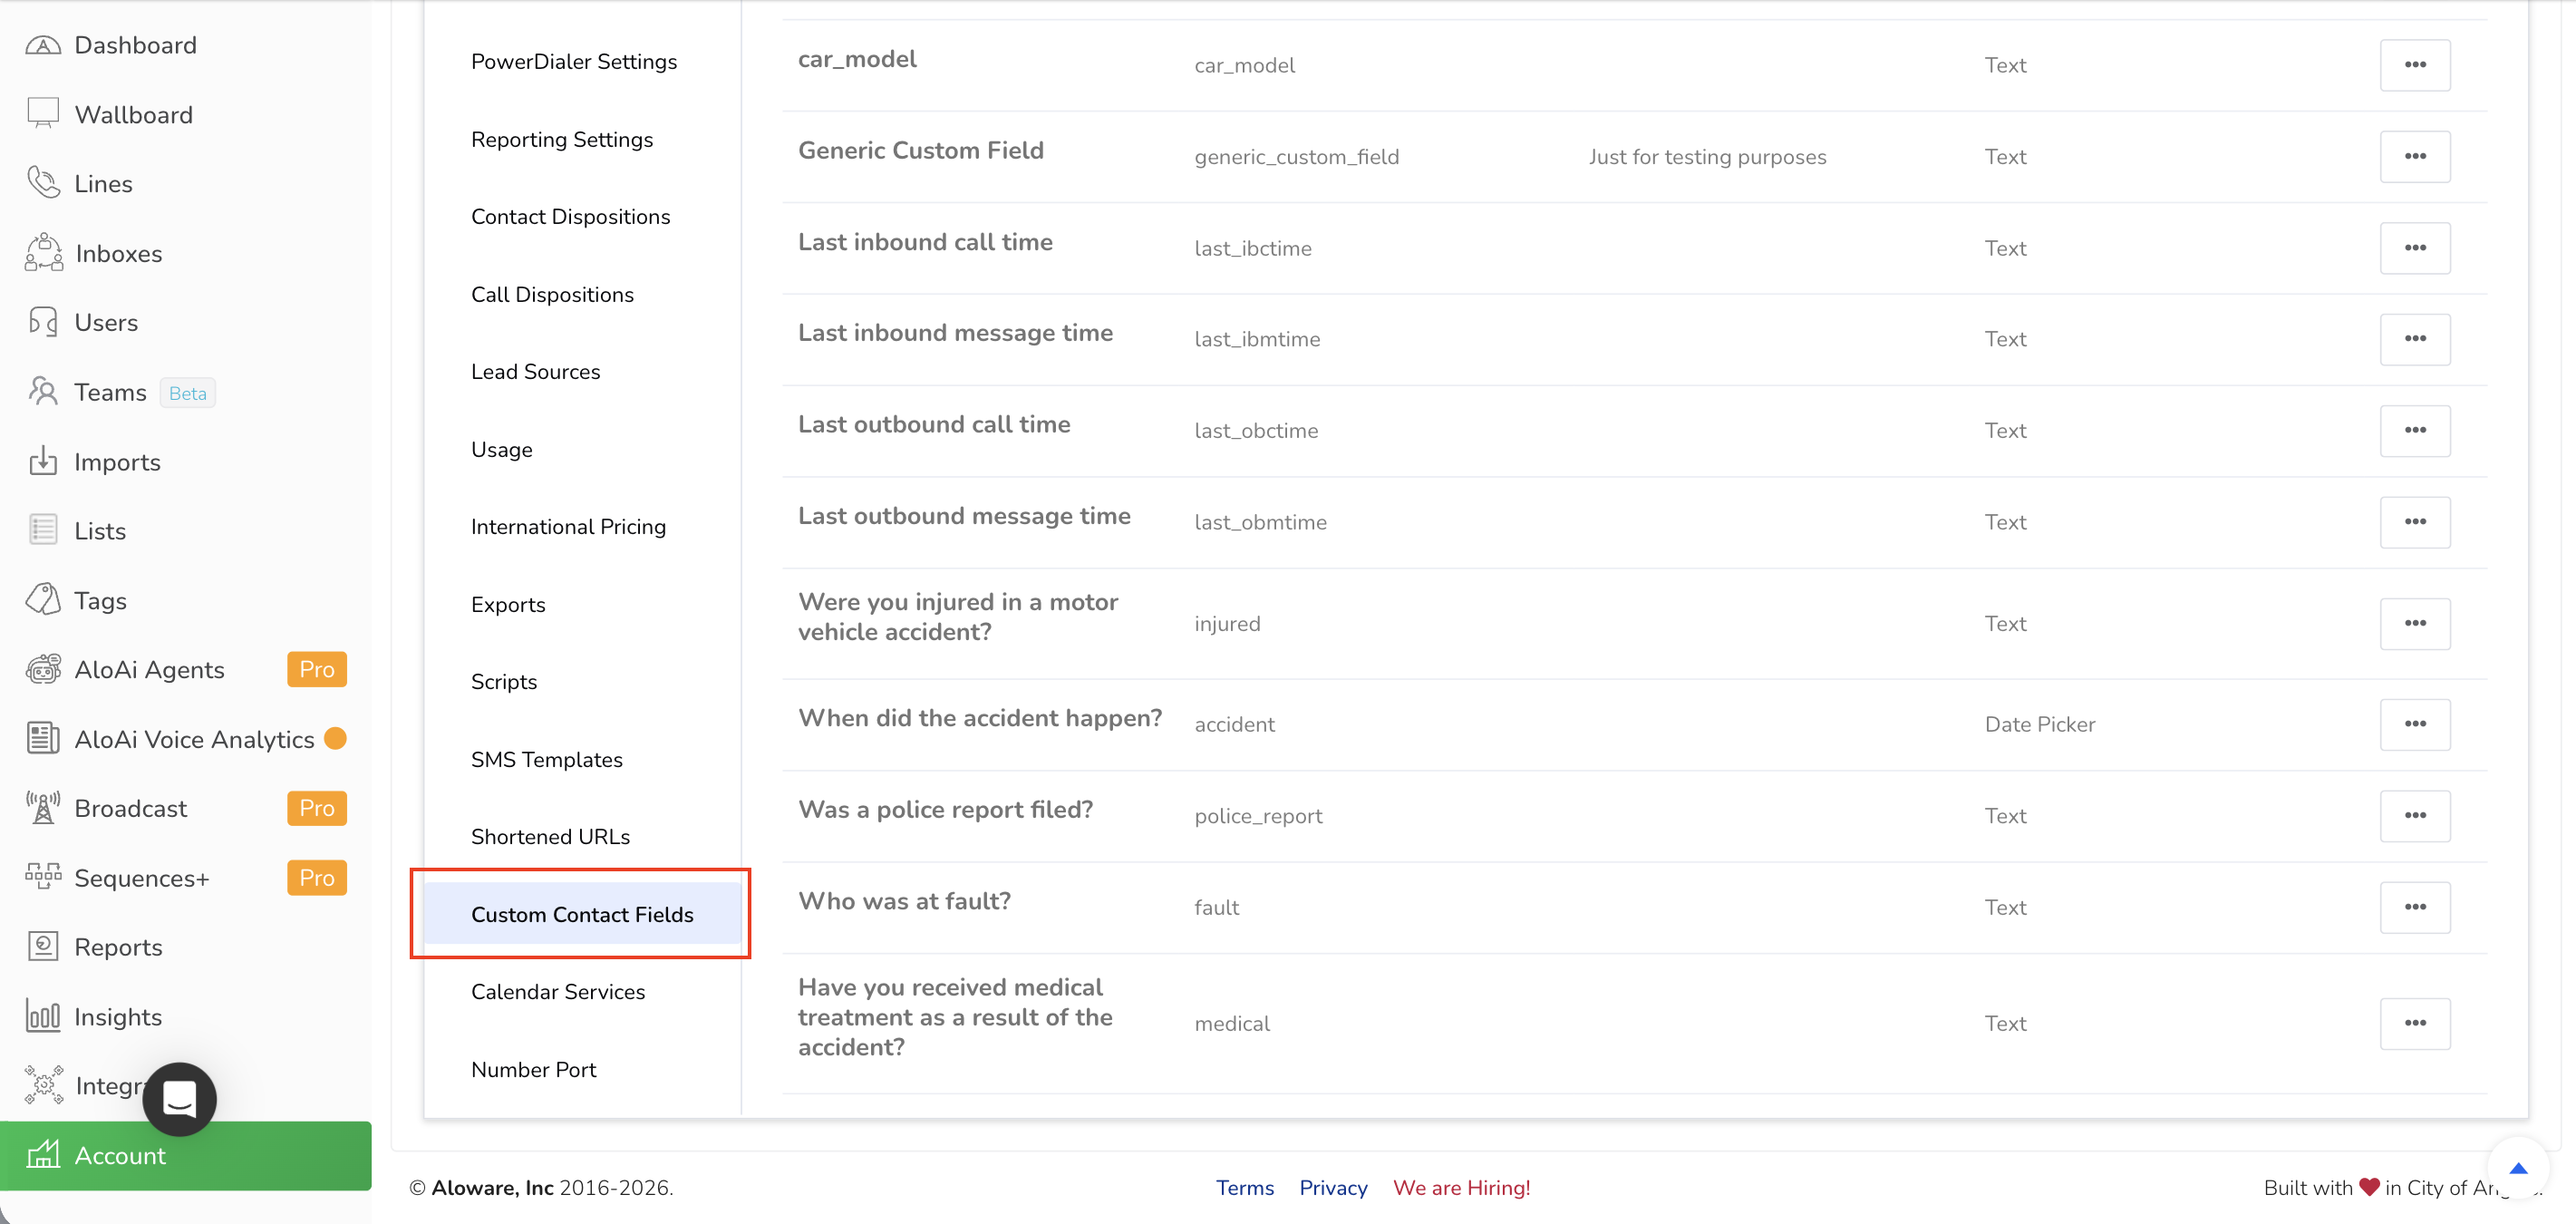
Whatever these fields hold goes into the new Contact and Matter. Model them on your intake process (case details, client history and so on) so the record is complete before it reaches Clio.
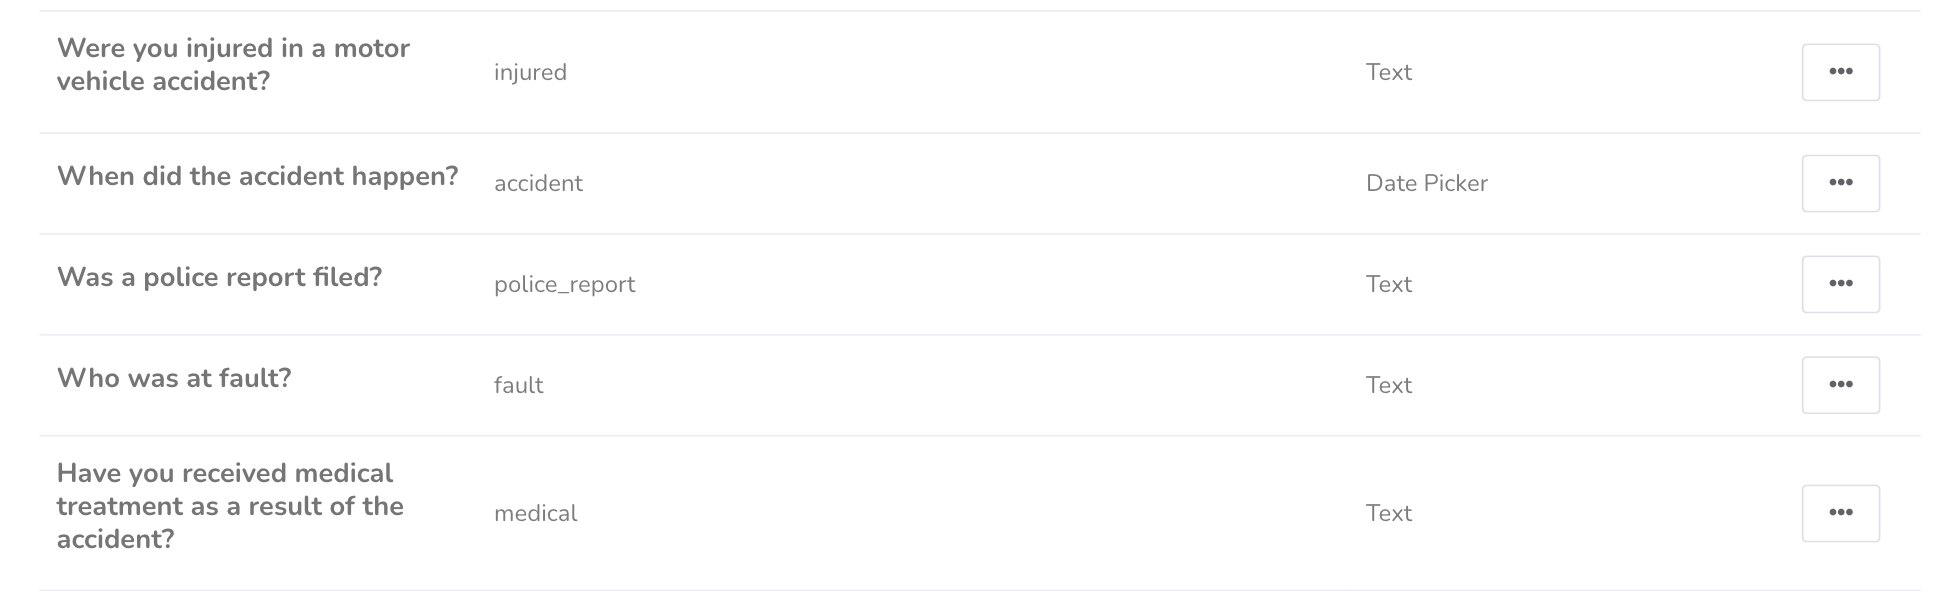
Name fields clearly, and write field keys in lowercase with underscores, for example police_report. Zapier needs that format to map them correctly.
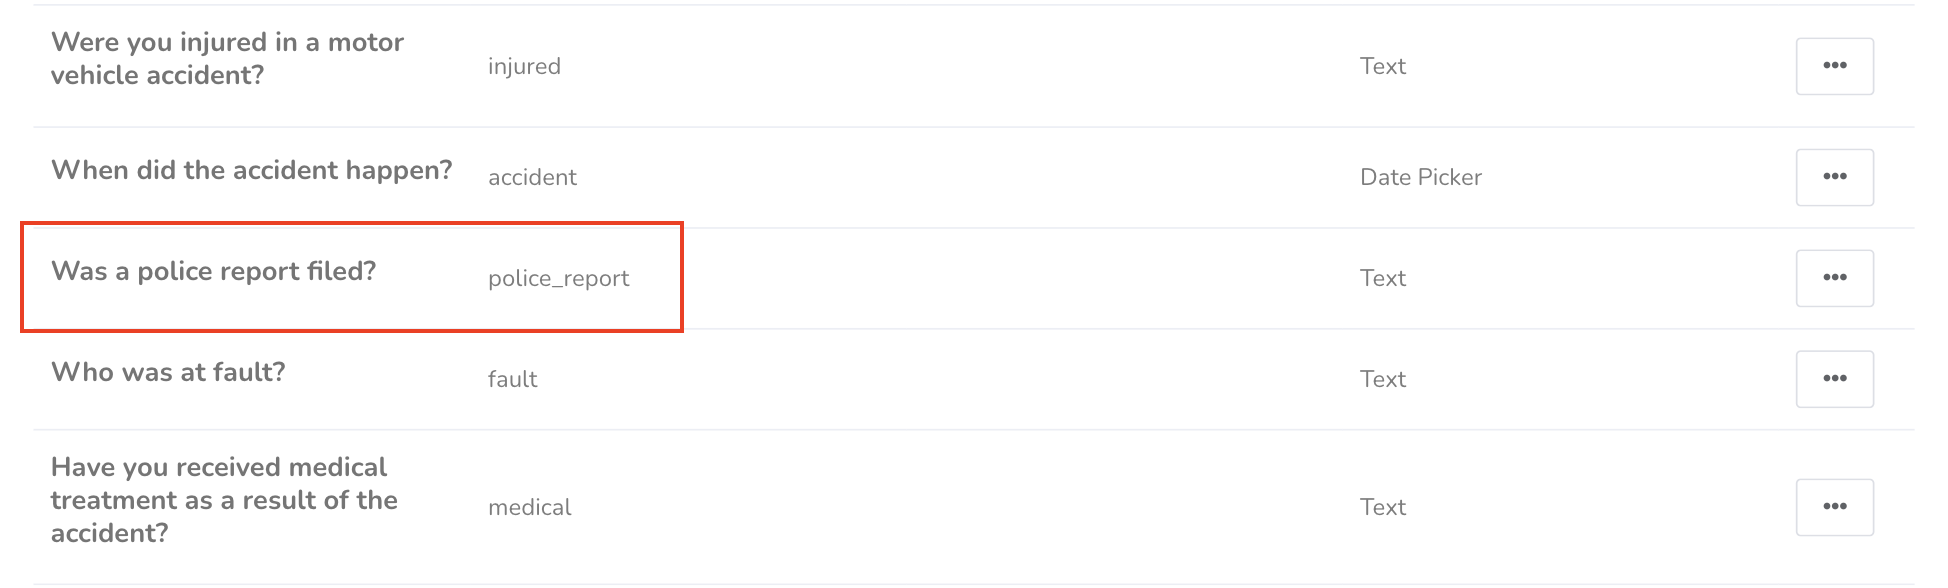
Pick the field type that fits the data.
For example: Text for free-form answers, Number for numbers, Date Picker for dates.
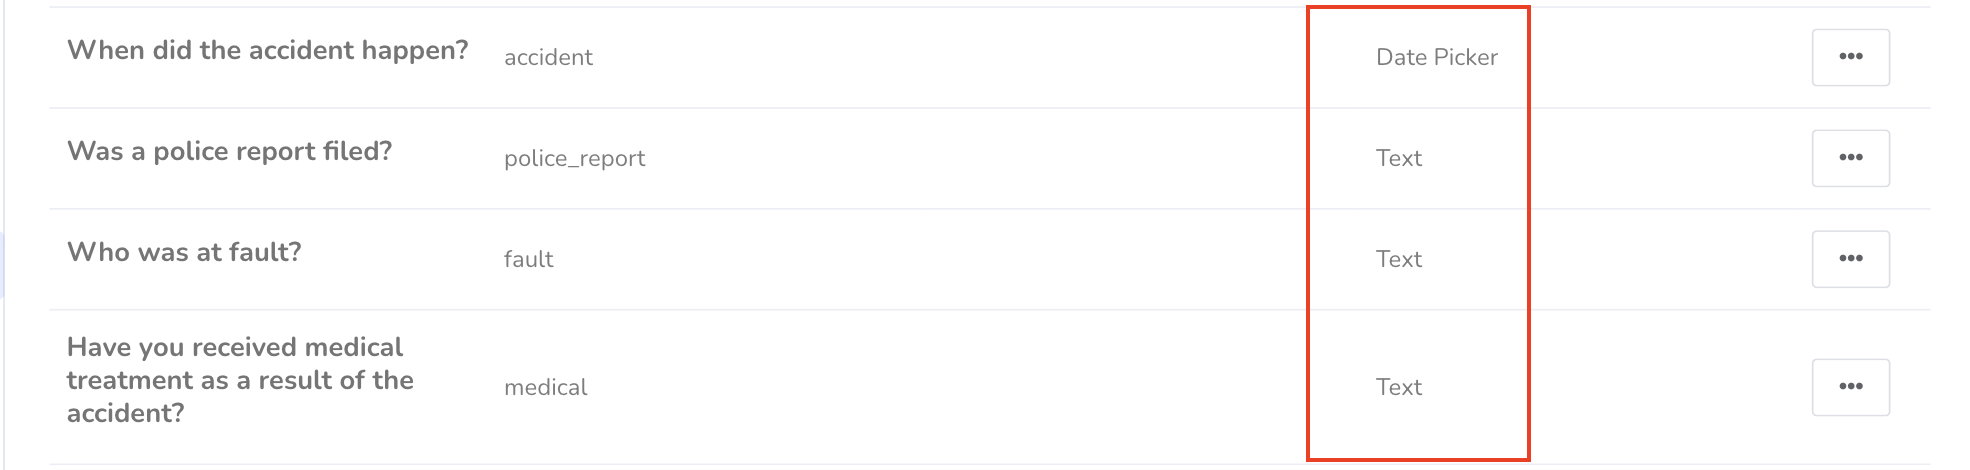
Use the same types on the Aloware and Clio side so values don't break in transit.
Build the Zaps
With the prerequisites done, move to Zapier.
Step 1: Check your Zapier account
Sign in and confirm which plan you're on. Zapier bills every action step as a task, so know how much usage this workflow will add.
Step 2: Zap 1, create a Clio Contact from an Aloware disposition (Zapier → Clio)
Built in Zapier. It creates a Clio Contact whenever a disposition changes in Aloware.
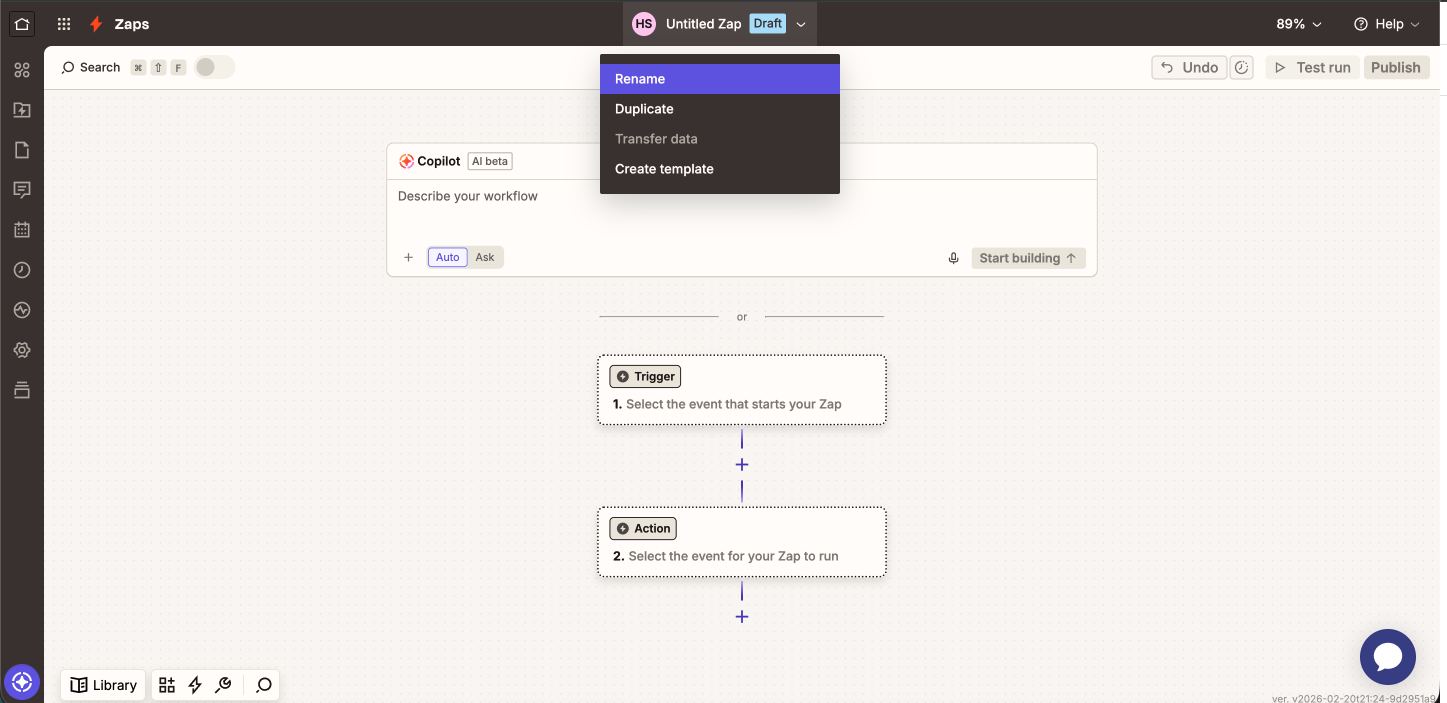
1. Create a Zap and name it so you can find it later.
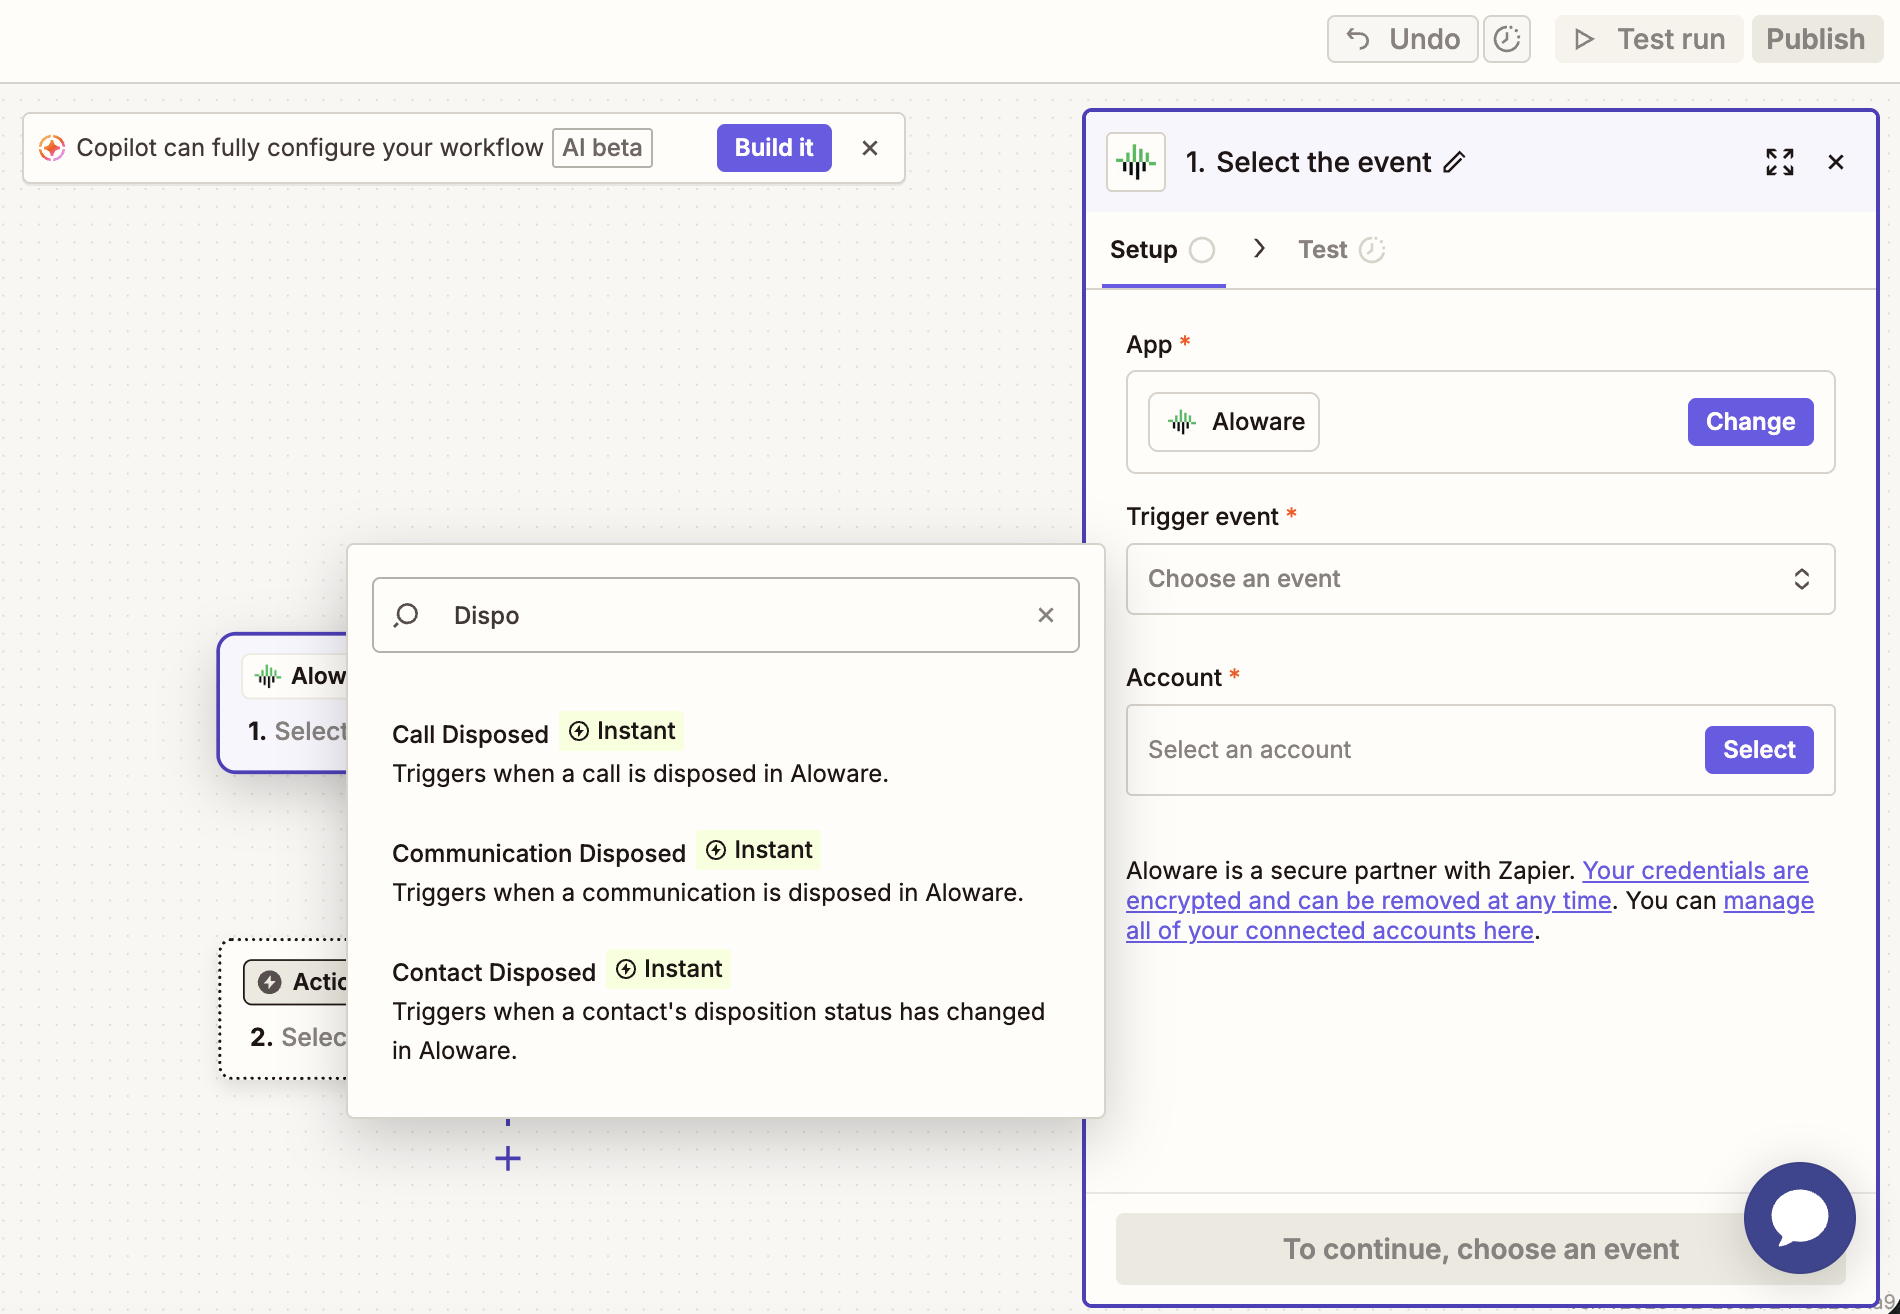
2. Choose Aloware as the trigger app with the event Contact Disposed. Connect your Aloware account and run the test to make sure contact data comes through.
3. Choose Clio as the action app, with Create Contact.
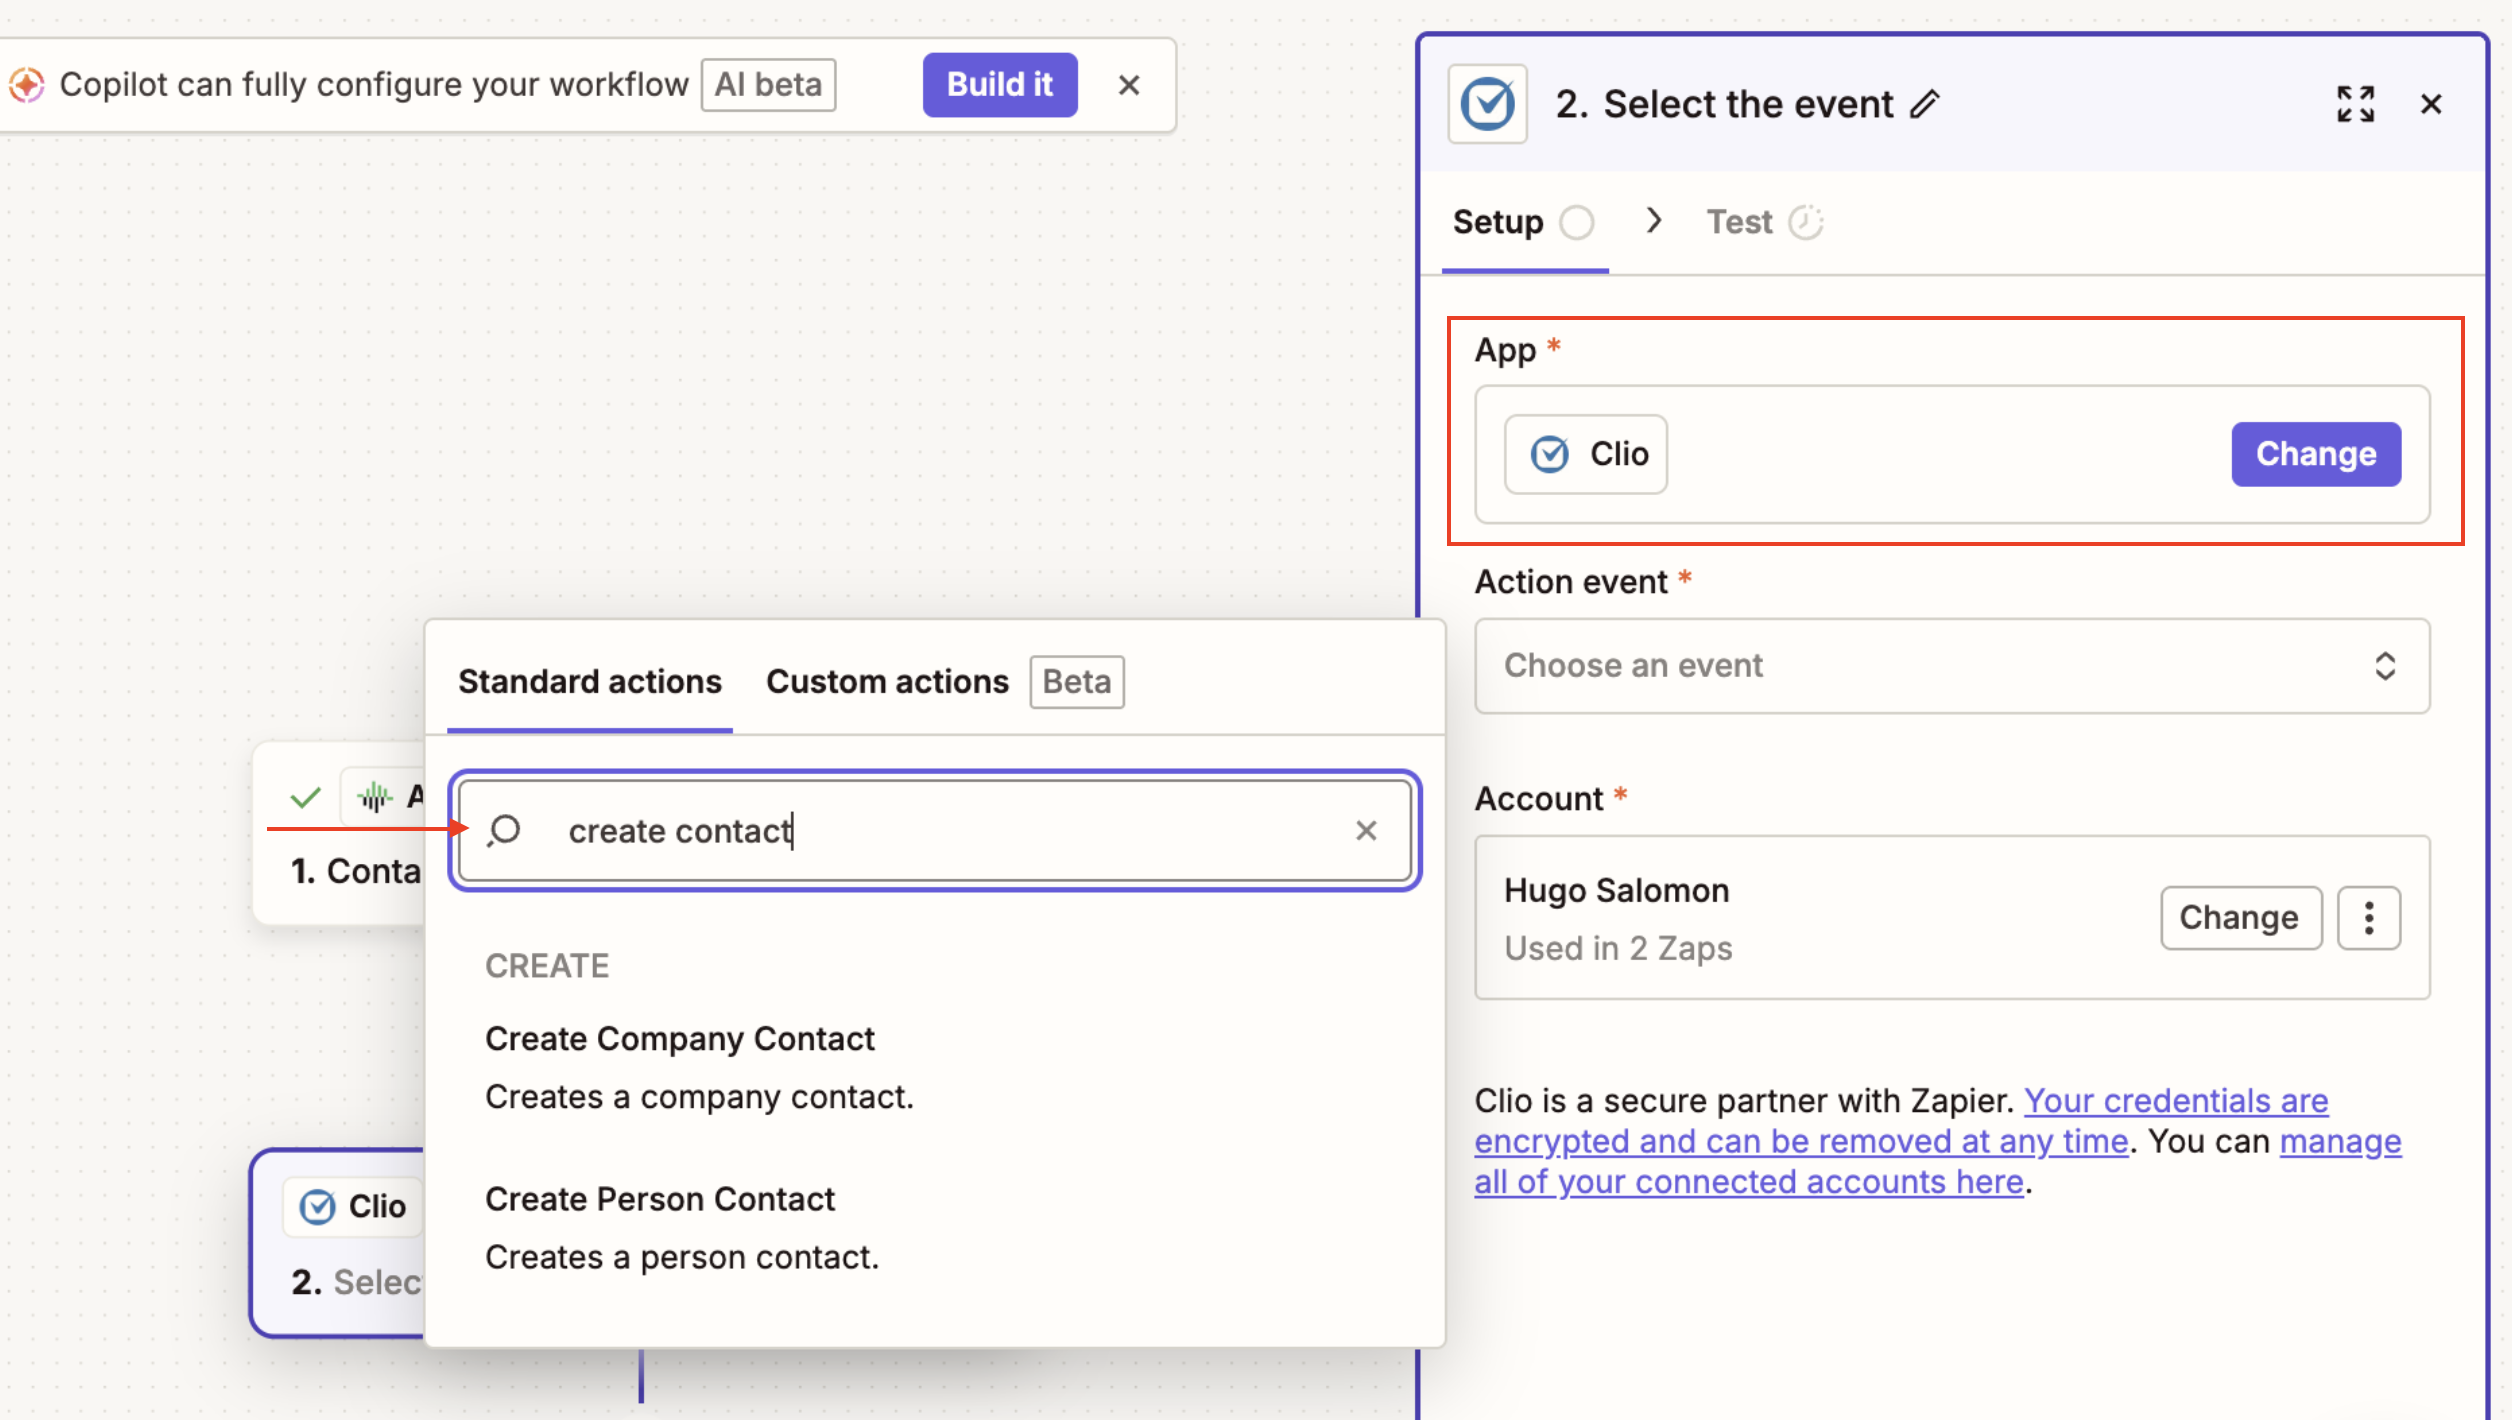
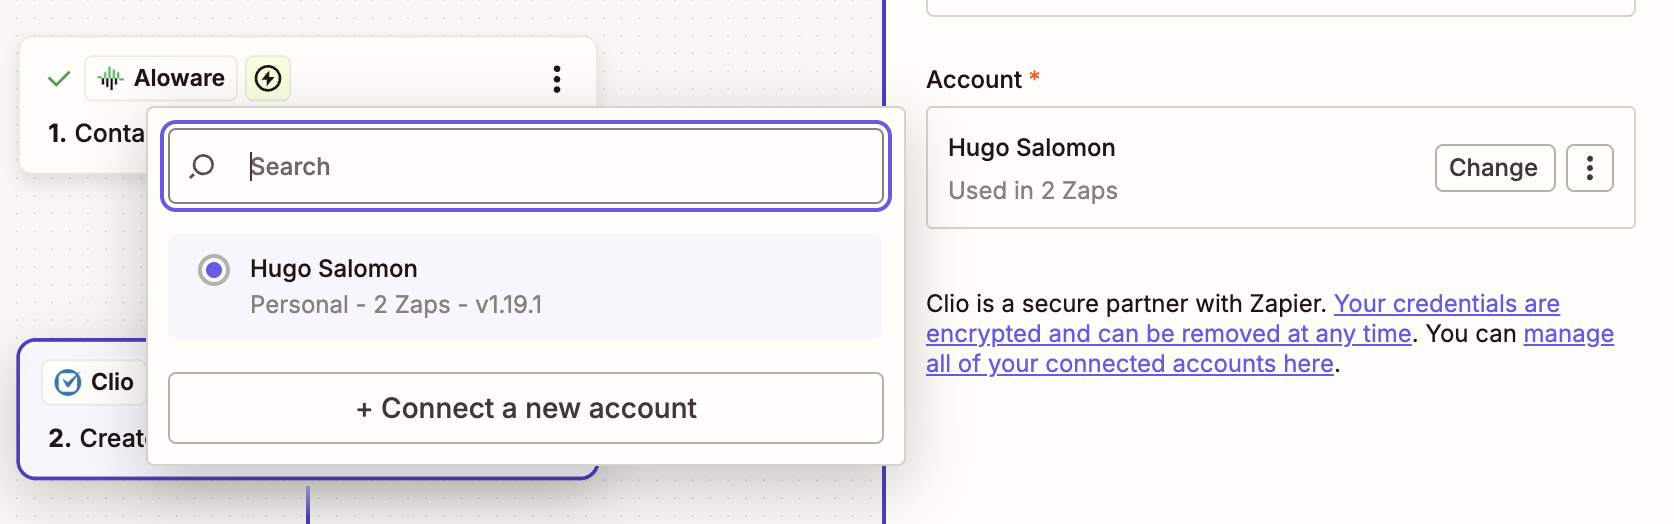
4. Pick your Clio account, or connect another.
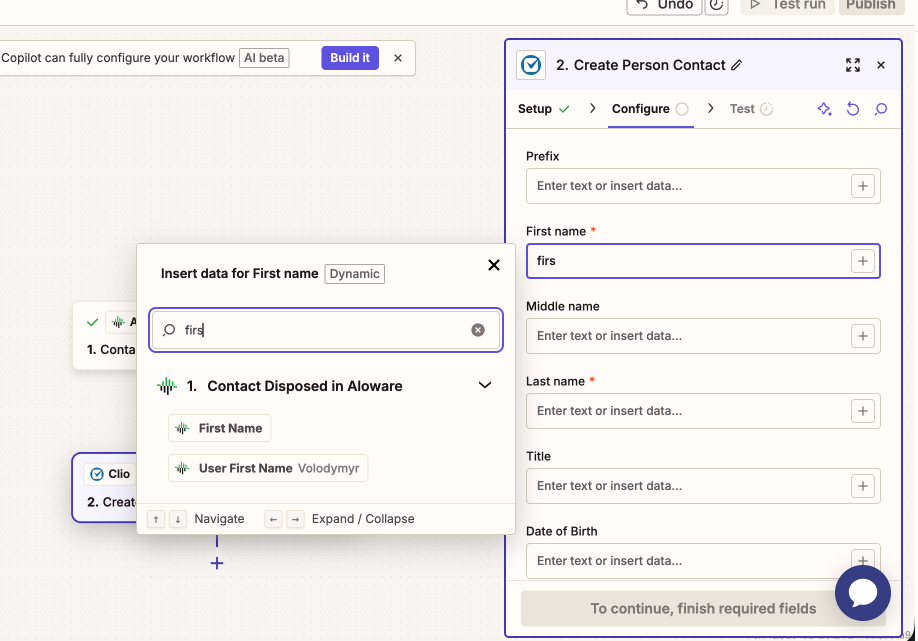
5. Map Aloware's values to Clio: First Name, Last Name, Phone Number, Email and Company.
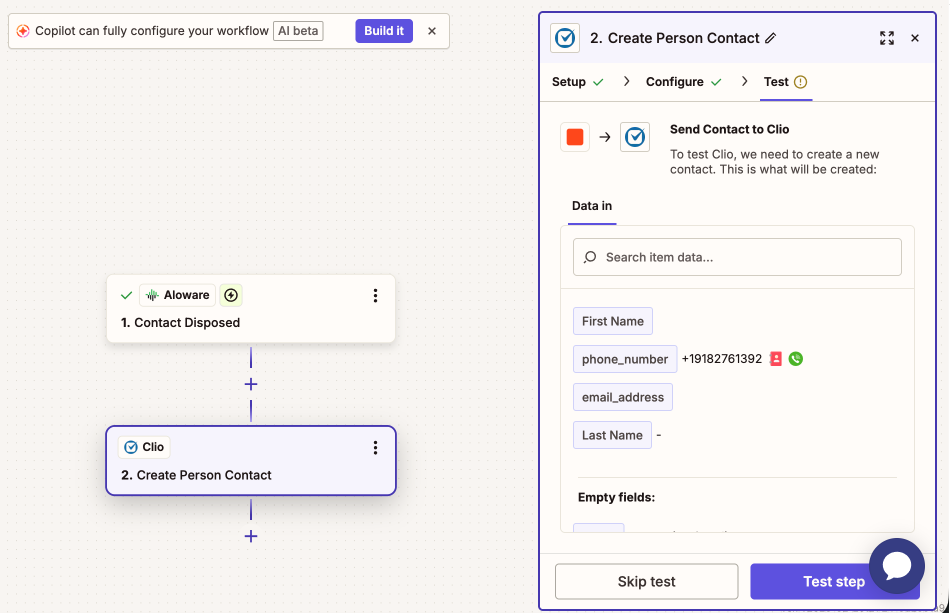
6. Test the action, check the result in Clio, then publish the Zap.
Step 3: Zap 2, write the Clio Contact ID back to Aloware (Zapier → Aloware)
Built in Zapier, but it changes data in Aloware.
1. Create another Zap.
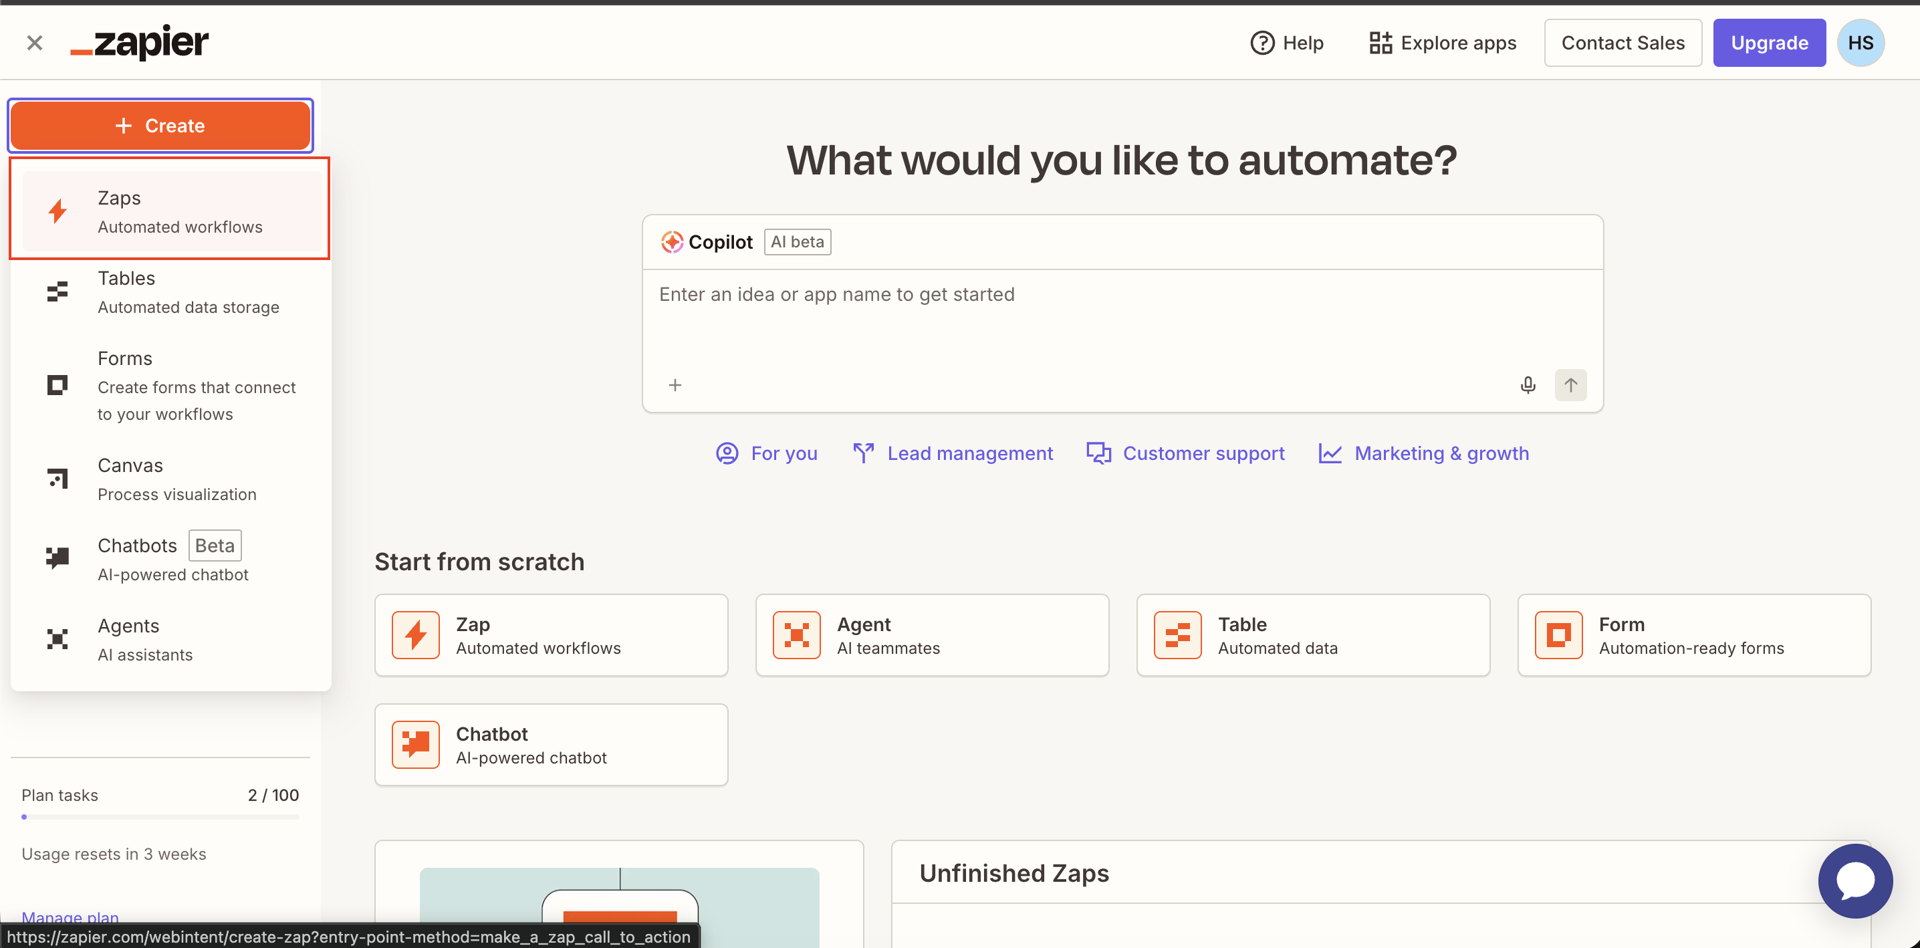
2. Choose Clio as the trigger app, with the trigger event New Contact.
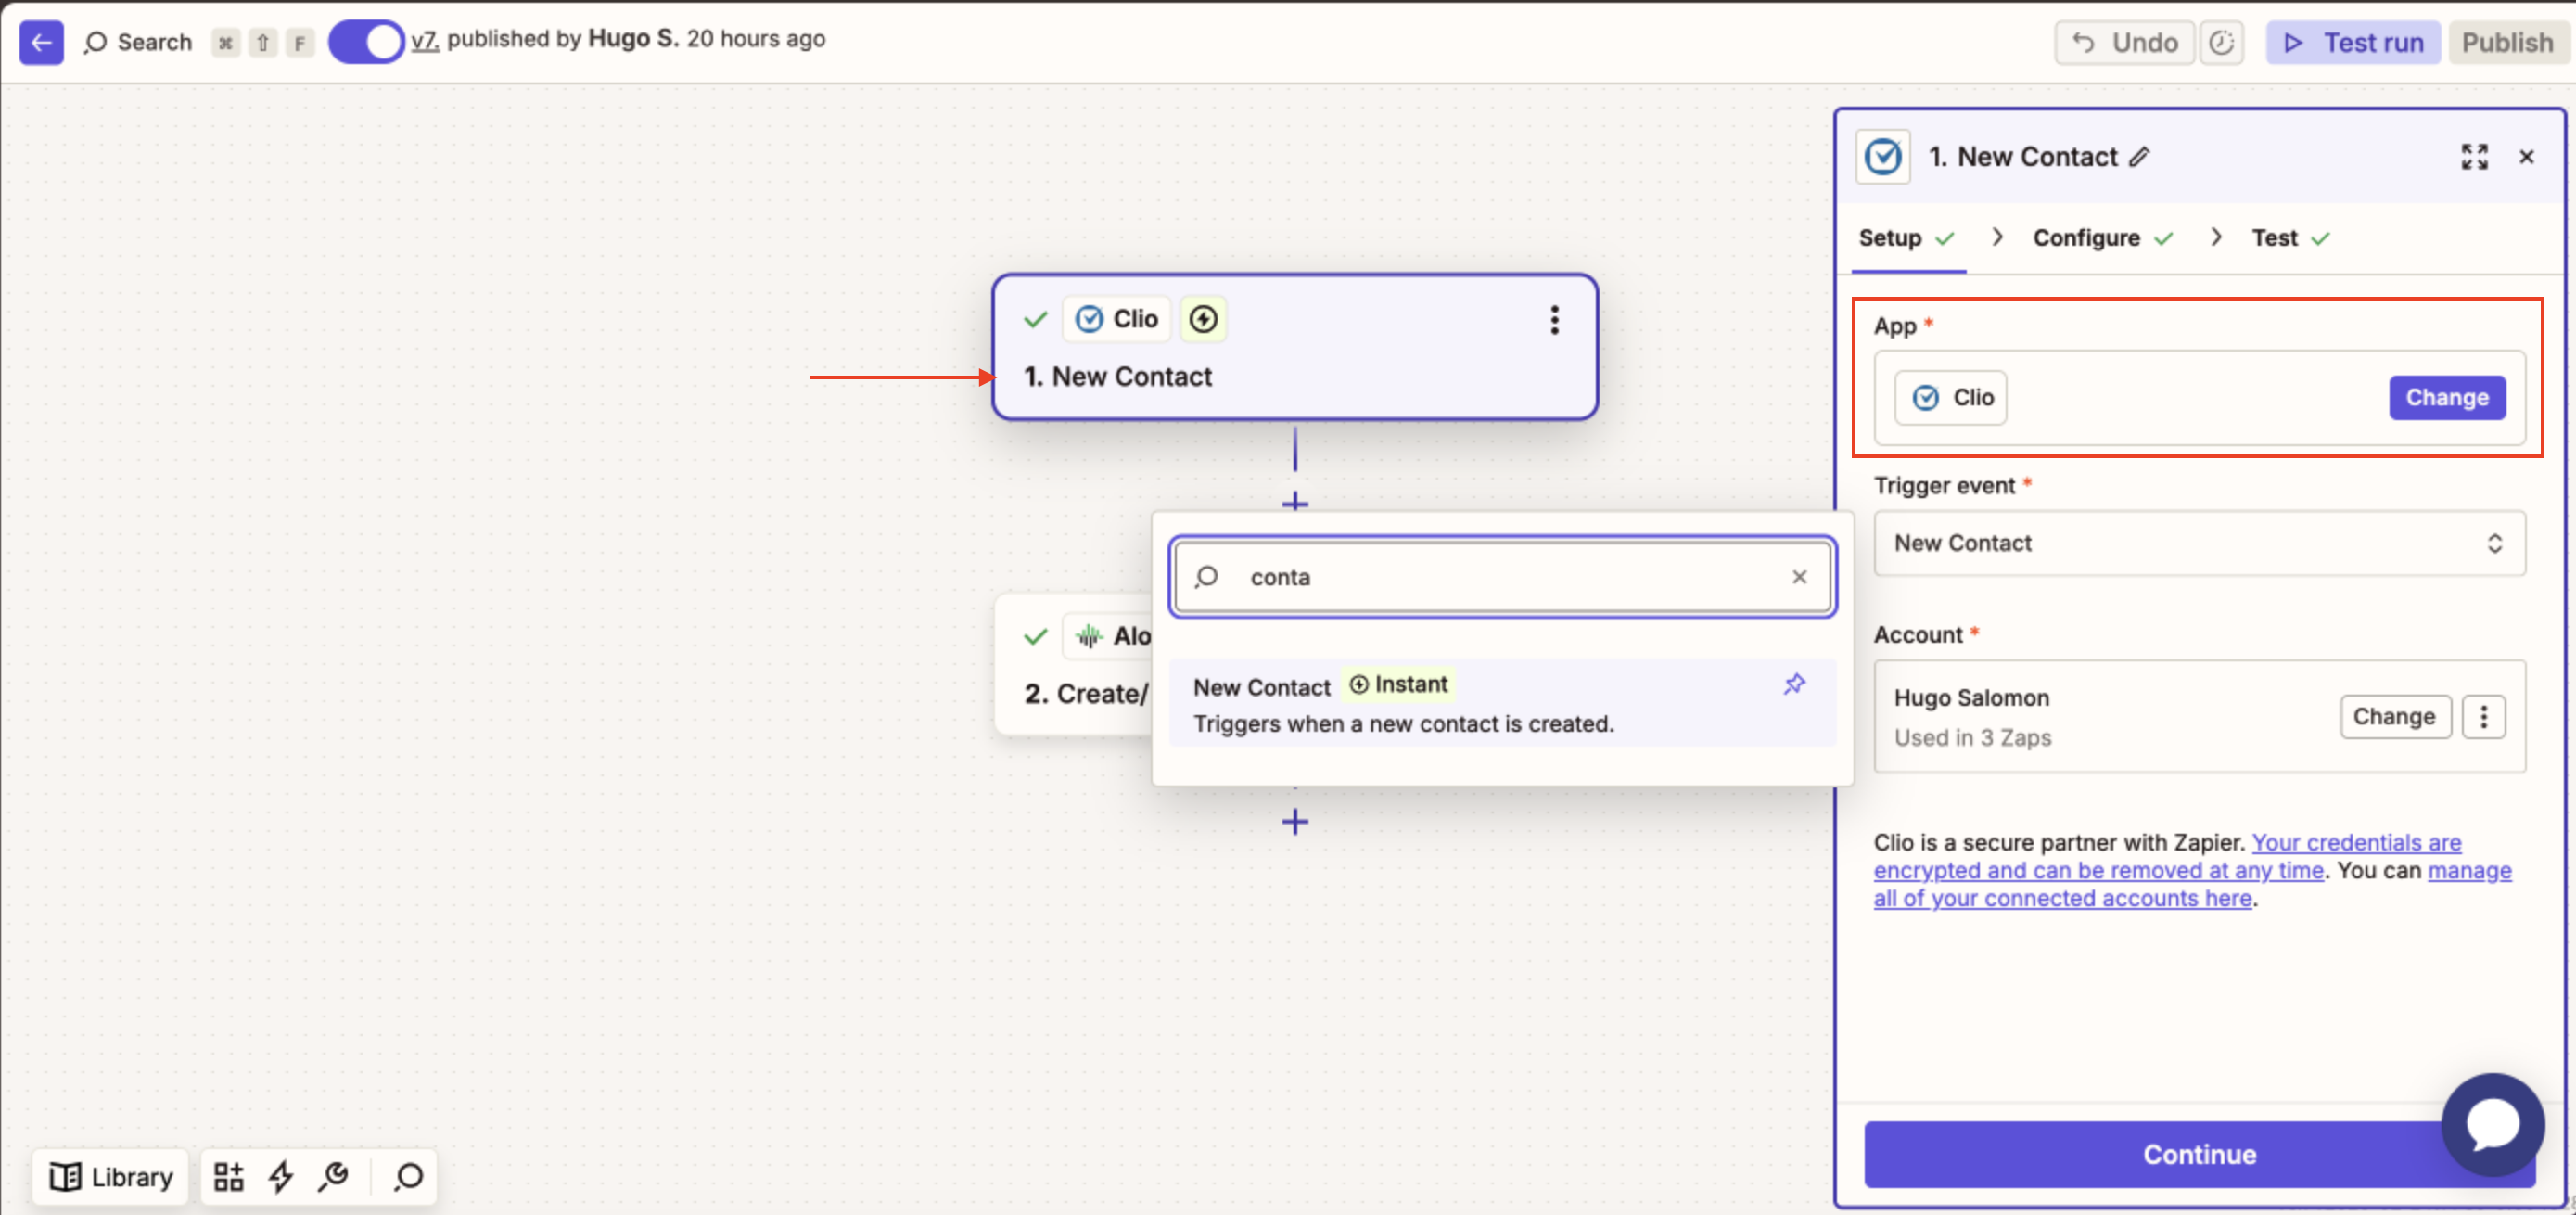
3. Connect your Clio account.
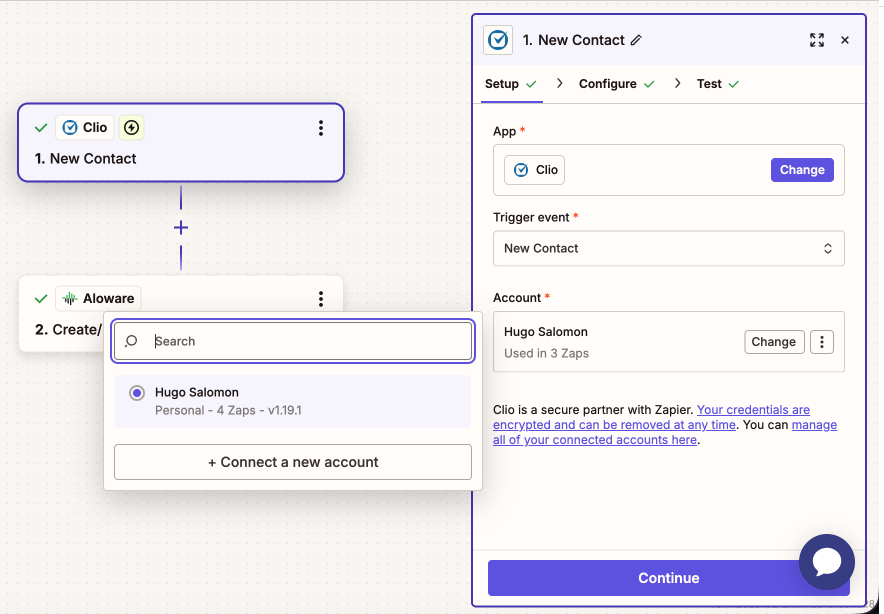
4. Pick the contact type: person or company.
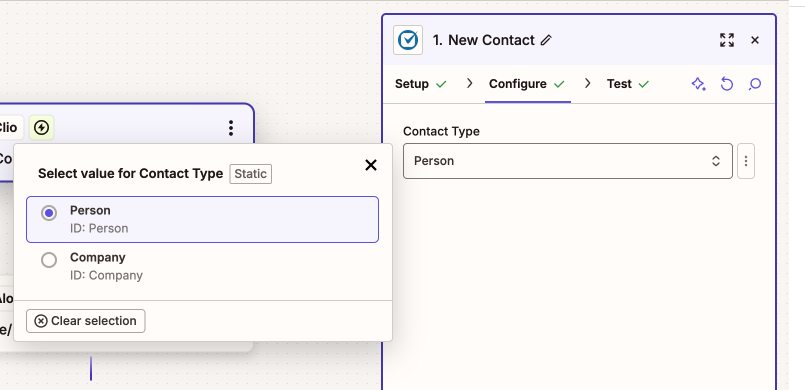
5. Run the trigger test against a Clio contact.
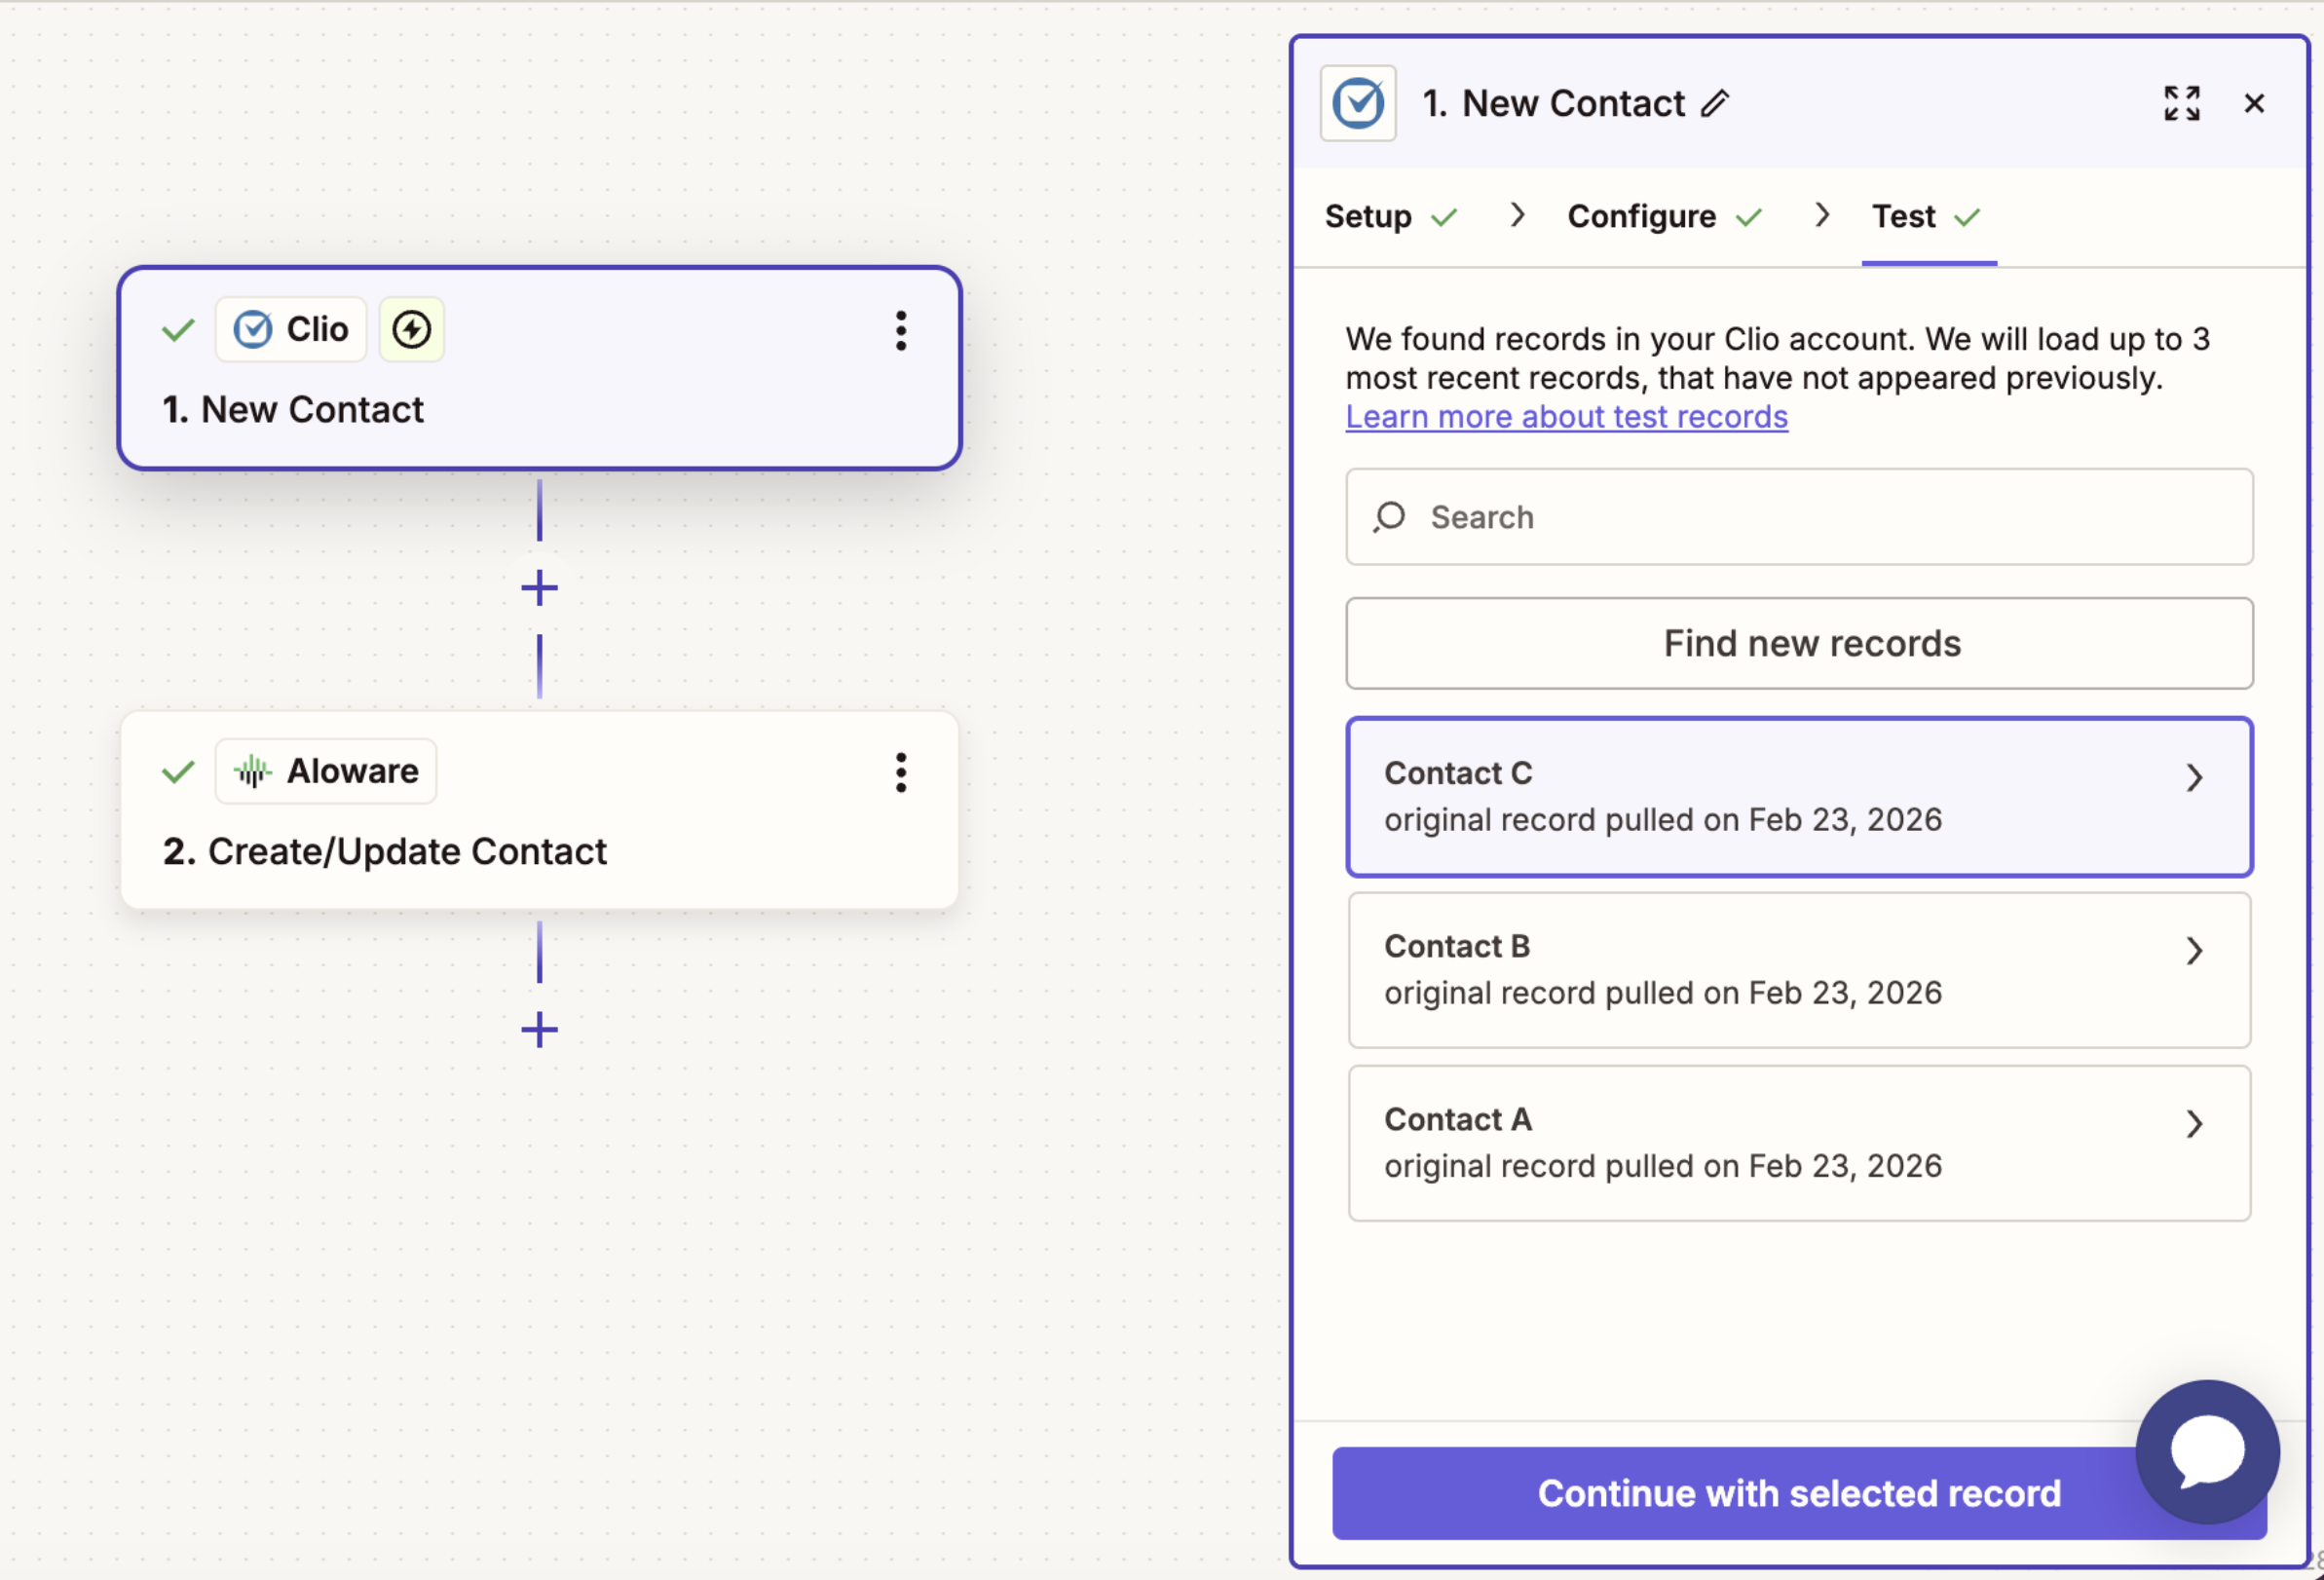
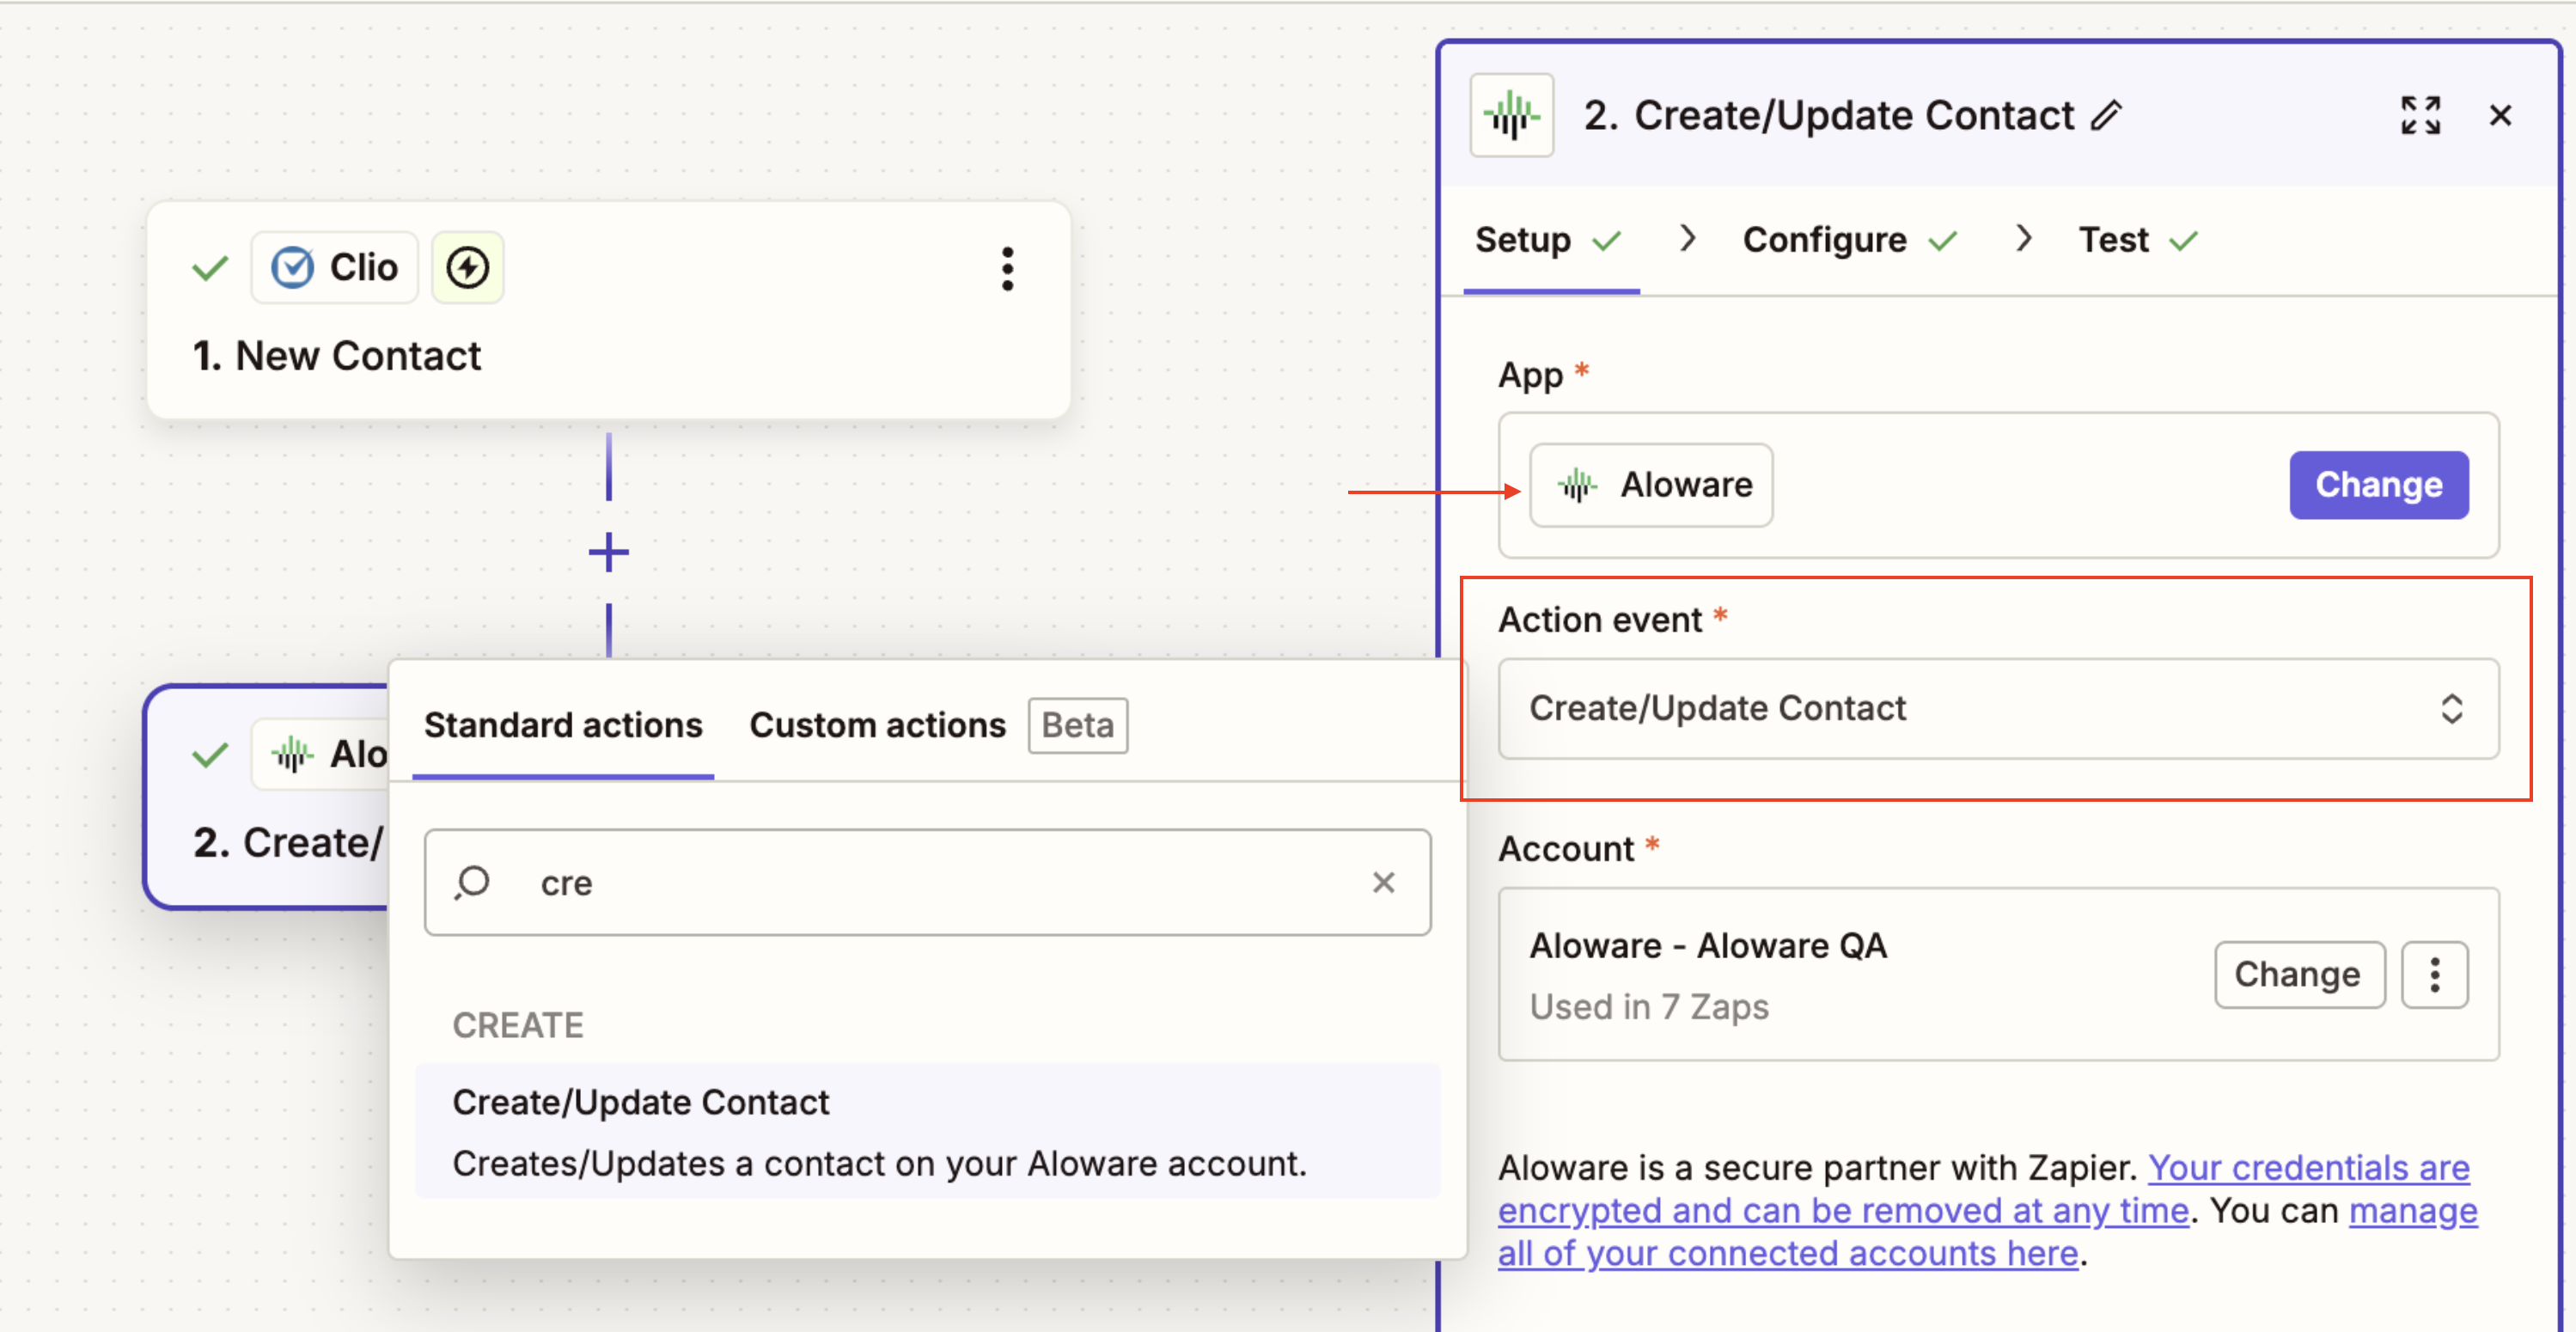
6. For the action, choose Aloware and Create/Update Contact.
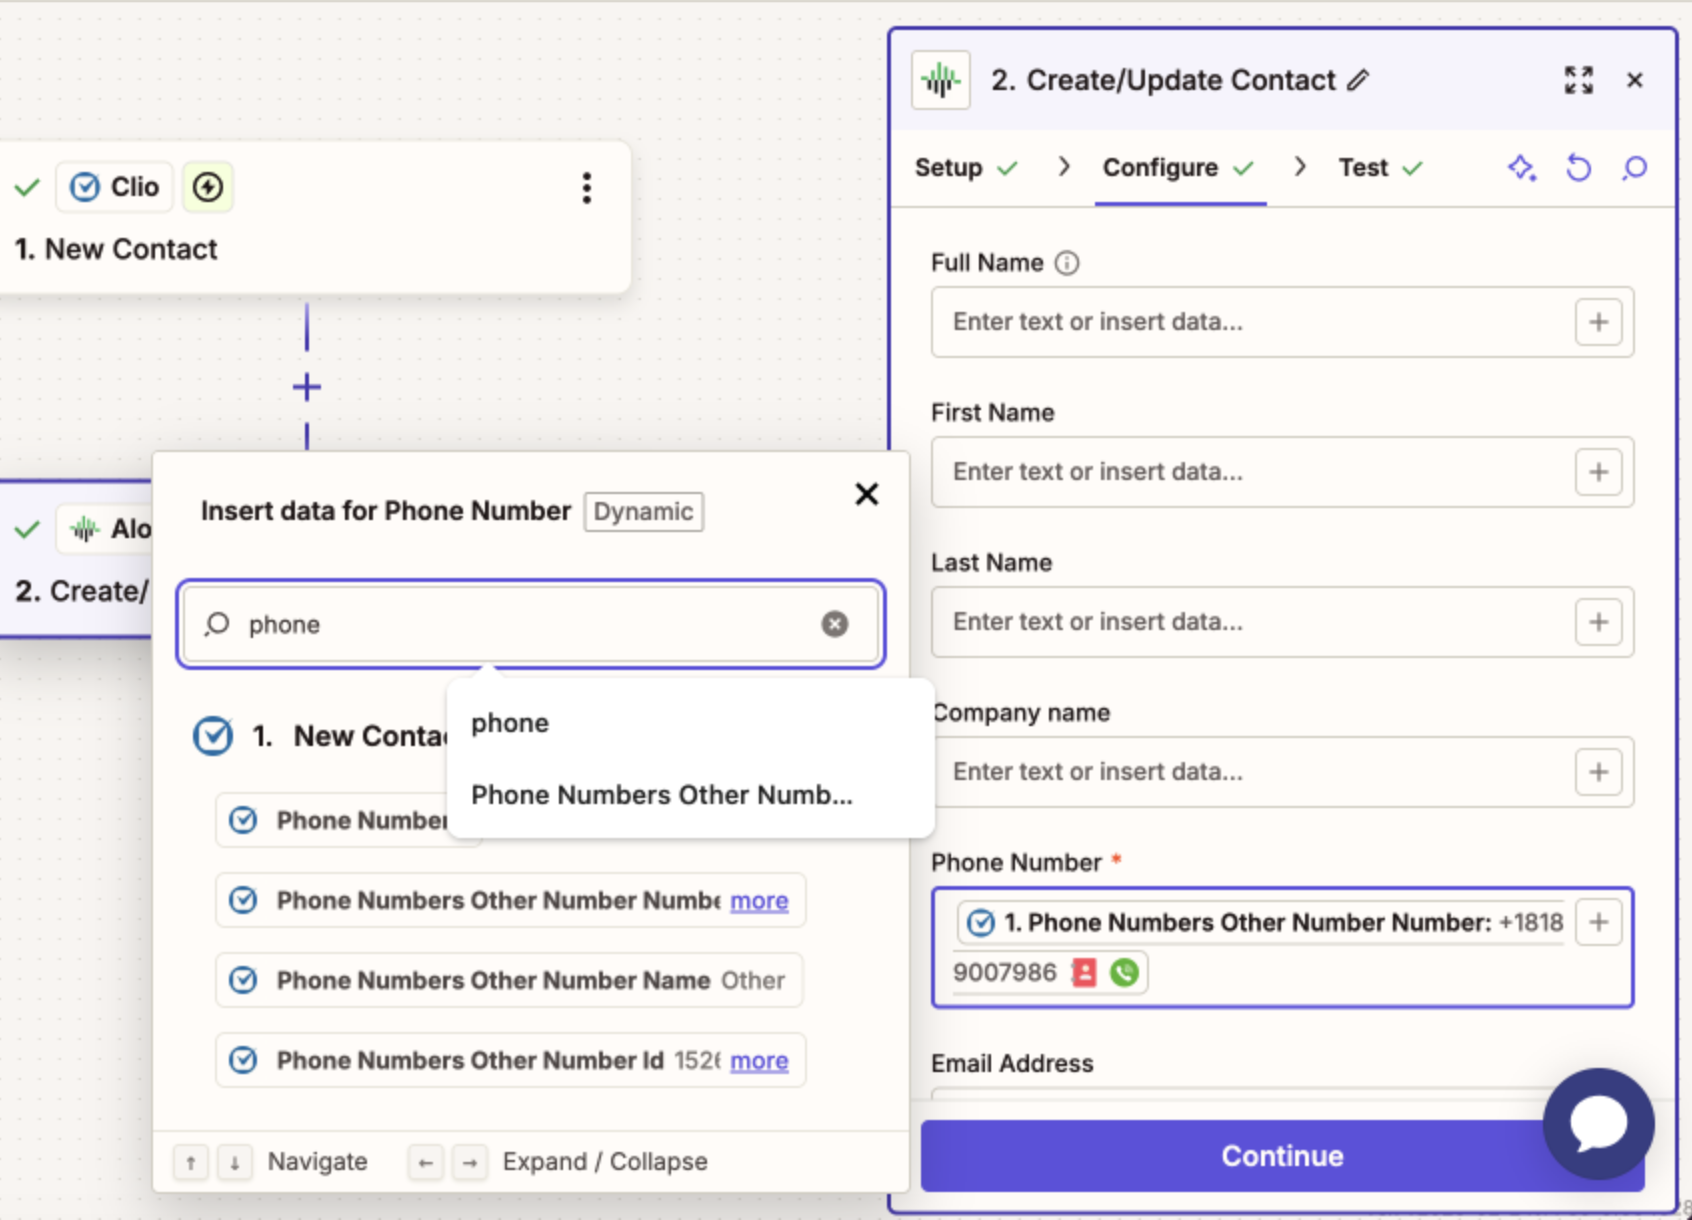
7. Map the Clio Contact ID into an Aloware custom field, for example Clio Contact ID, phone number, CSF1 (to capture Clio contact ID, and store ID in an Aloware custom field).
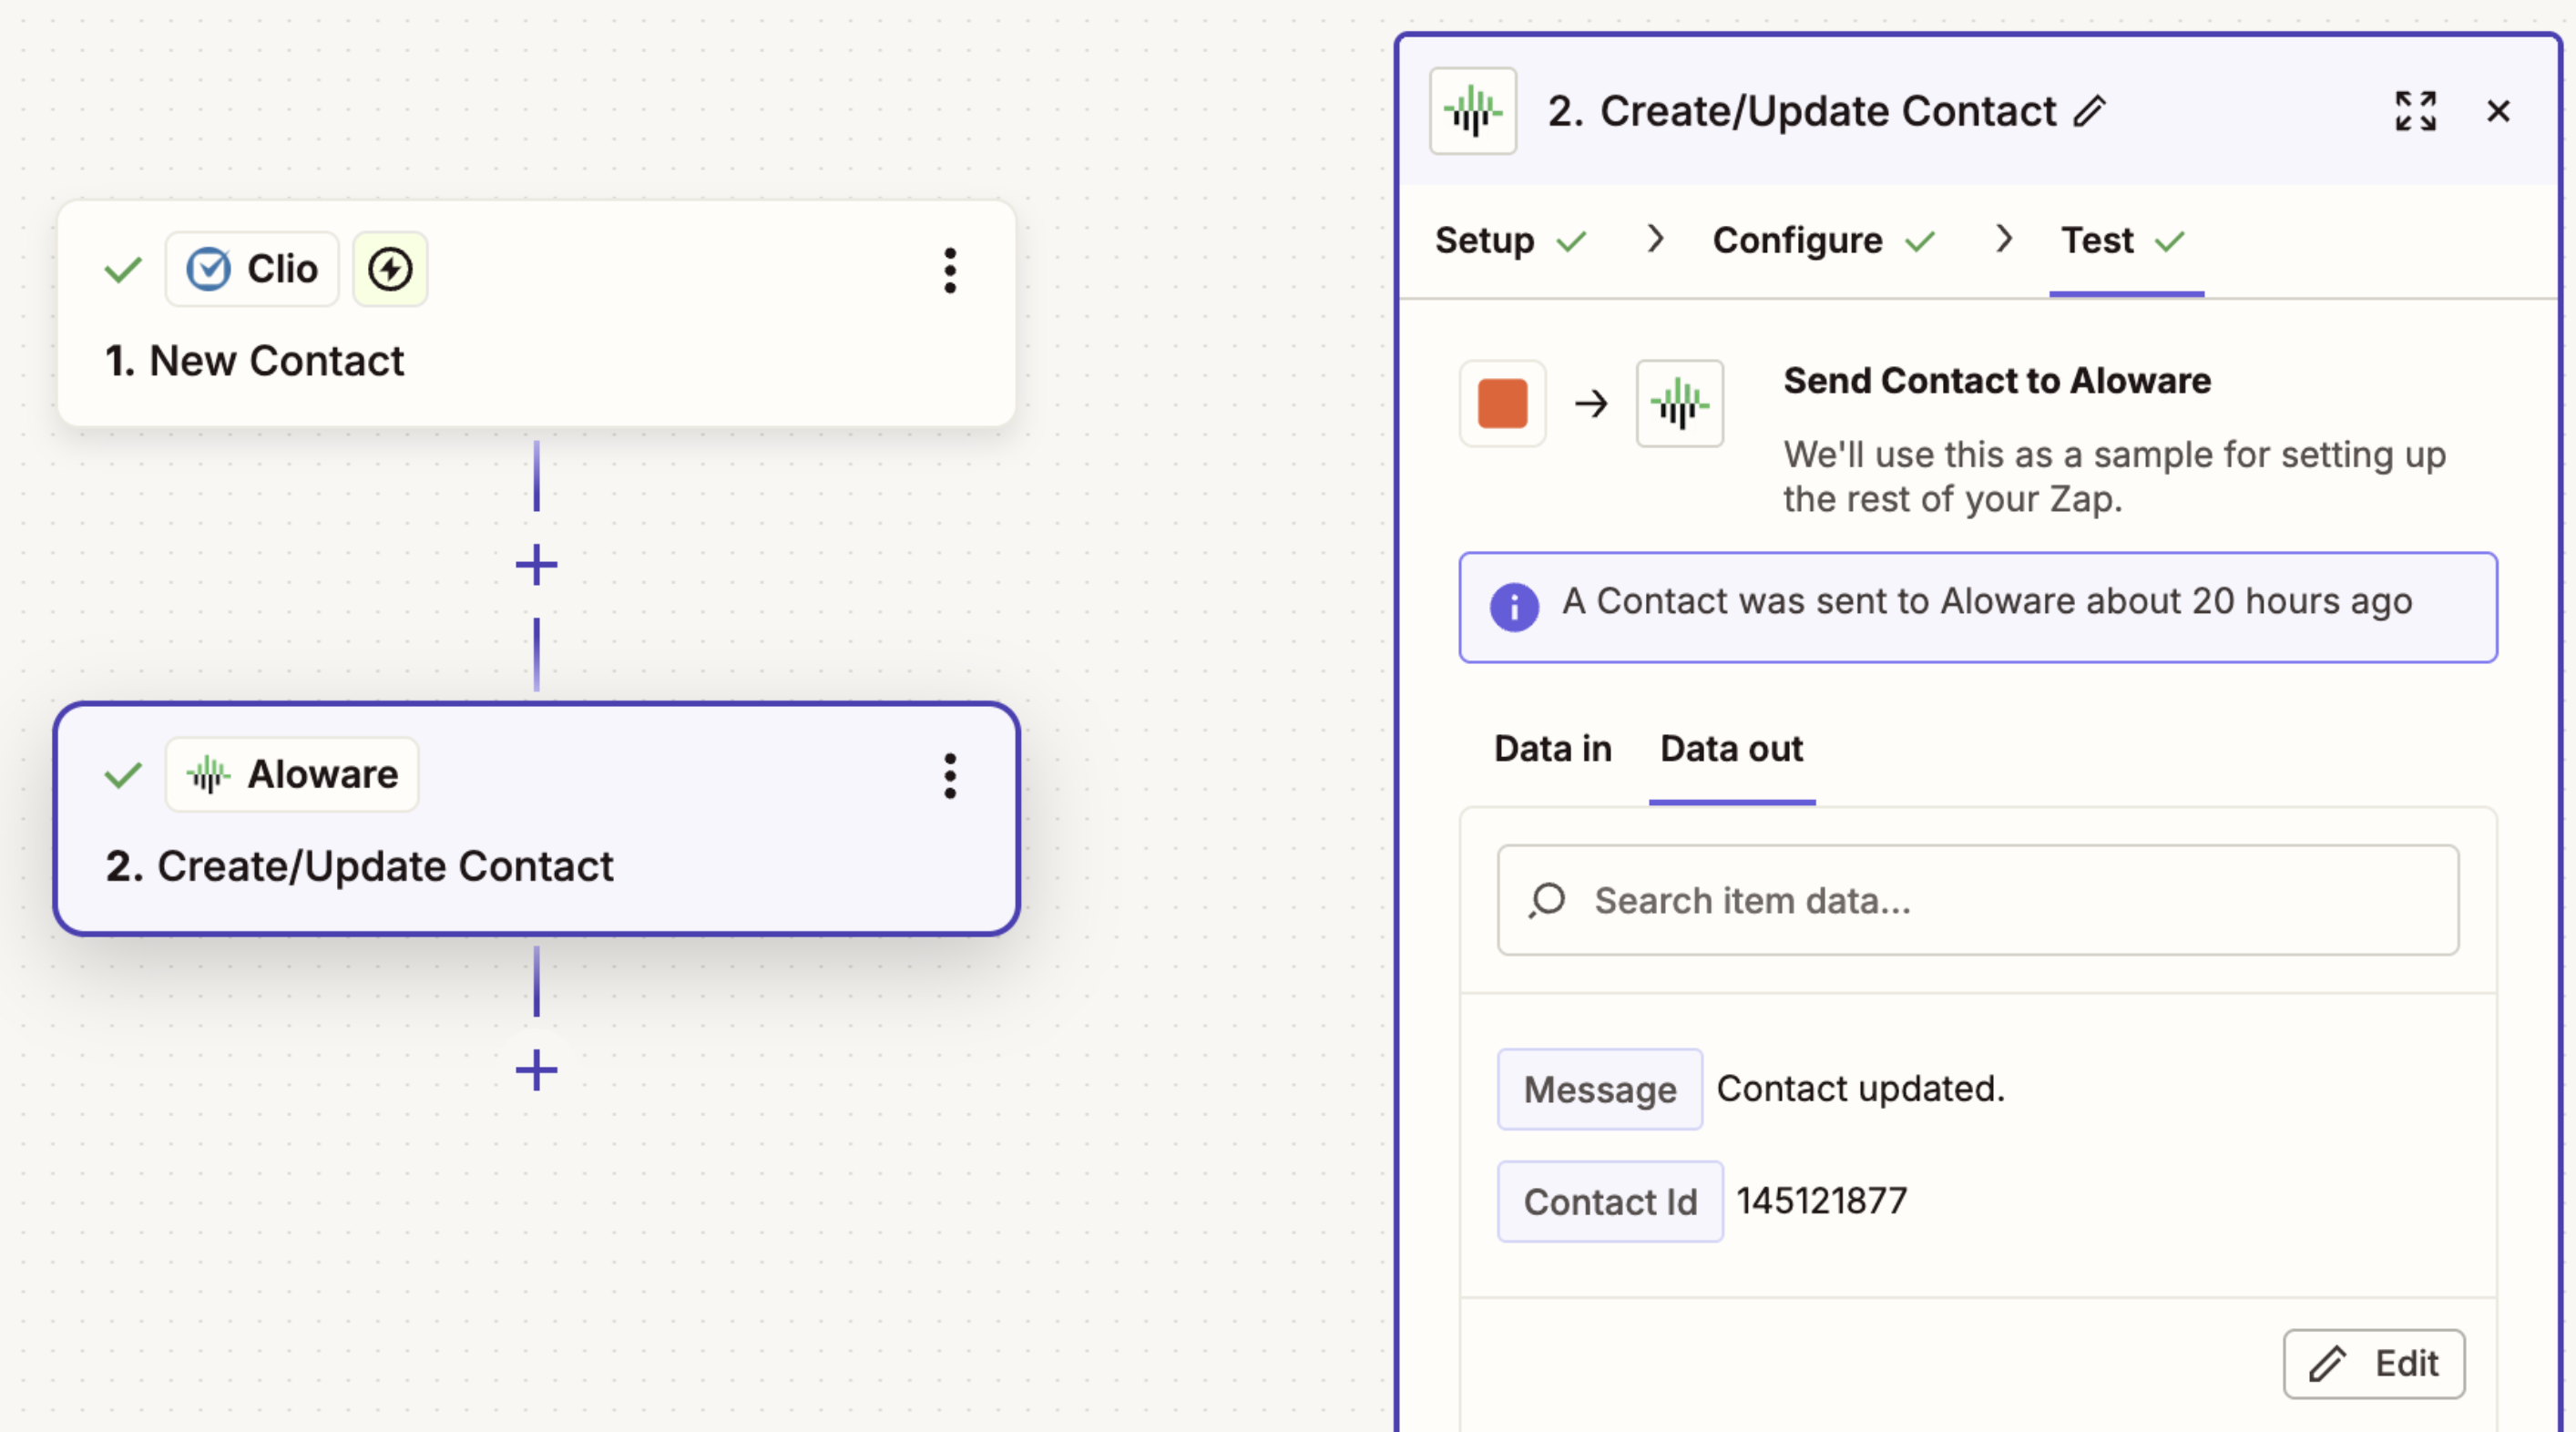
8. Test, then publish. From now on, each Contact created in Clio keeps its ID in Aloware for later steps.
Step 4: Zap 3, create a Matter in Clio Manage
Built in Zapier. It creates the Clio Matter from Aloware data.
1. On the Free Zapier plan, this is a third Zap.
2. Choose Aloware as the trigger app with the Contact Disposed event. The contact record must already contain the Clio Contact ID.
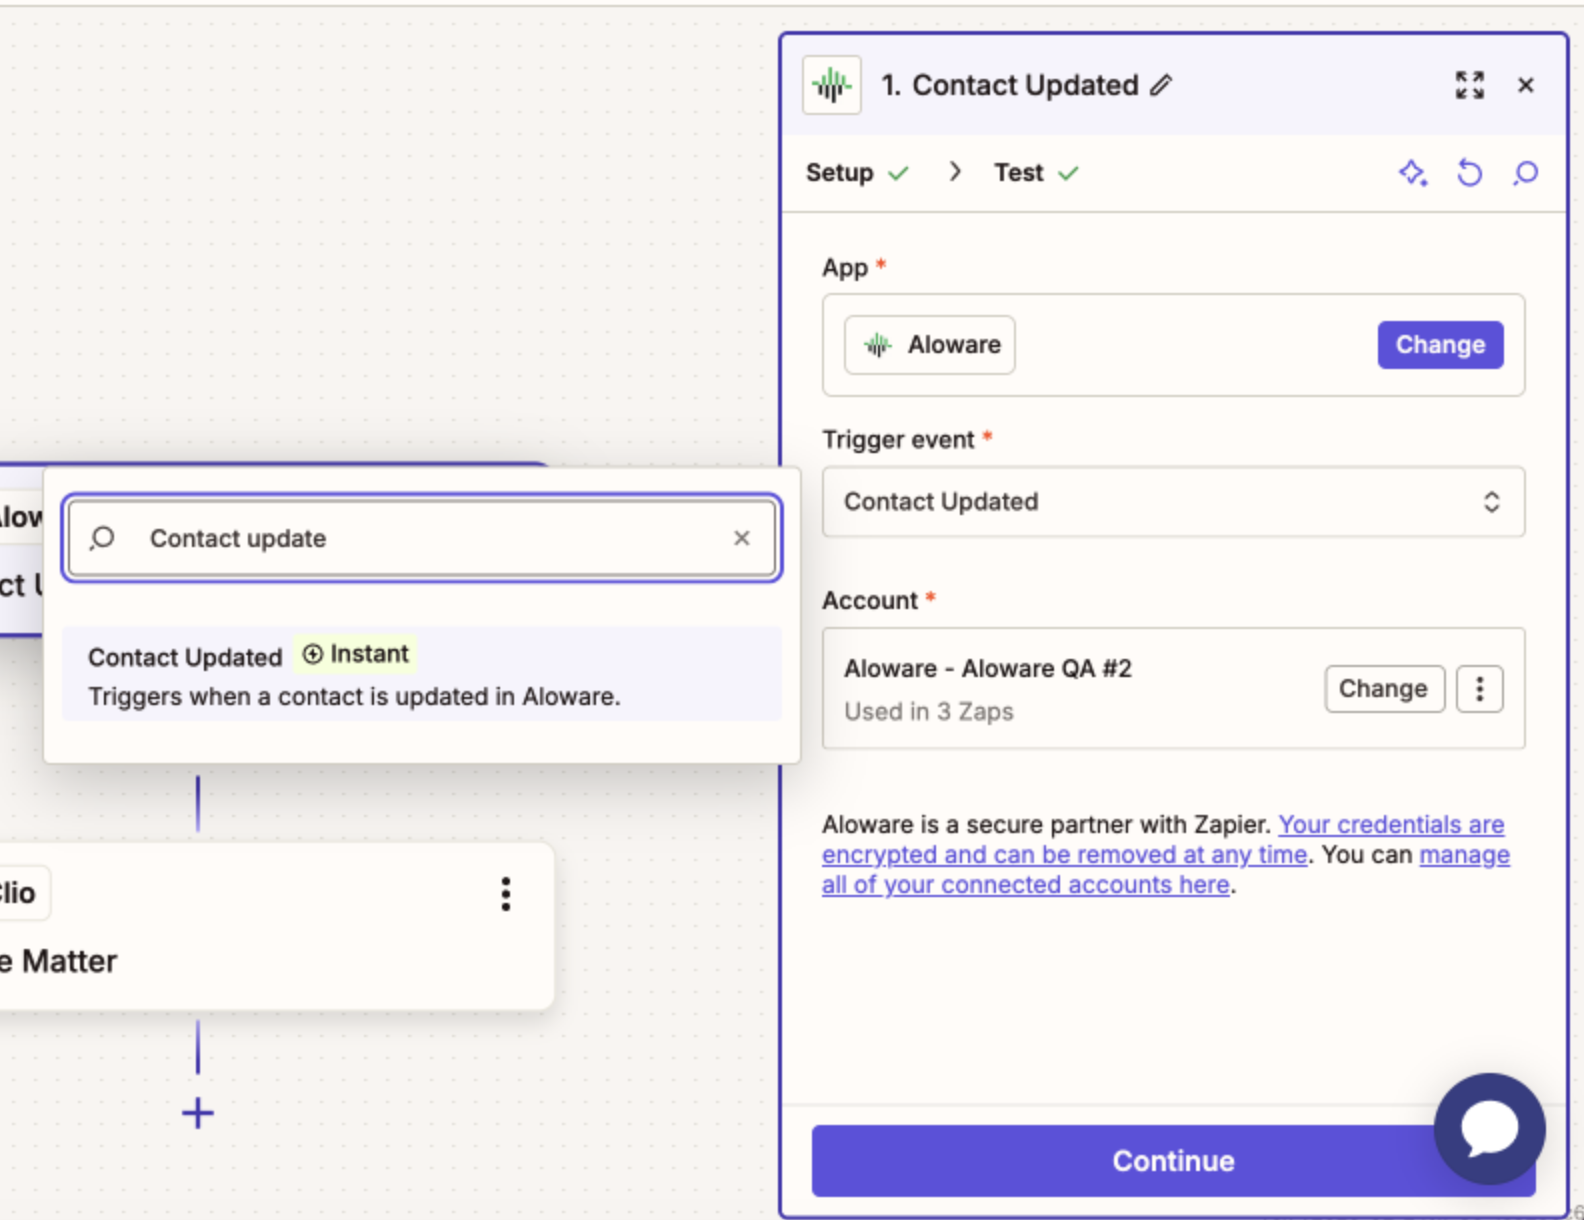
3. Choose Clio as the action app, with Create Matter.
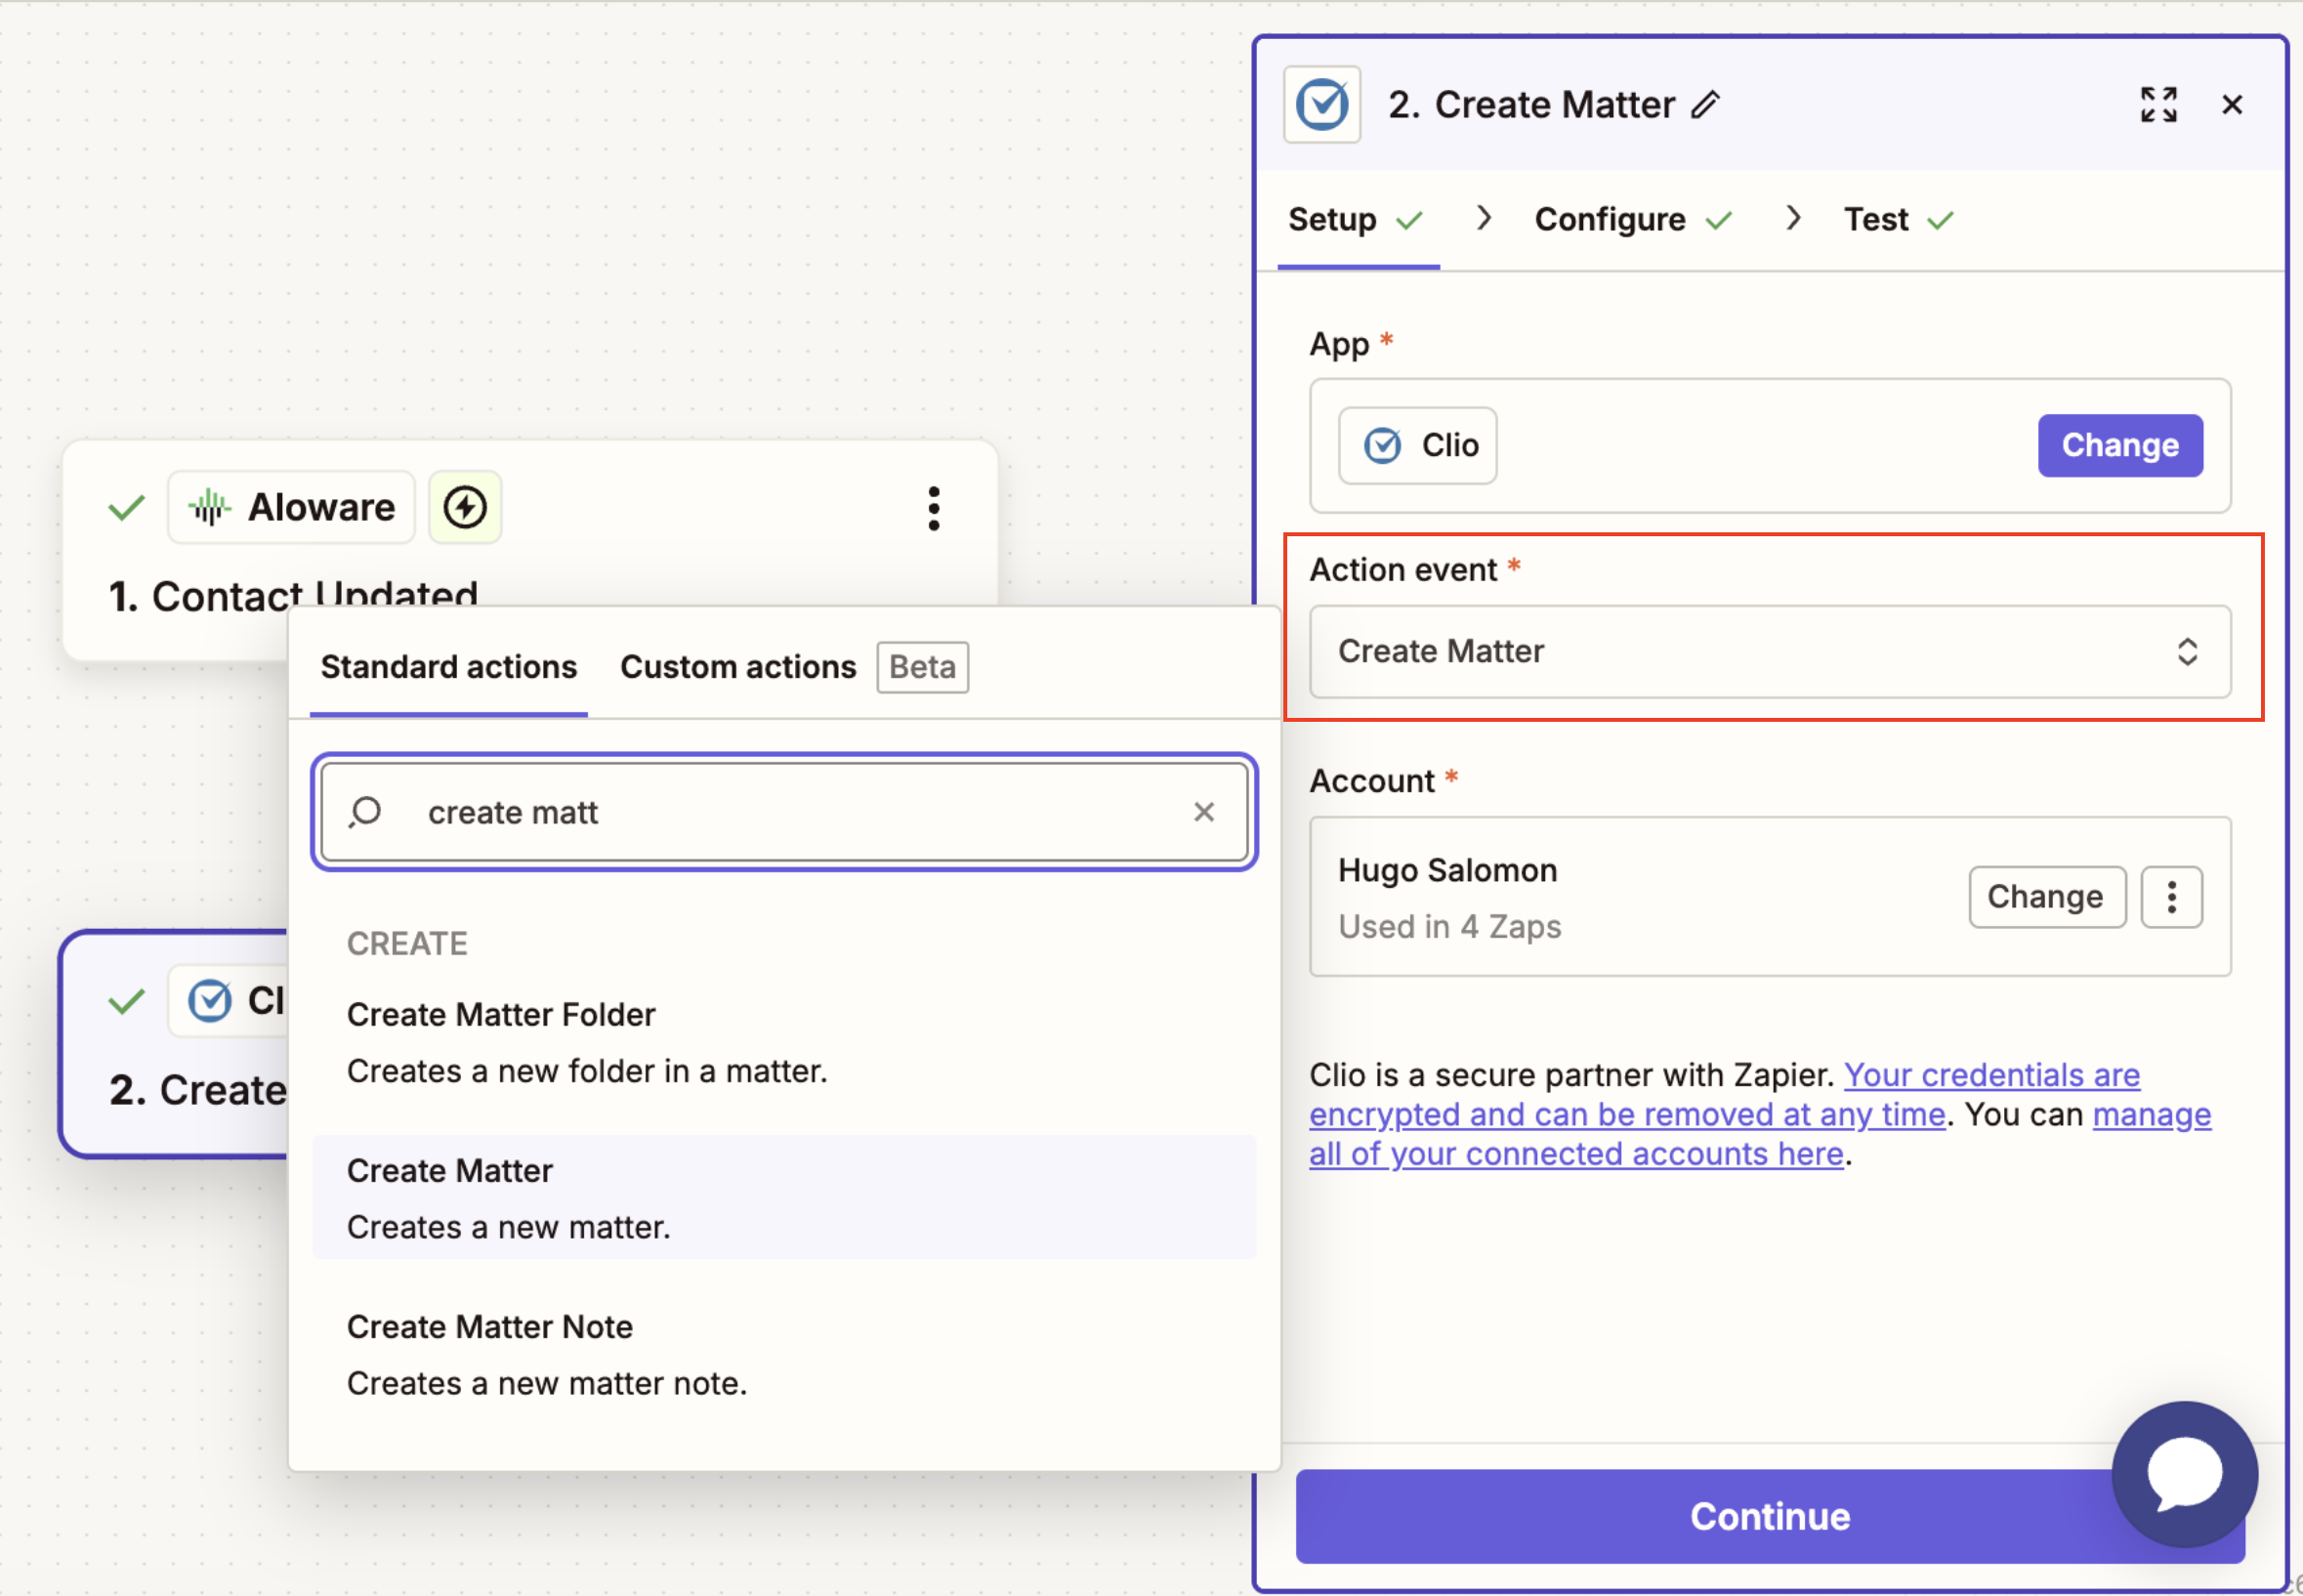
4. Map the Client field to the Contact ID stored in Aloware. Write the Matter description and map notes or any custom intake fields.
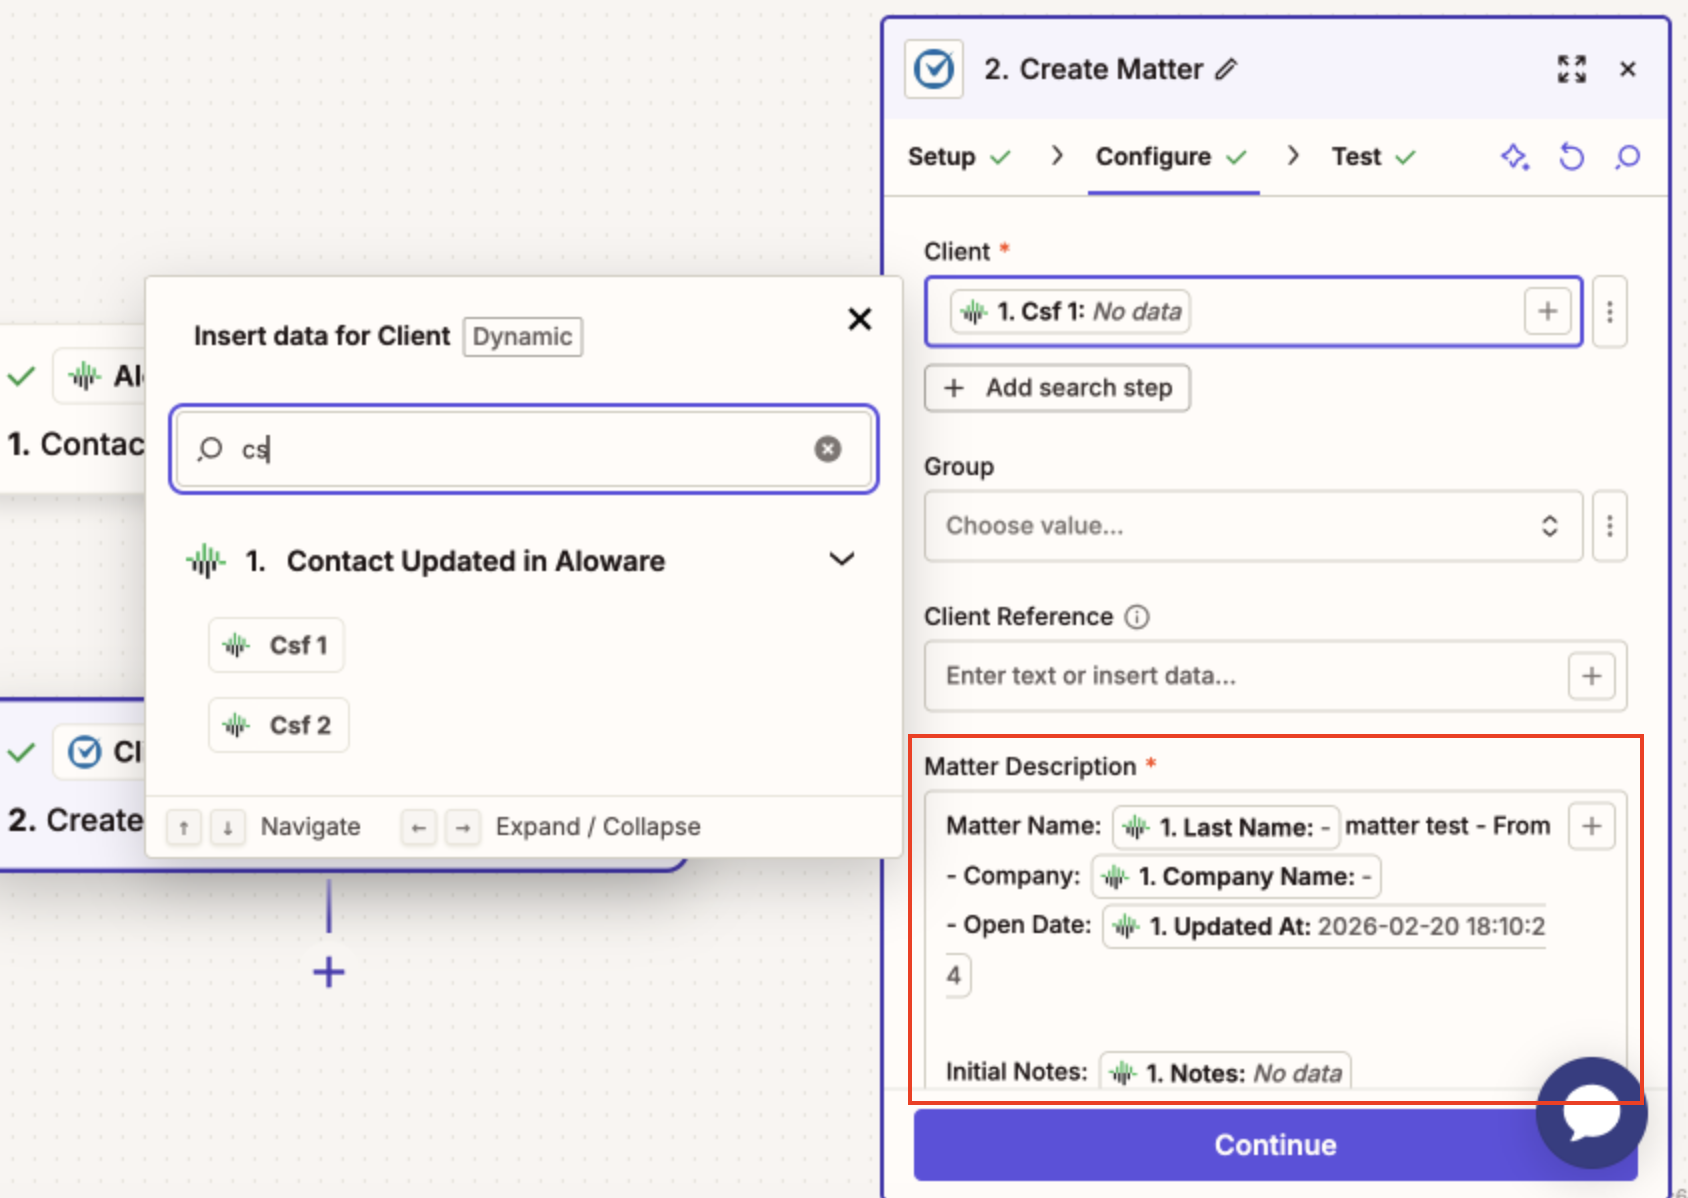
5. Test, confirm Clio created the Matter properly, and publish.
On the Professional Zapier plan you can merge these steps into one multi-step Zap, which is easier to maintain and less error-prone.
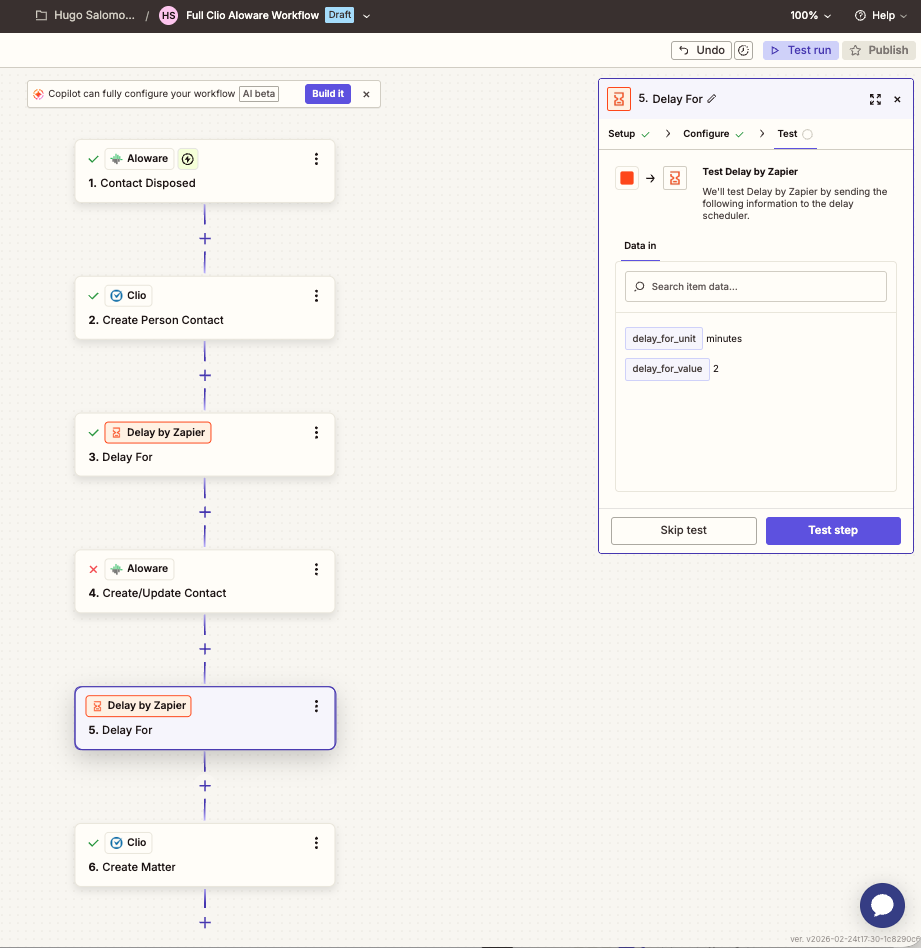
Step 5: Run an end-to-end test (Aloware → Zapier → Clio)
This test starts in Aloware and checks every system in the chain.
Add a lead in Aloware, fill in the required intake fields, and set its disposition to Signed Retainer.
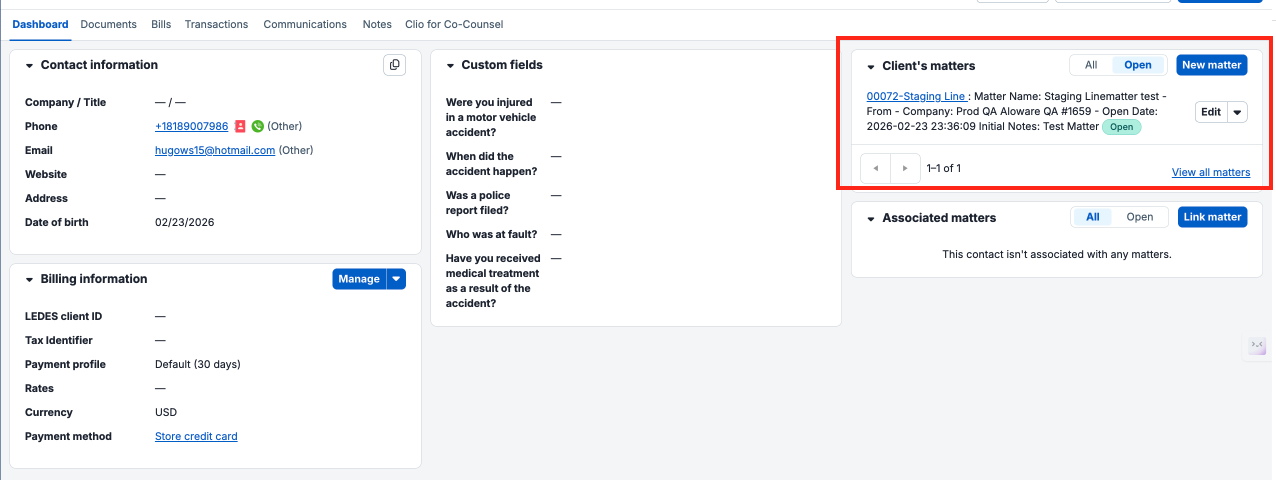
After you save, Zapier runs. Check three things: a Contact exists in Clio, its Contact ID is now in Aloware, and a Matter exists in Clio linked to that Contact.
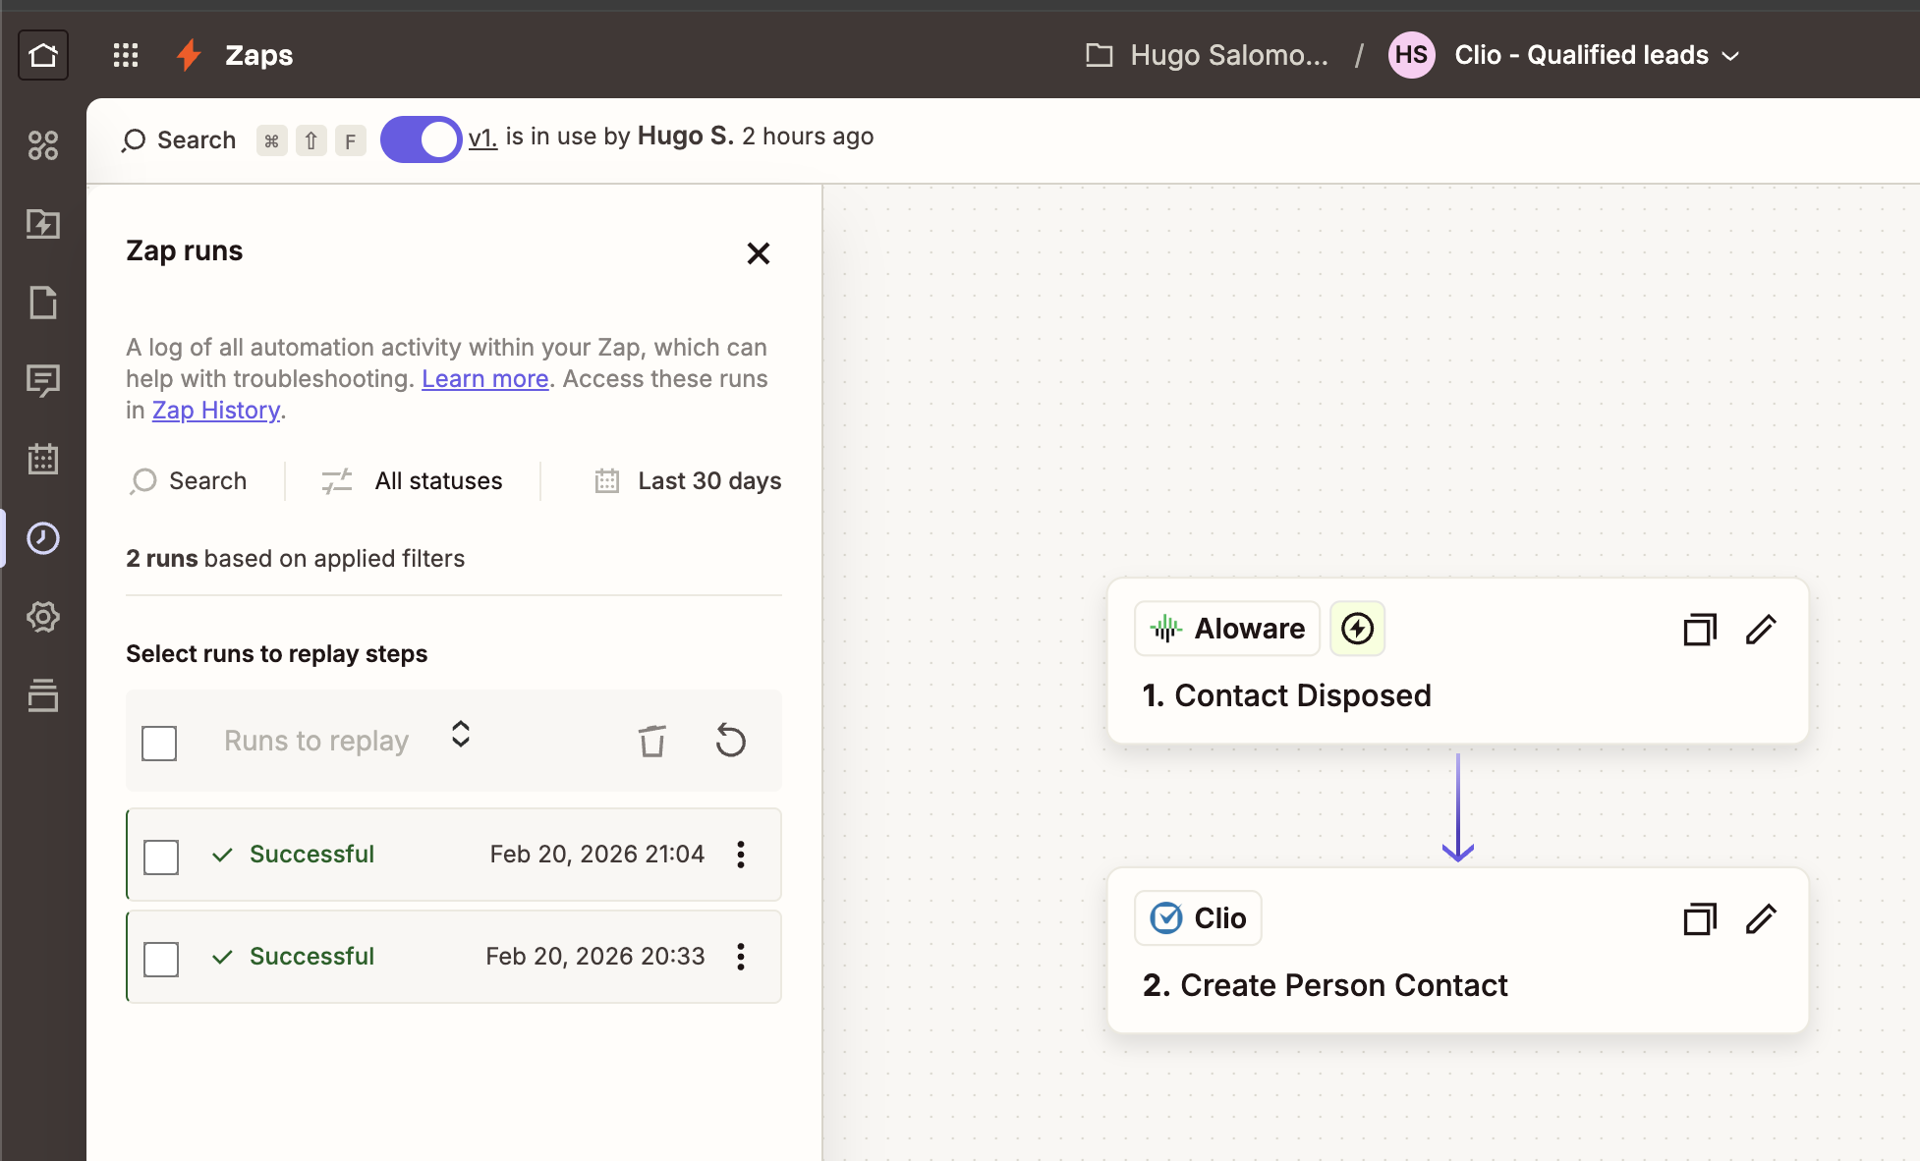
If all three check out, you can go live.
What agents do
Agents and users never need Zapier access. They do everything inside Aloware as part of normal work.
A call, message or form submission arrives in Aloware, and the agent opens the contact. While talking to the lead, they fill in the required intake fields and note anything relevant.
When the lead is fully qualified, the agent sets the Contact Disposition to Signed Retainer. Saving it fires the automation.
Zapier then works in the background: it creates the contact in Clio, saves the contact ID in Aloware, and creates a Matter linked to that Contact.
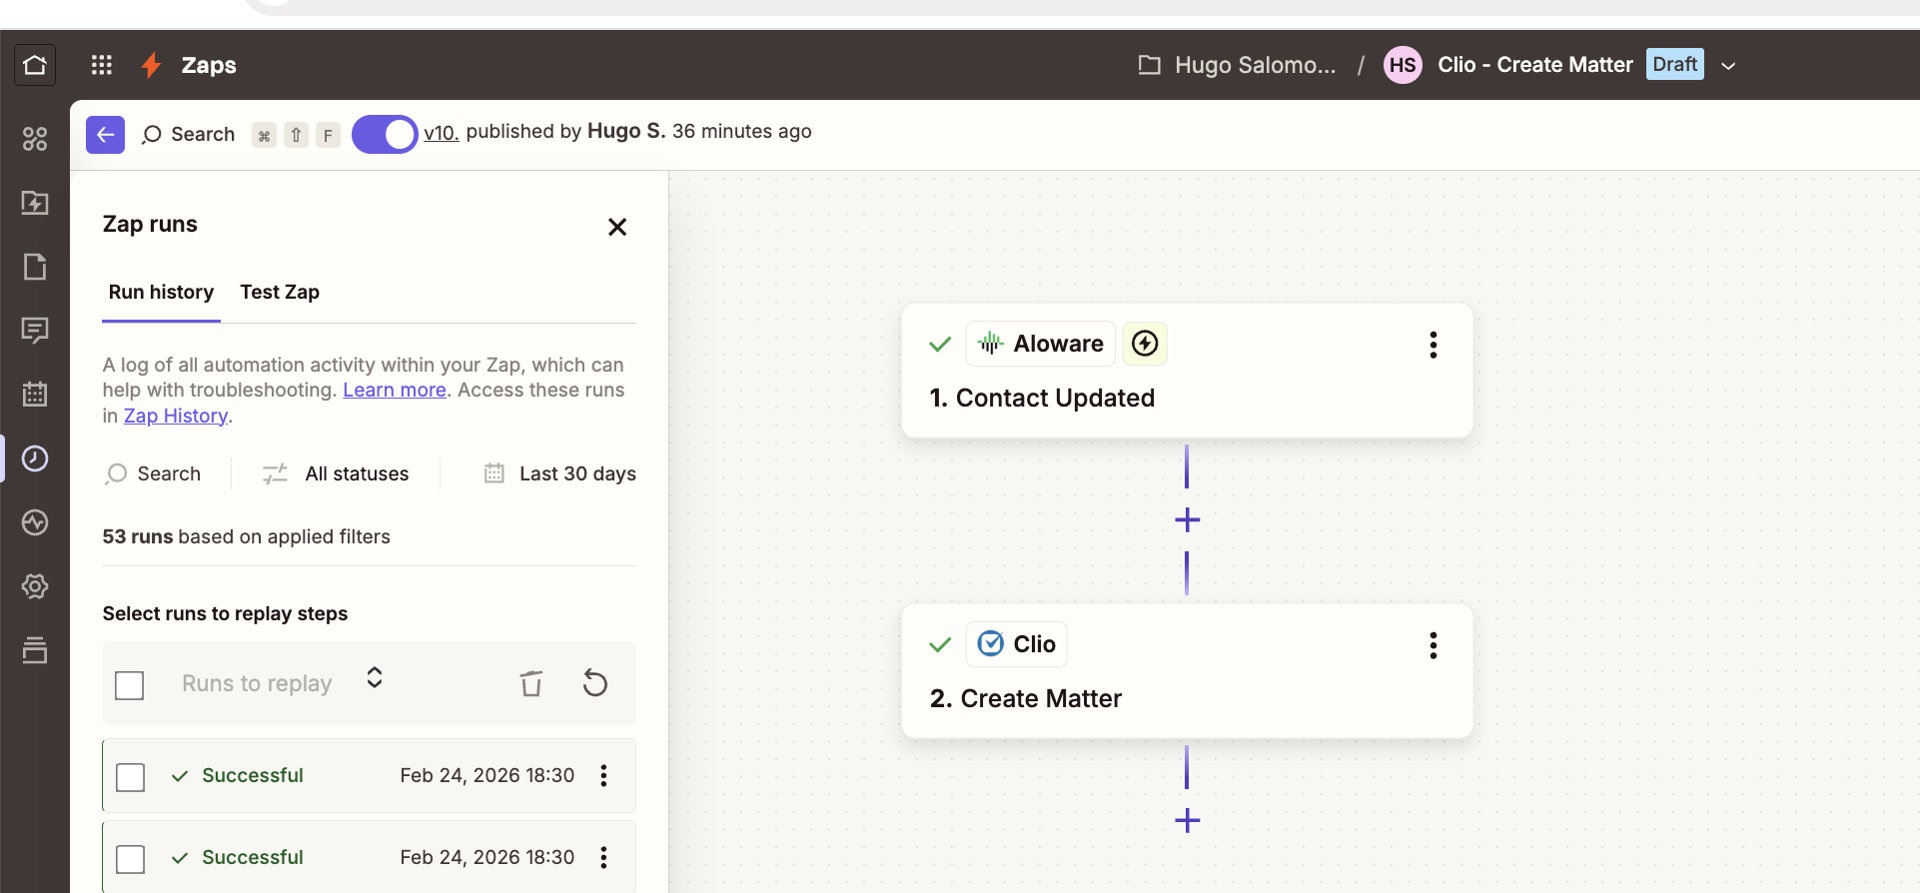
Afterwards the agent can open Clio to confirm the records are there and the intake data came across. Nothing else is required of them.
Gotchas
A few settings carry this integration, and small mistakes change what lands in Clio.
- Get the disposition rule right first. Apply
Signed Retaineronly to fully qualified leads: it is what creates the Contact and Matter, and setting it early produces incomplete records. - Linking needs the stored Contact ID. Each new Clio Contact's ID has to be written to an Aloware custom field, or the Matter can't be attached to the right Contact.
- Check every field mapping. Each Aloware field needs its Clio counterpart with the same data type, otherwise values go missing or arrive wrong.
- Test the Zapier trigger before launch. Contact Disposed and Contact Updated don't behave the same, and a wrong choice can produce duplicate records.
- Confirm access during setup. You need admin permissions in Aloware and in Clio, and each connected account must be authorized properly.
Once live, watch your Zapier task count. Every action is a task, so usage grows with the number of leads going through.
Where this fits
Aloware owns lead intake and qualification, Clio Manage owns case management, and Zapier moves the data between them.
If your firm uses only Clio Manage, this can stand in for Clio Grow as the intake layer, with all qualification and first data capture kept in Aloware.
Our support team can help you set this up.