Form-to-text workflow
Text HubSpot form fills automatically.
Build a HubSpot workflow that texts a lead through Aloware the moment they submit a form. The video walks through the whole setup; the steps below match it.
Texting right after the submission means leads hear from you while they're still interested, and your team doesn't have to send that first message by hand.
Before you start
Aloware must already be connected to HubSpot.
Build the workflow
What you'll end up with: a personalized text goes out to each lead automatically once they submit a form.
This example uses the form below, built in HubSpot.
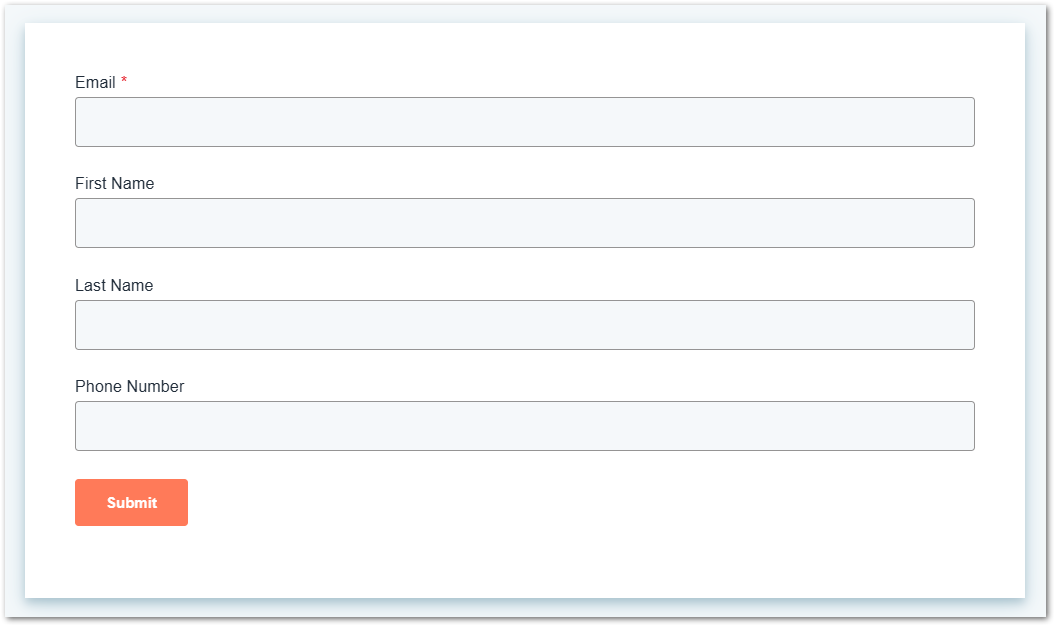
The HubSpot form used in this example
1. Start a new workflow
Step 1. Sign in to HubSpot and open Workflows.
Step 2. Click "create workflow", then from scratch.
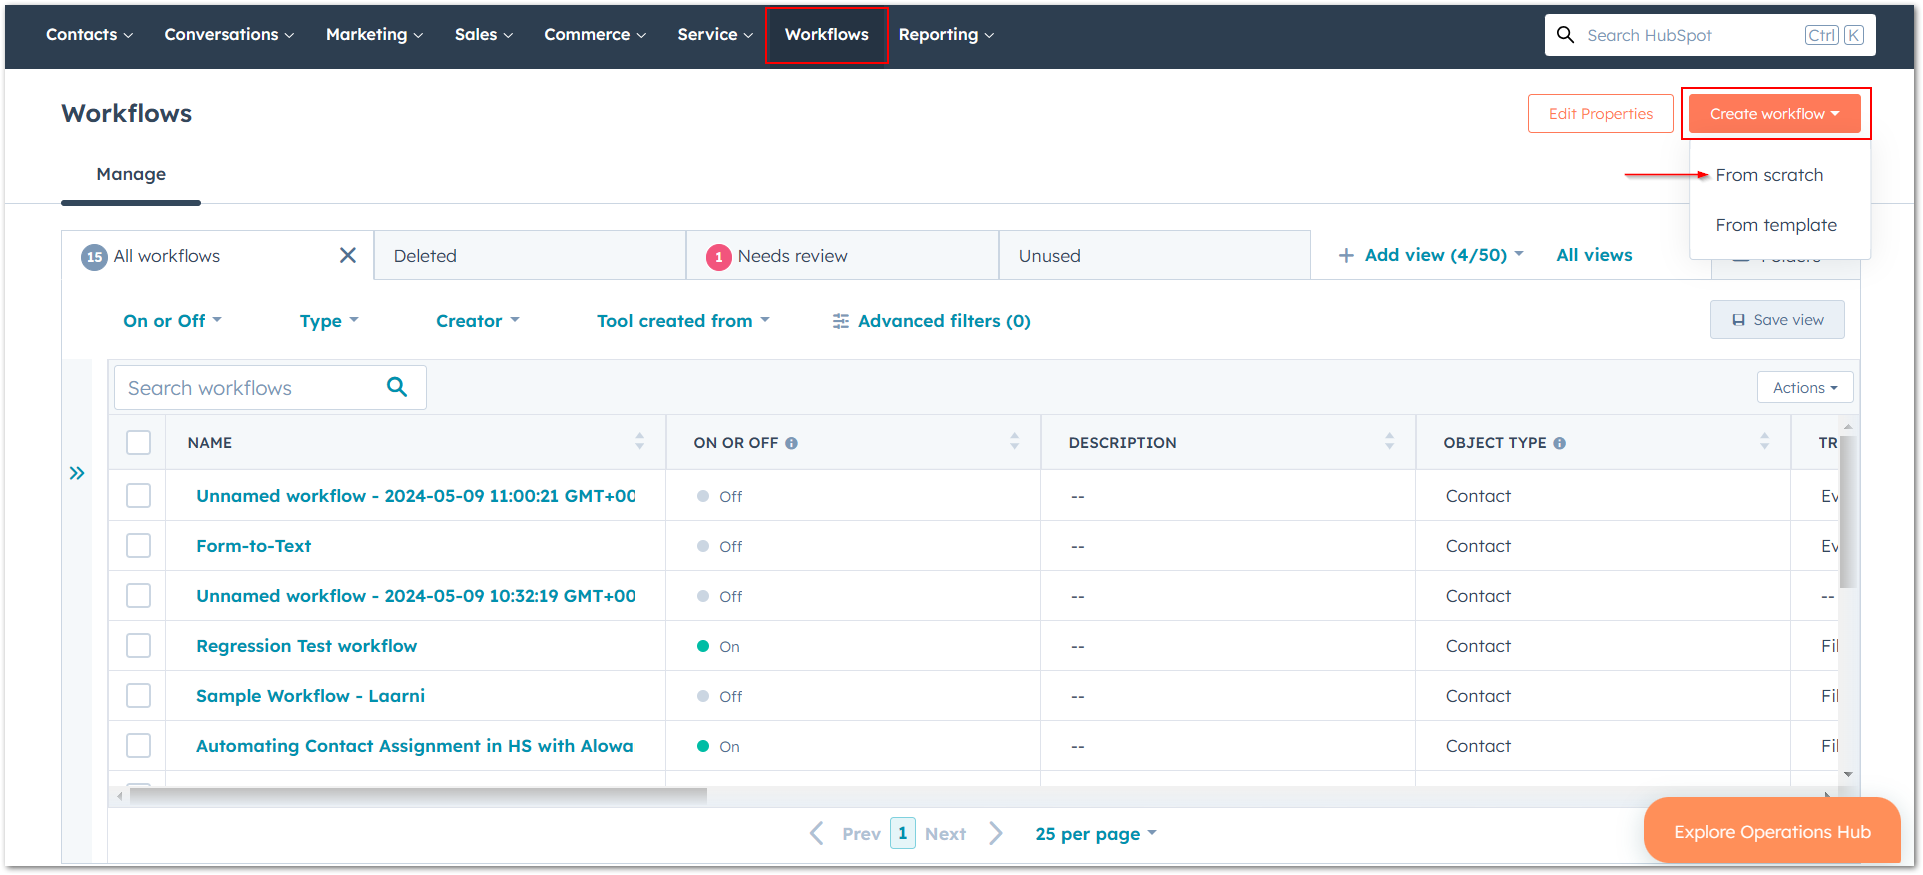
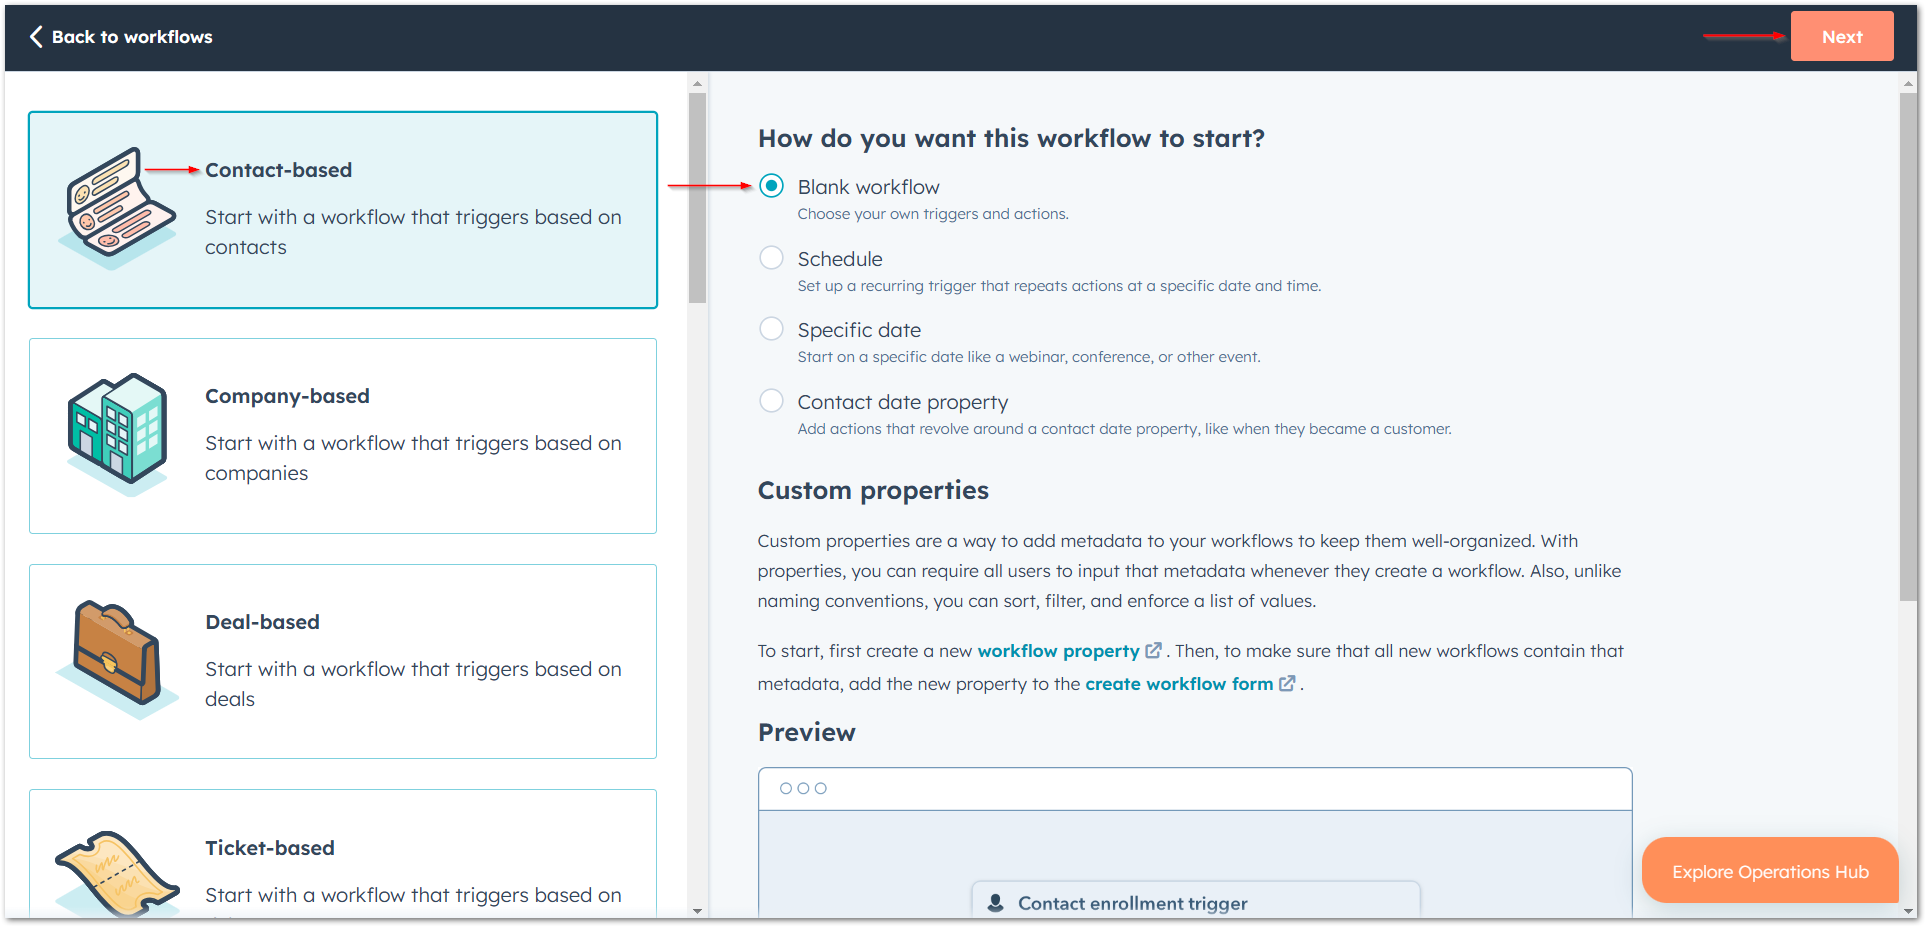
2. Set the workflow type and trigger
Step 1. Pick contact-based, then blank workflow. Click Next.
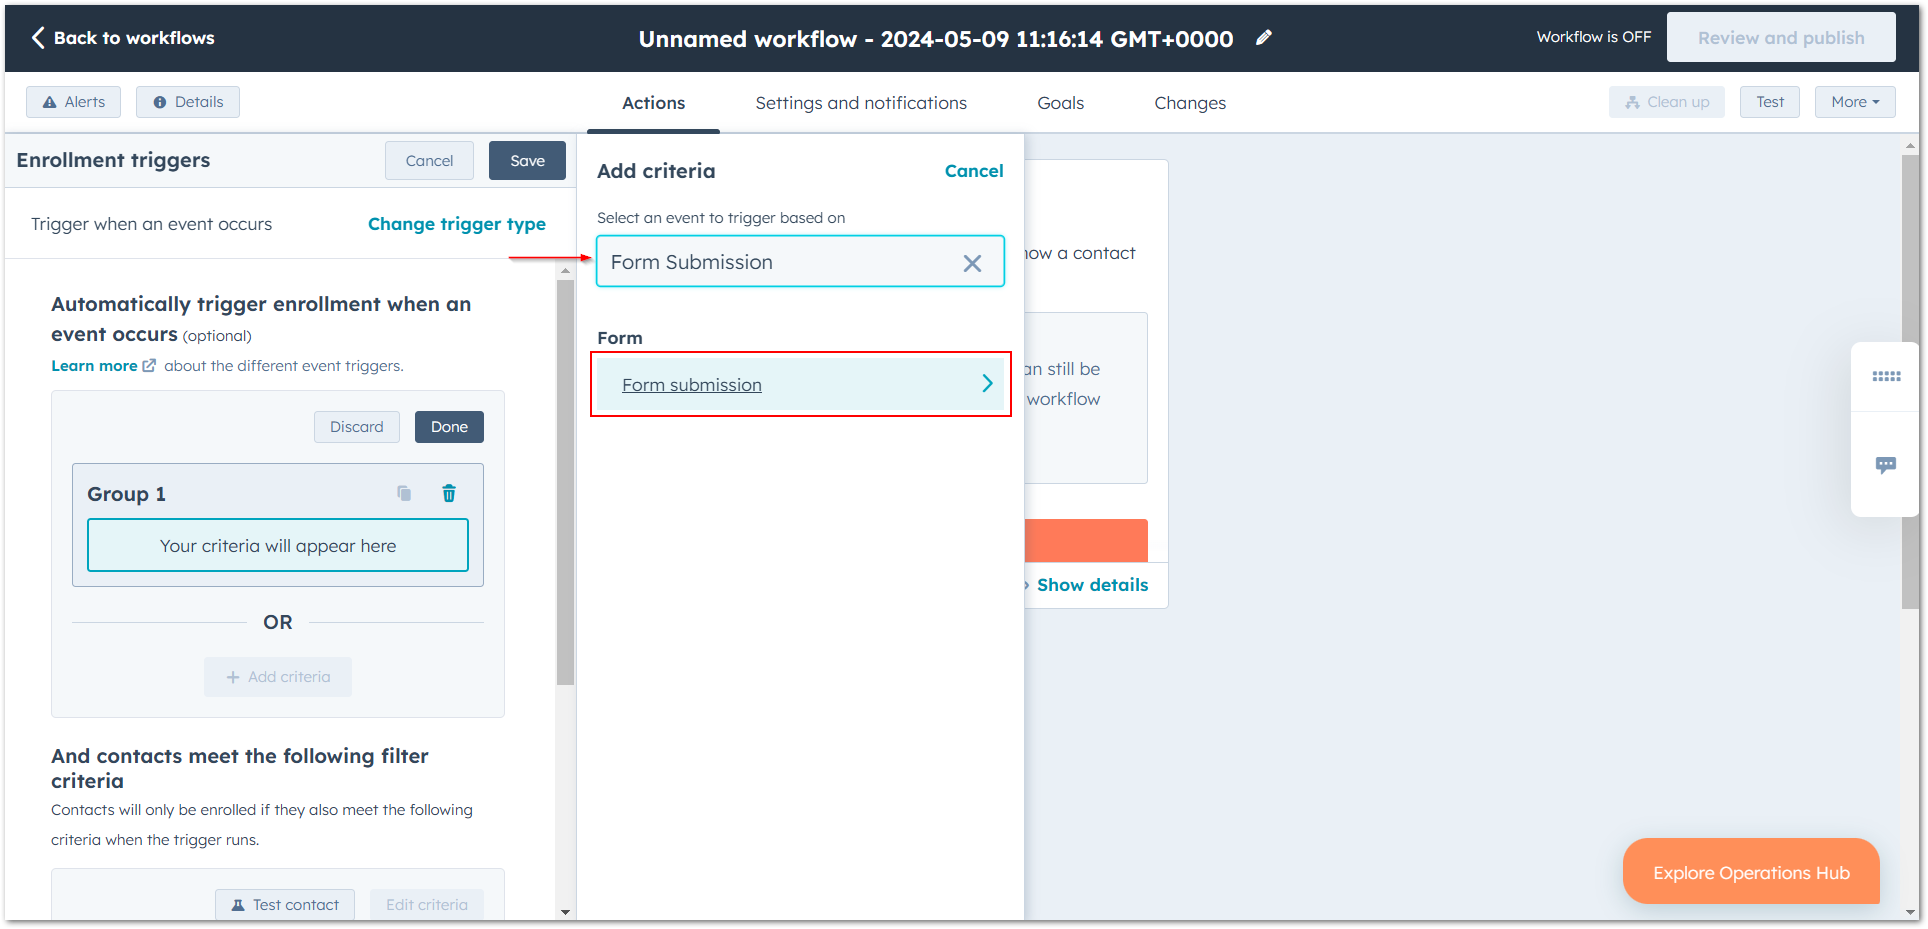
Step 2. Click set up triggers and pick when an event occurs.
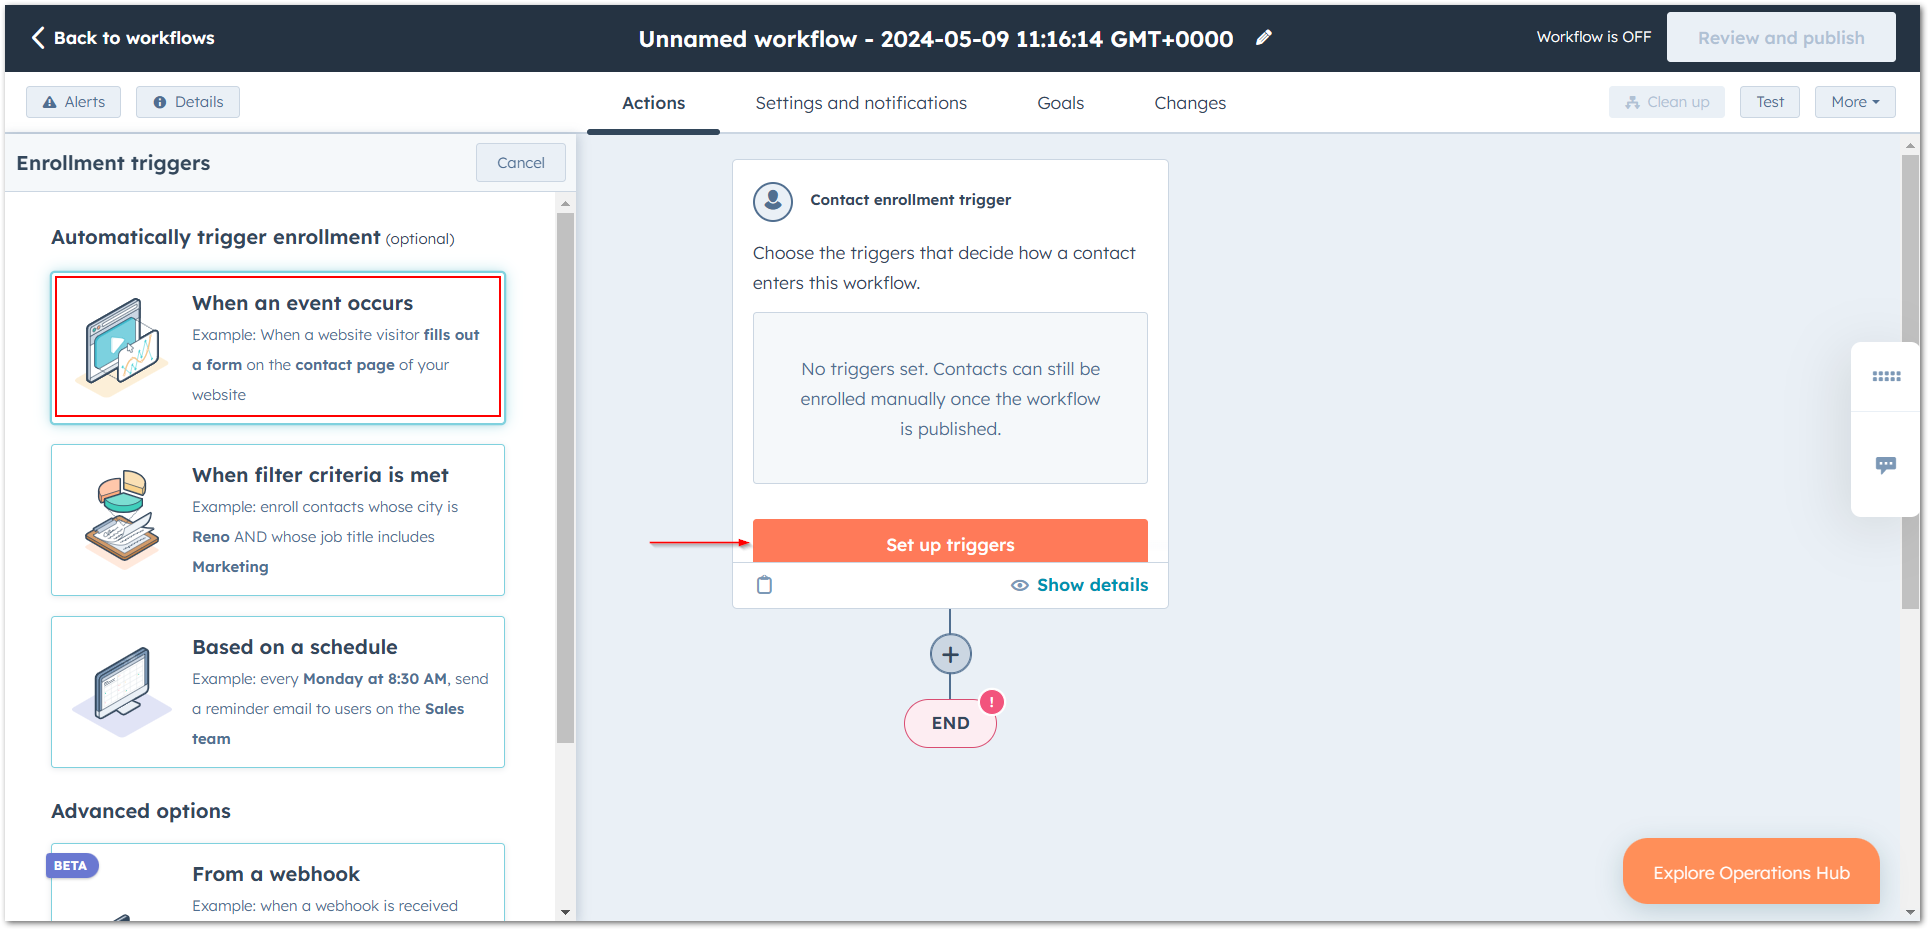
Step 3. Use form submission as the criteria, so contacts who submitted the form are enrolled.
3. Pick the form
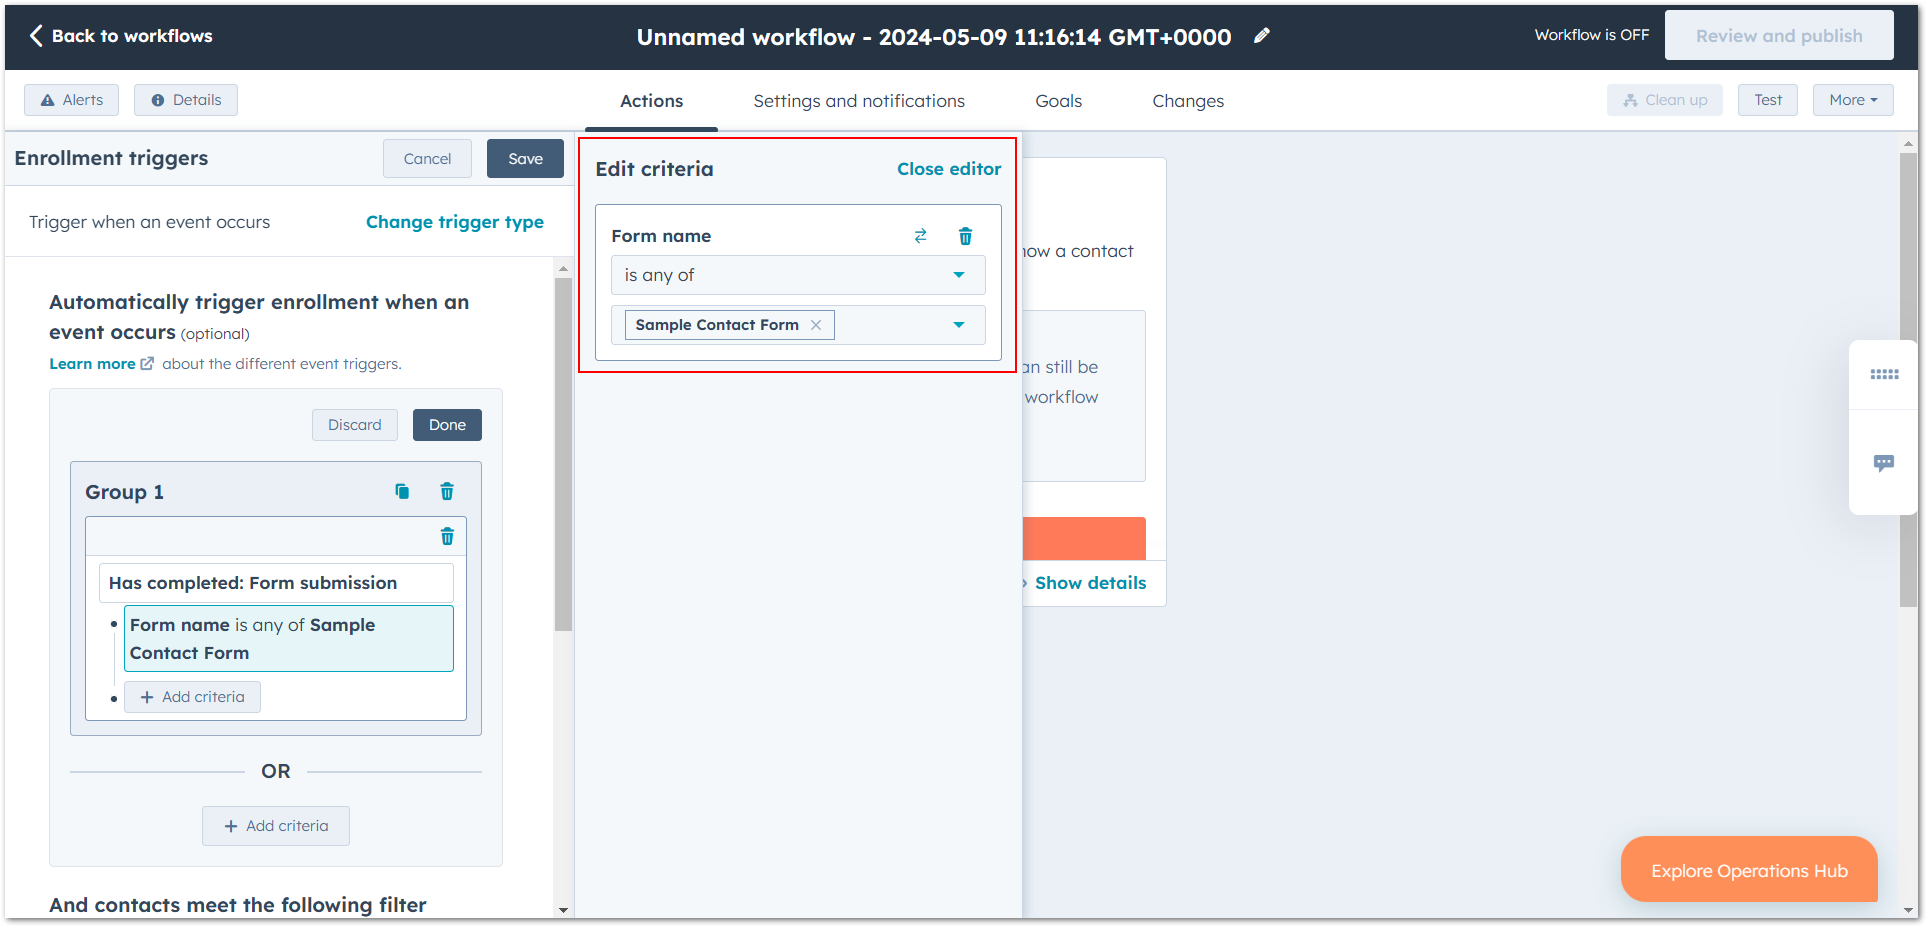
Step 1. Click +add criteria, then form name.
Step 2. Select the form that should start the workflow.
Step 3. Click Save.
4. Add the Aloware text action
Next, tell the workflow what to do after a submission. Here it will send an SMS through Aloware.
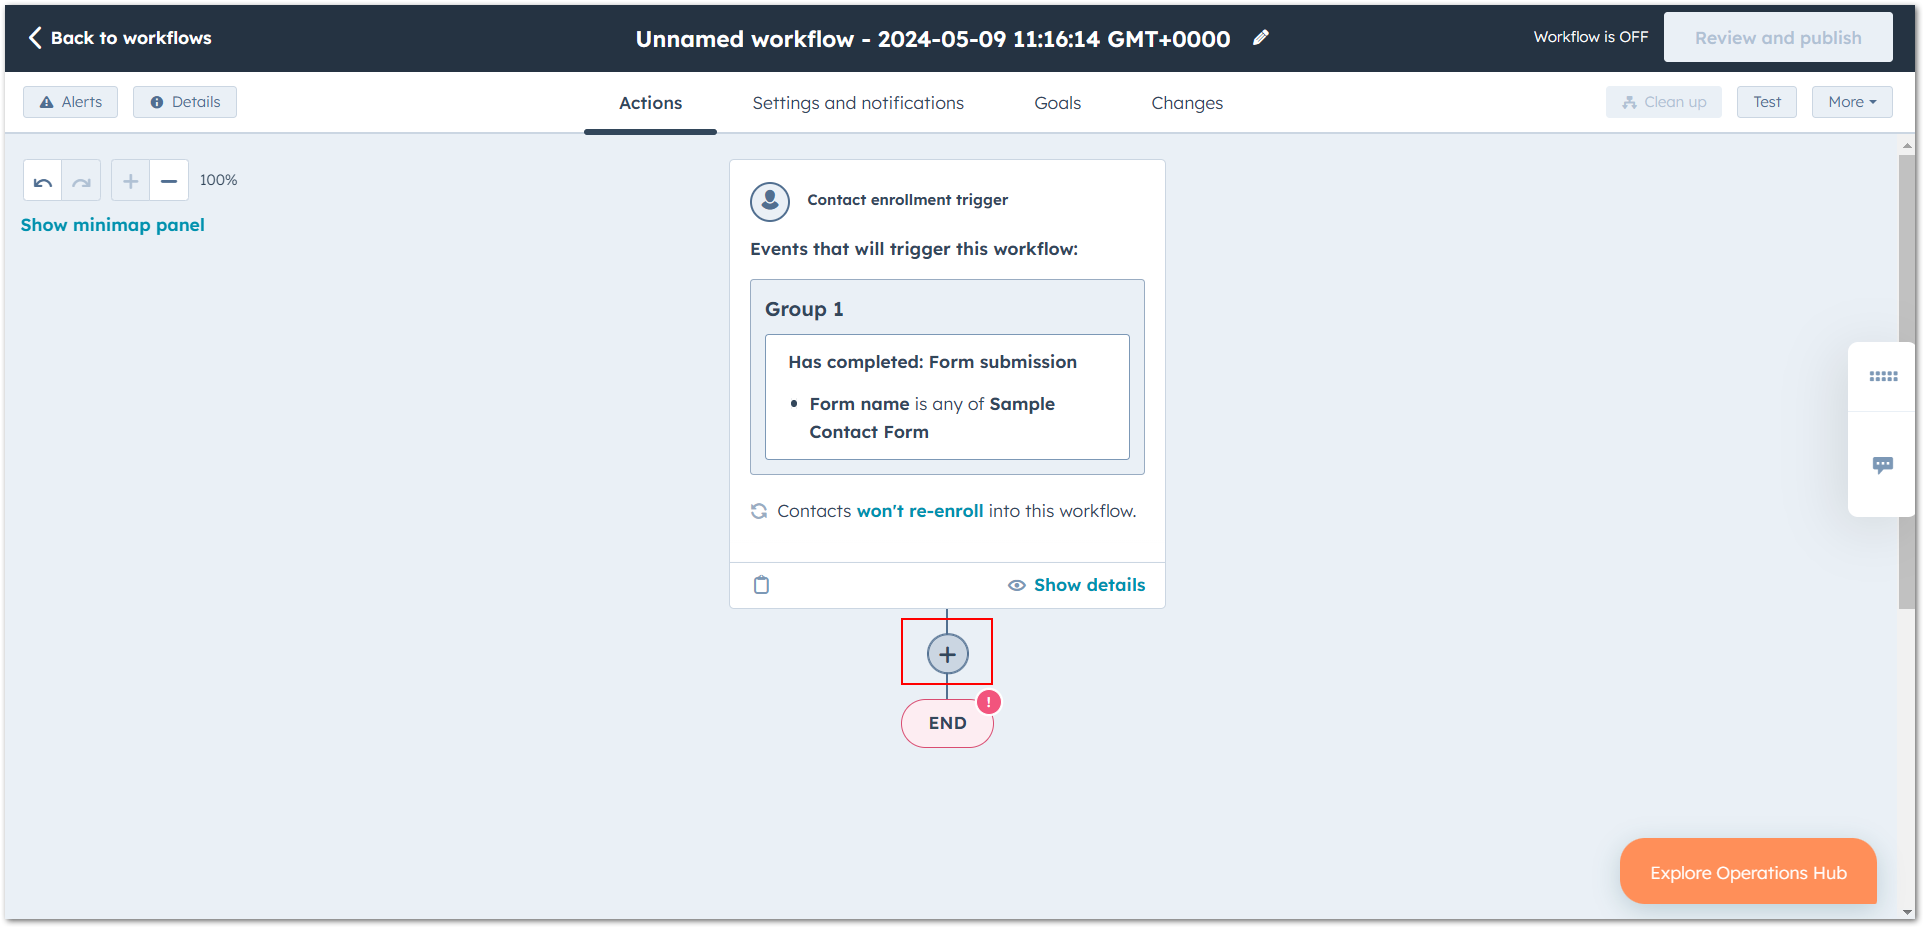
Step 1. Click + to add an action.
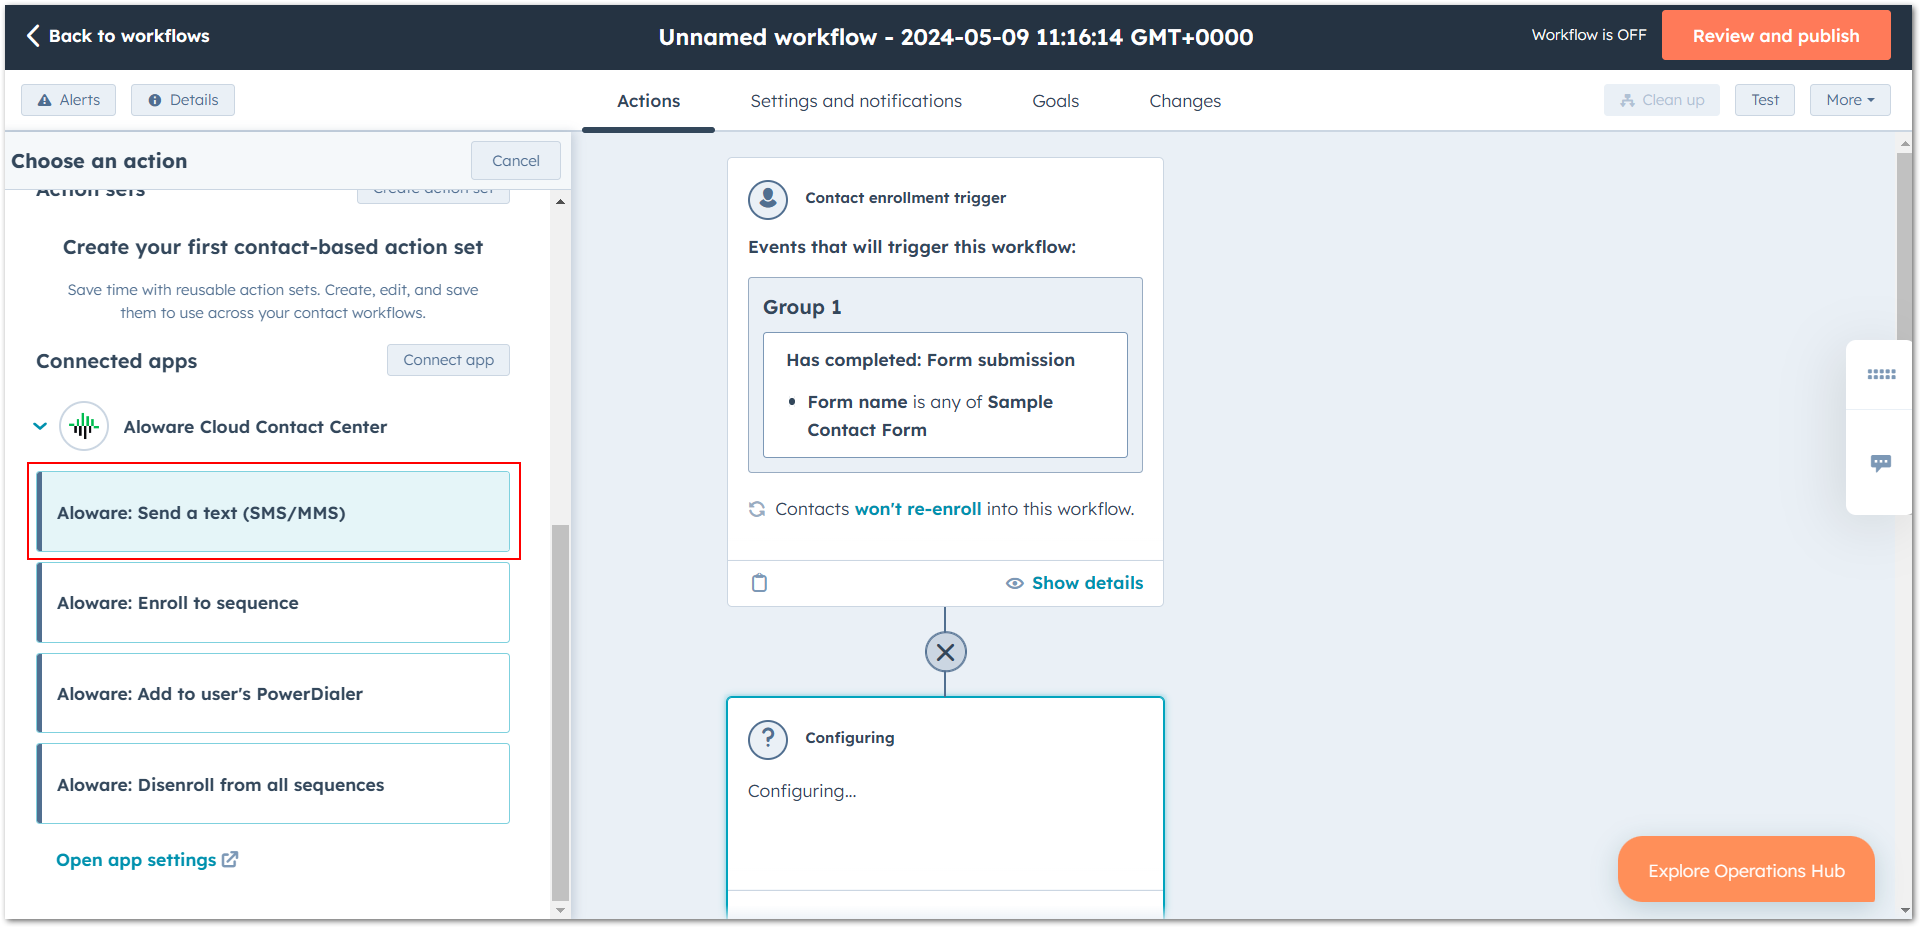
Step 2. In the side panel, open Aloware cloud contact center. That gives the workflow access to Aloware's texting action inside HubSpot.
Step 3. Pick Aloware: Send a text (SMS/MMS).
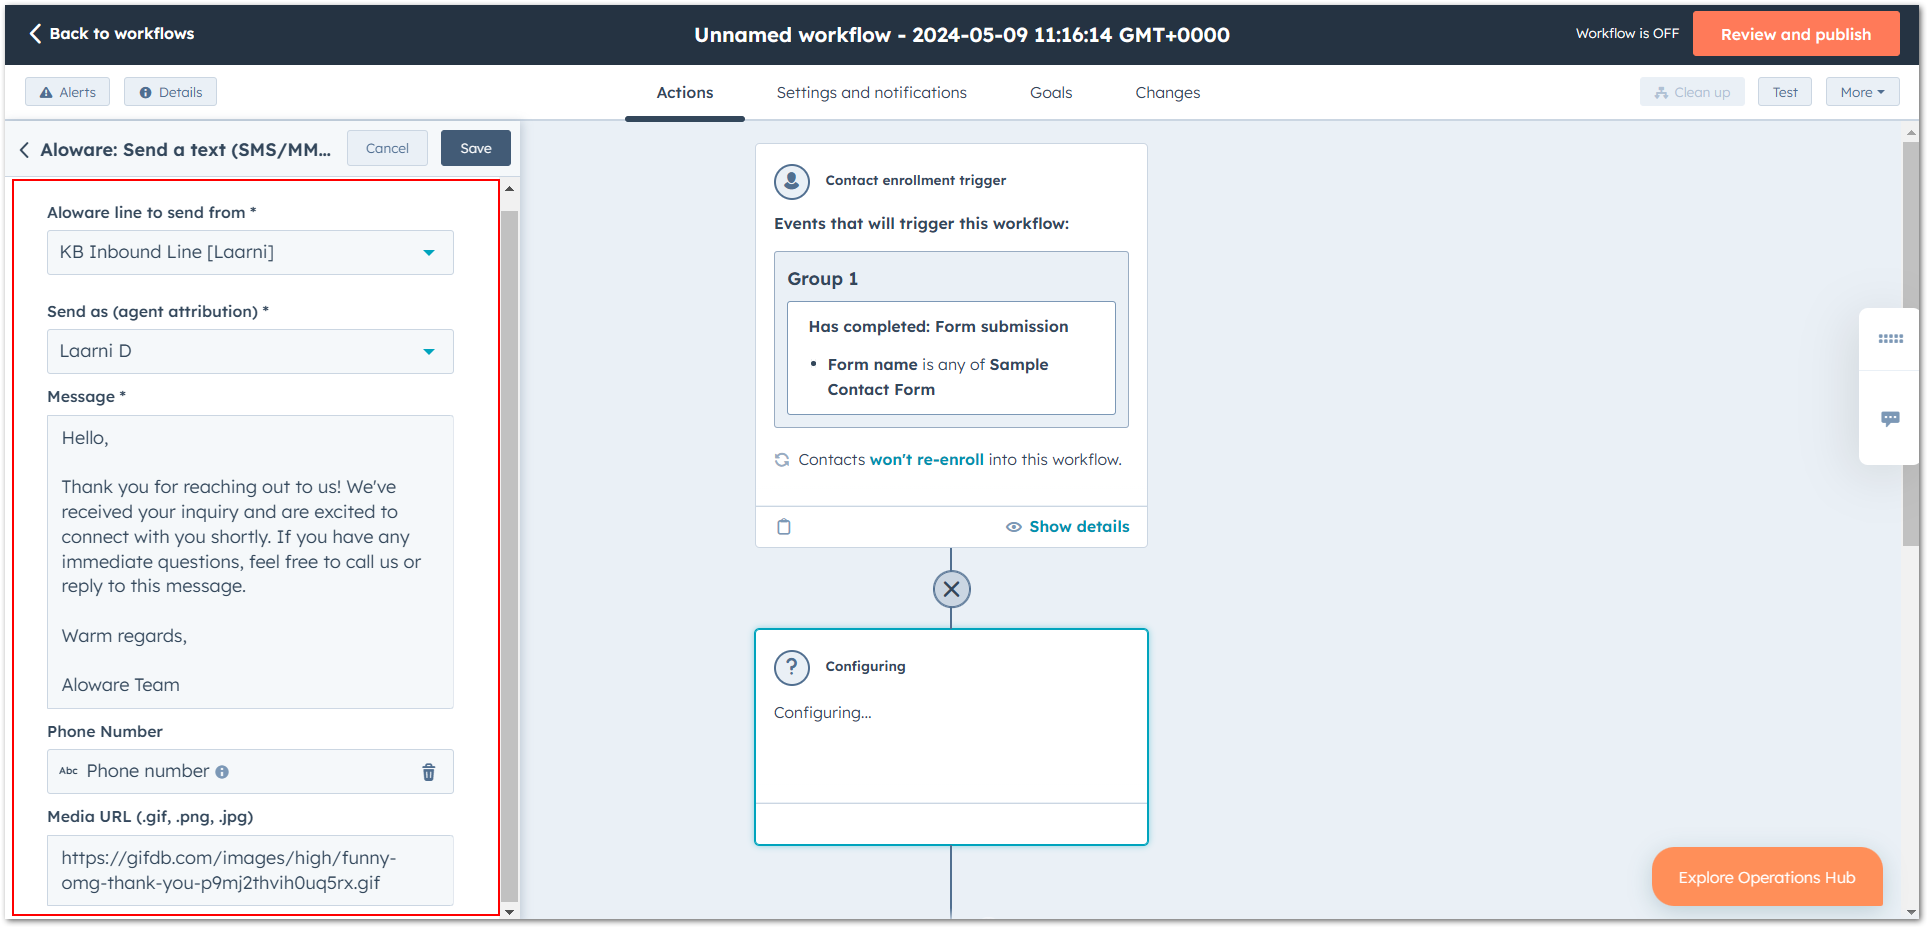
5. Fill in the SMS settings
Set the message, who receives it, and any personalization you want to pull in from HubSpot custom properties.
Step 1. Choose the Aloware line the text goes out from.
Step 2. Use Send as to credit the message to an agent.
Step 3. Write the message.
Step 4. Add the lead's phone number and, if you need one, a media URL.
6. Test, then publish
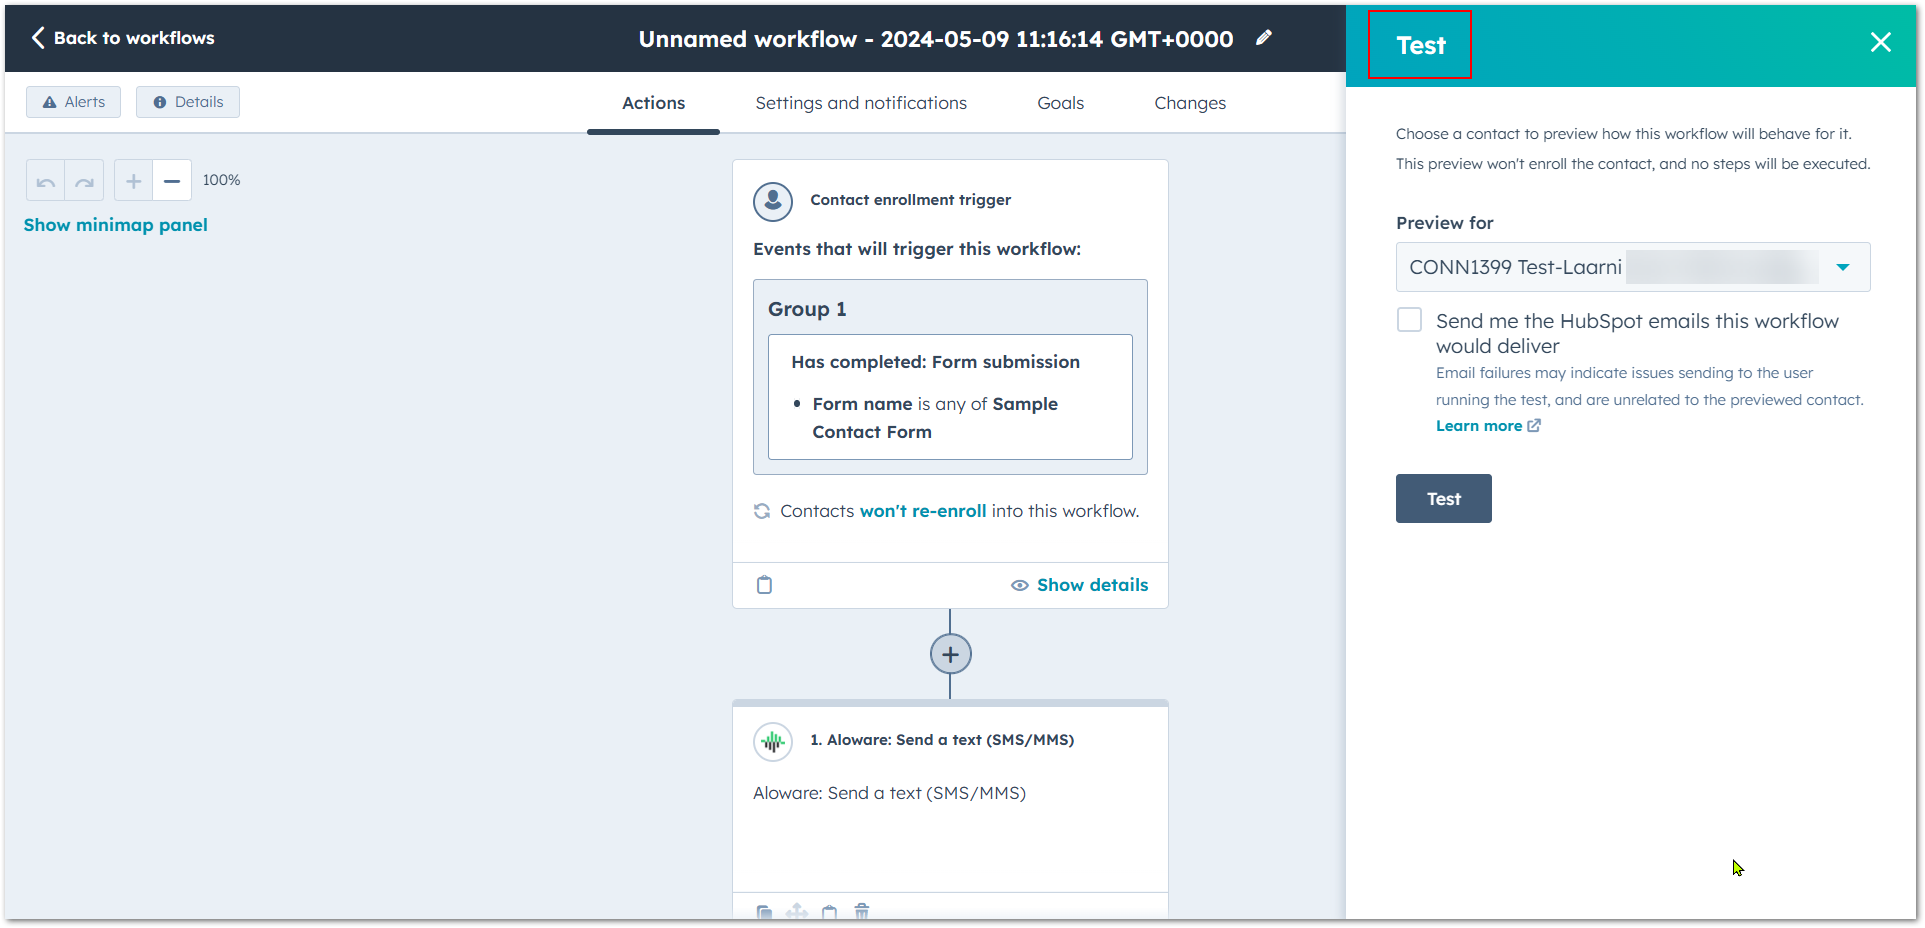
Step 1. Enroll a test contact to try the workflow.
Step 2. Check the settings once more.
Step 3. Publish it. From then on, every lead who submits the form gets a text right away.
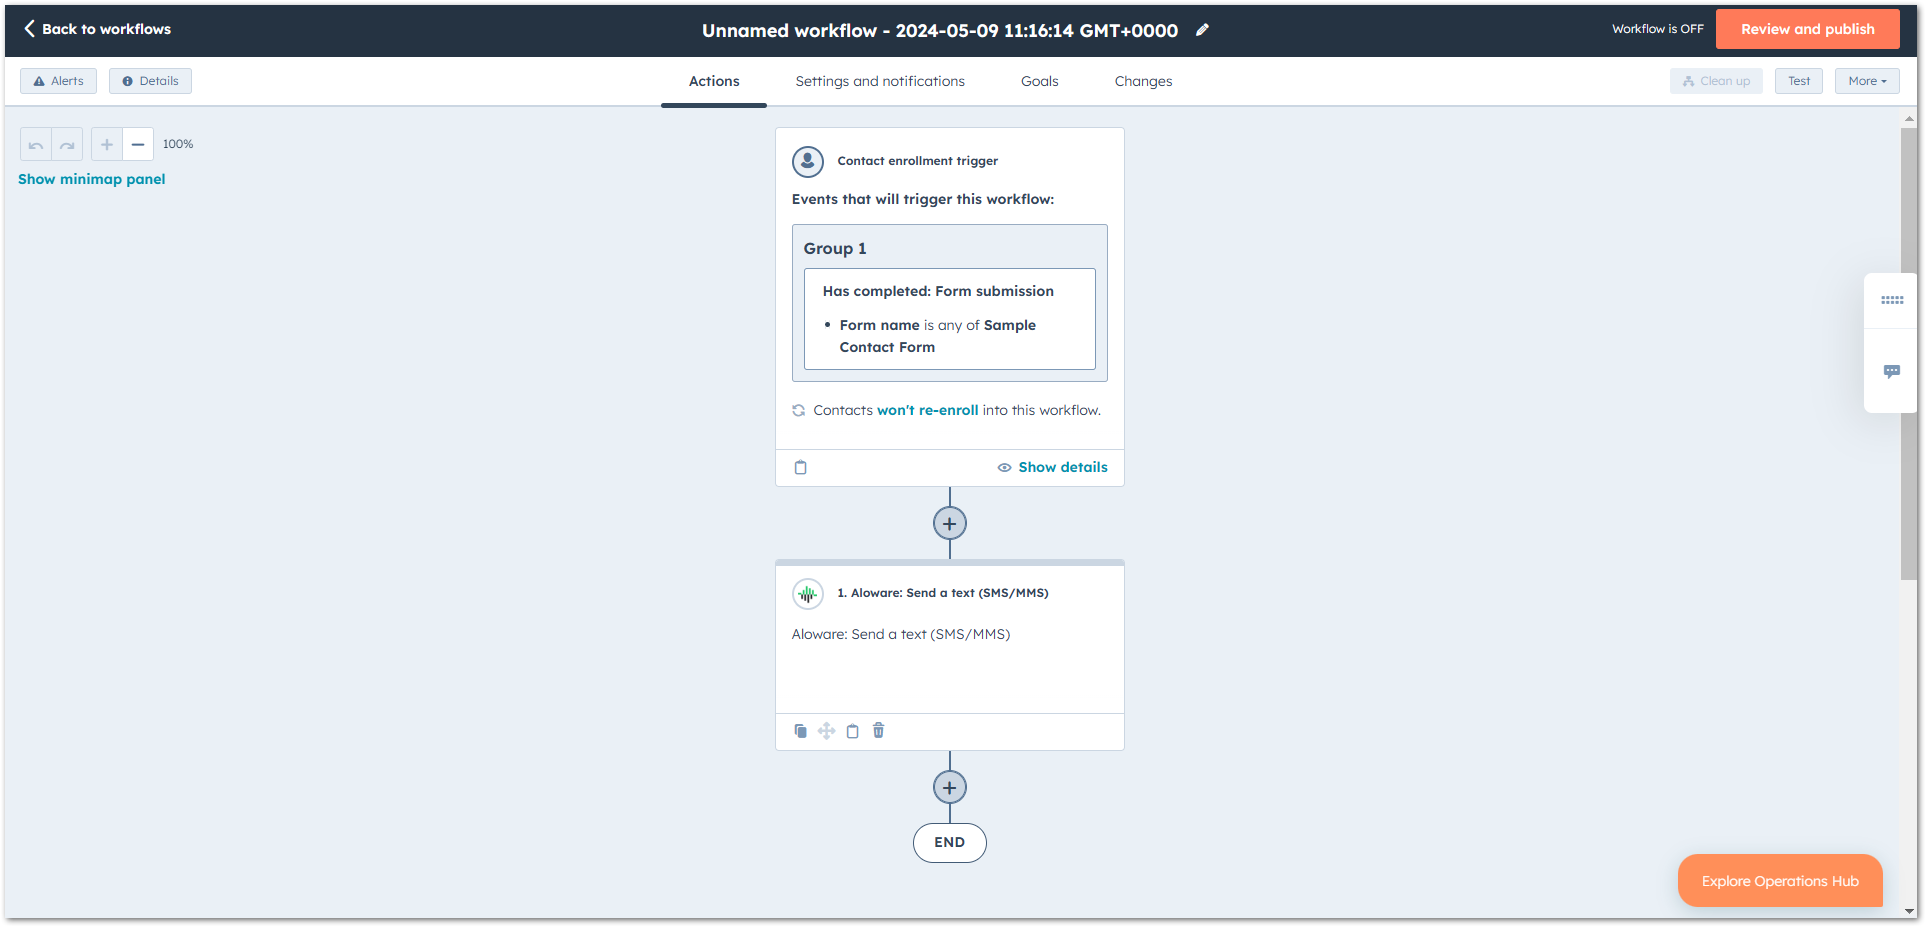
The finished workflow
When you're done, the workflow should look like this:
Leads now get a text within moments of submitting the form, so you reply faster and give more of them a reason to convert.
Our support team can help you set this up.