Form-to-call lead distribution
Route HubSpot form leads into the Power Dialer.
Use a HubSpot workflow to route leads straight into the right Aloware user's power dialer, so no one has to move lists between the two tools by hand and reps can spend their time on calls.
Why use it
Exporting leads from the CRM and importing them into a dialer is slow, and it's easy to get wrong. With this workflow:
- No more manual list moves - each lead lands in the correct agent's power dialer in Aloware on its own.
- Faster outreach - leads get called soon after their engagement or behavior in HubSpot qualifies them.
- More selling time - reps work on closing deals instead of maintaining contact lists.
Before you start
Make sure your HubSpot and Aloware integration is set up.
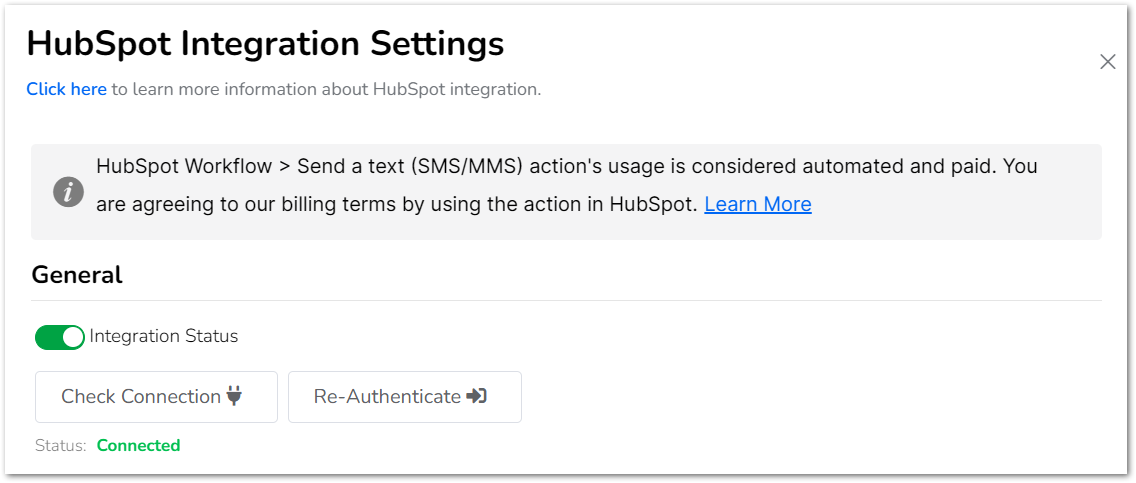
What you'll end up with: leads flow into each agent's power dialer automatically, with no list import per team member. Less busywork, more time saved.
Build the workflow in HubSpot
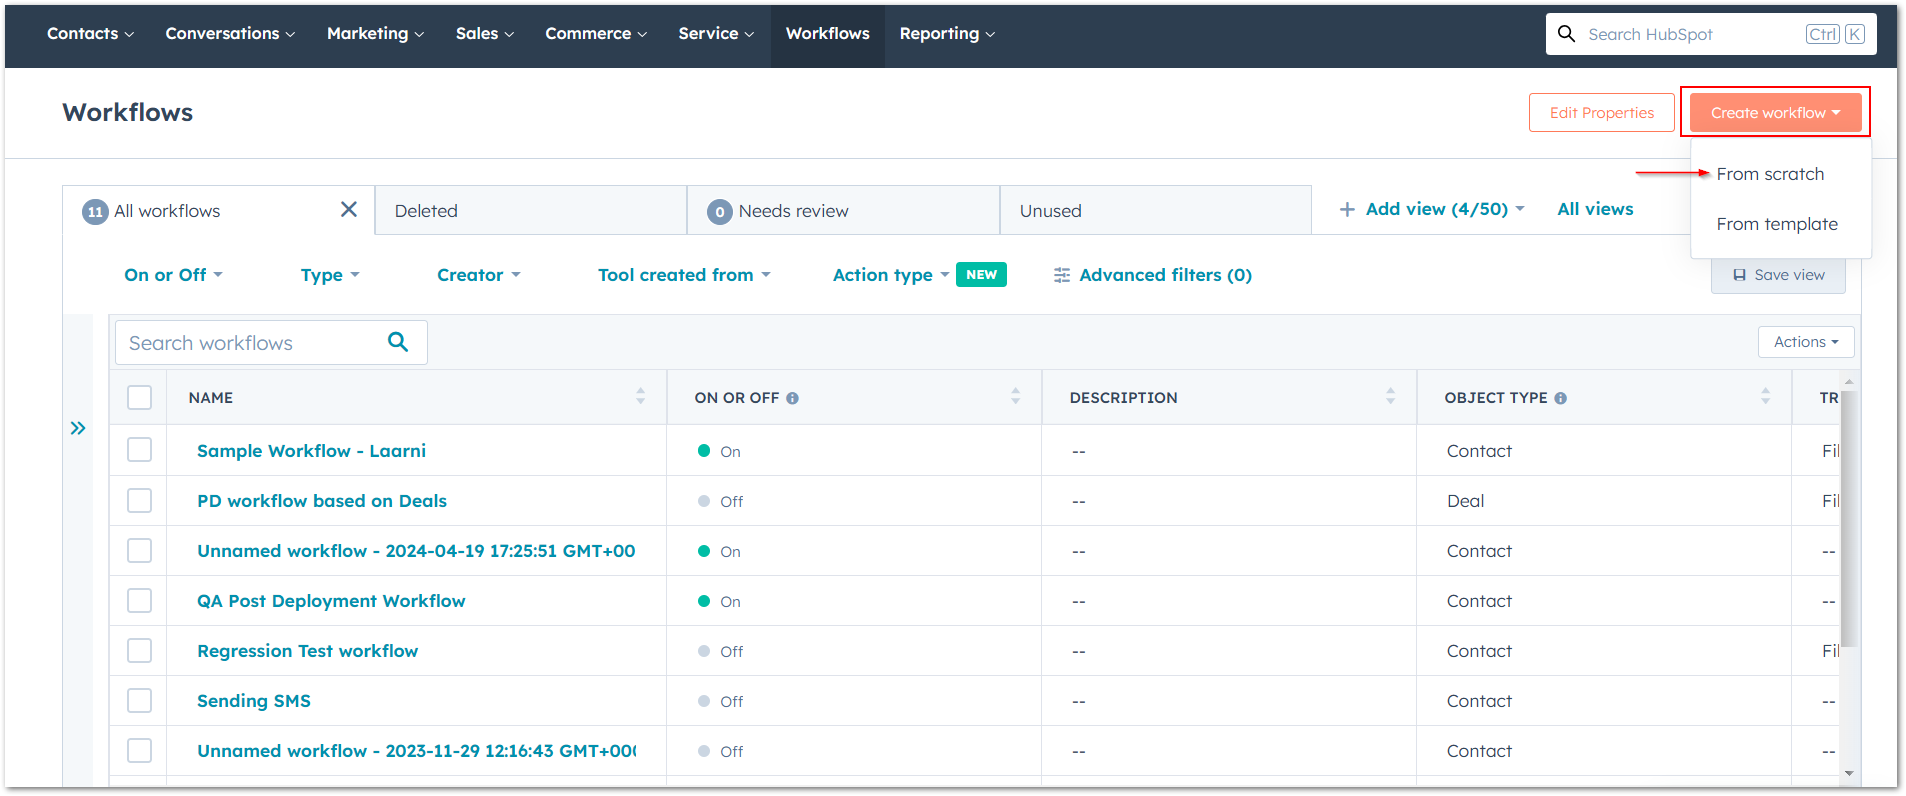
1. Open Workflows
Go to the Workflows tab in HubSpot.

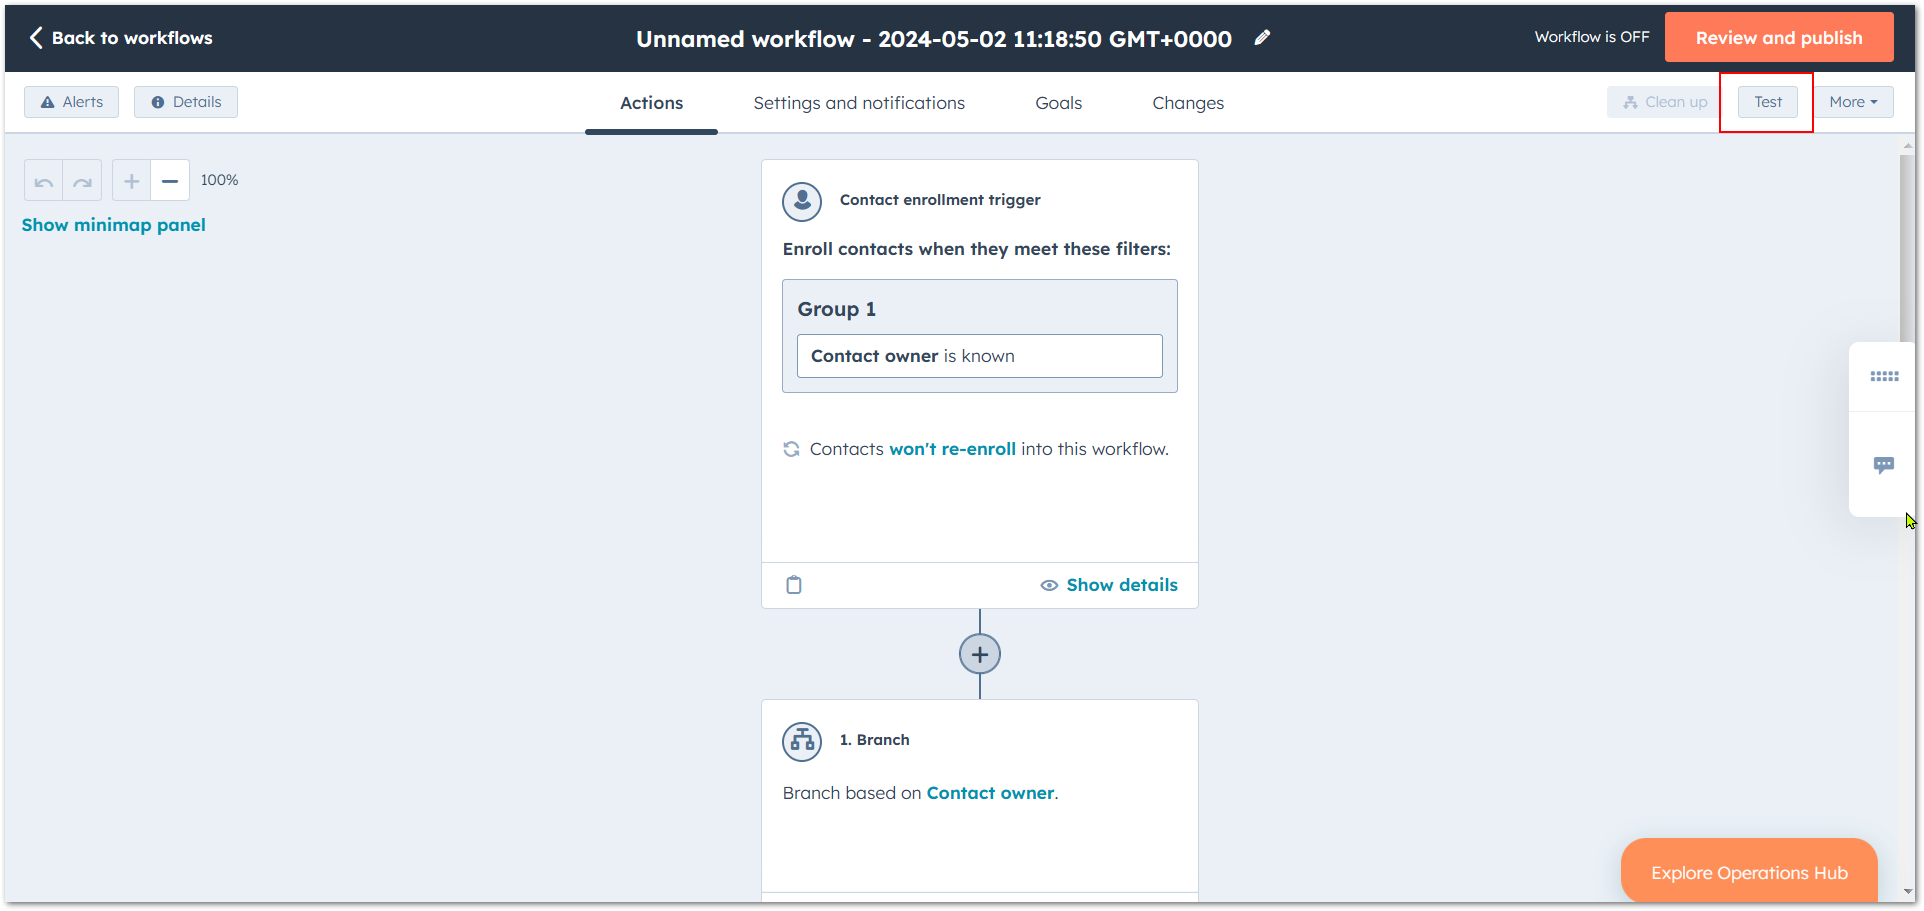
2. Create a contact-based workflow
Step 1. Click create workflow, then from scratch for an empty template.
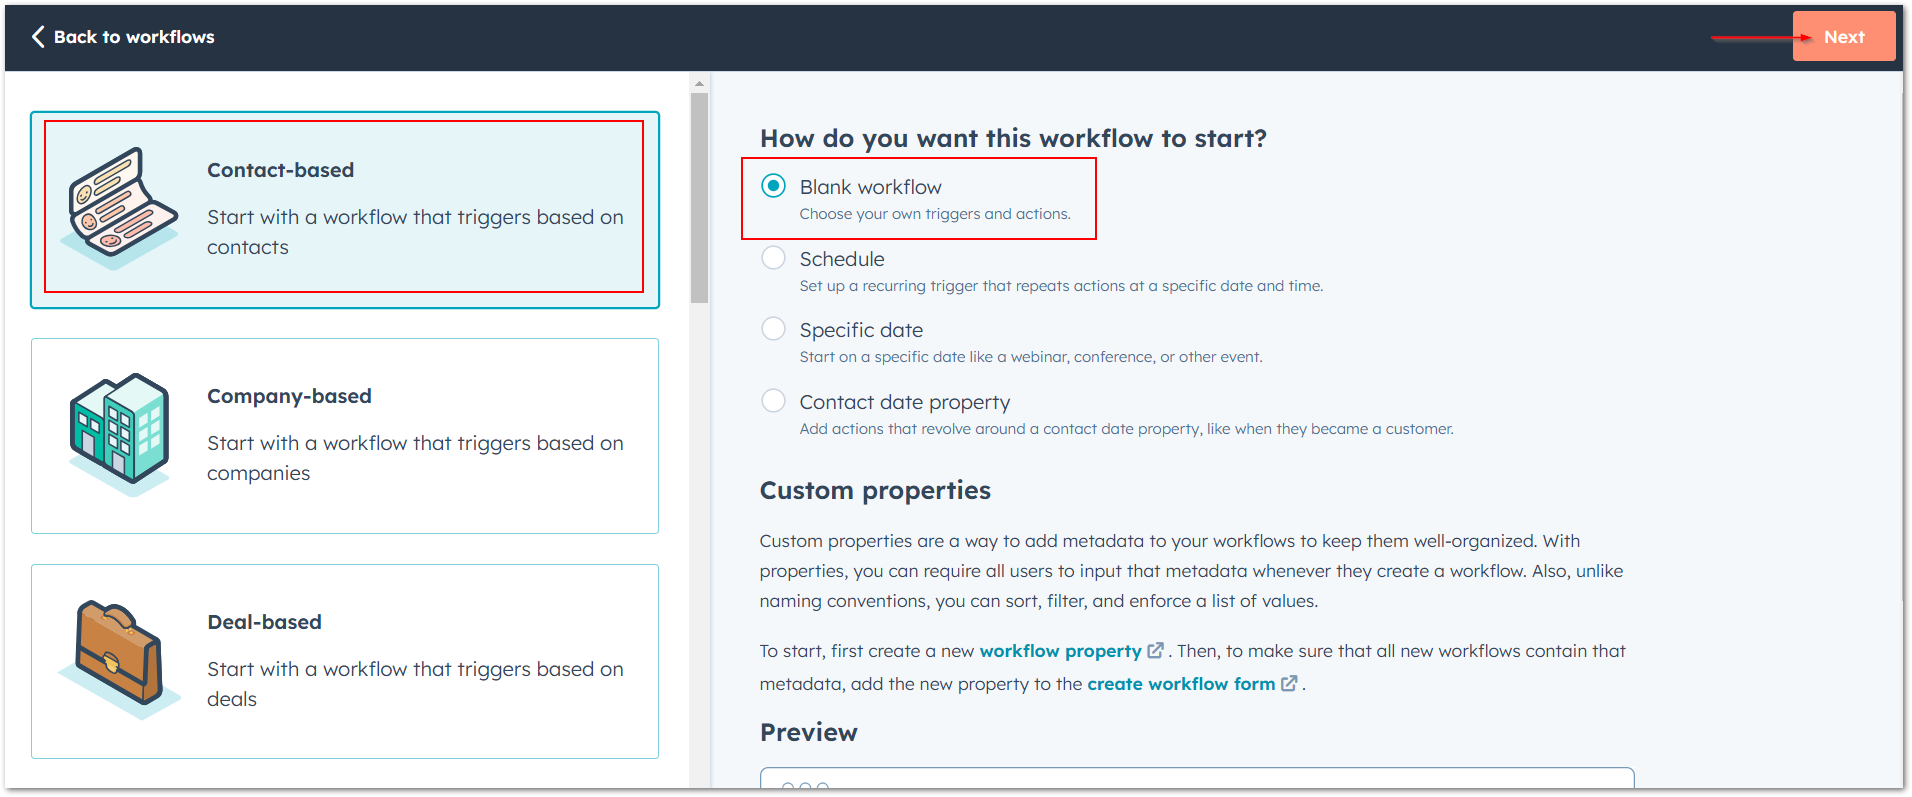
Step 2. Pick contact-based, then blank workflow. This type suits routing by contact properties.
Step 3. Click Next.
3. Set the enrollment trigger
Step 1. Click set up triggers to choose what starts the workflow.
Step 2. In the side panel, pick when filter criteria are met.

Step 3. Click "+add criteria", choose your properties, and click "save".

4. Branch by owner
Step 1. Branches split the records by deal owner.
Step 2. Click + to add a branch.
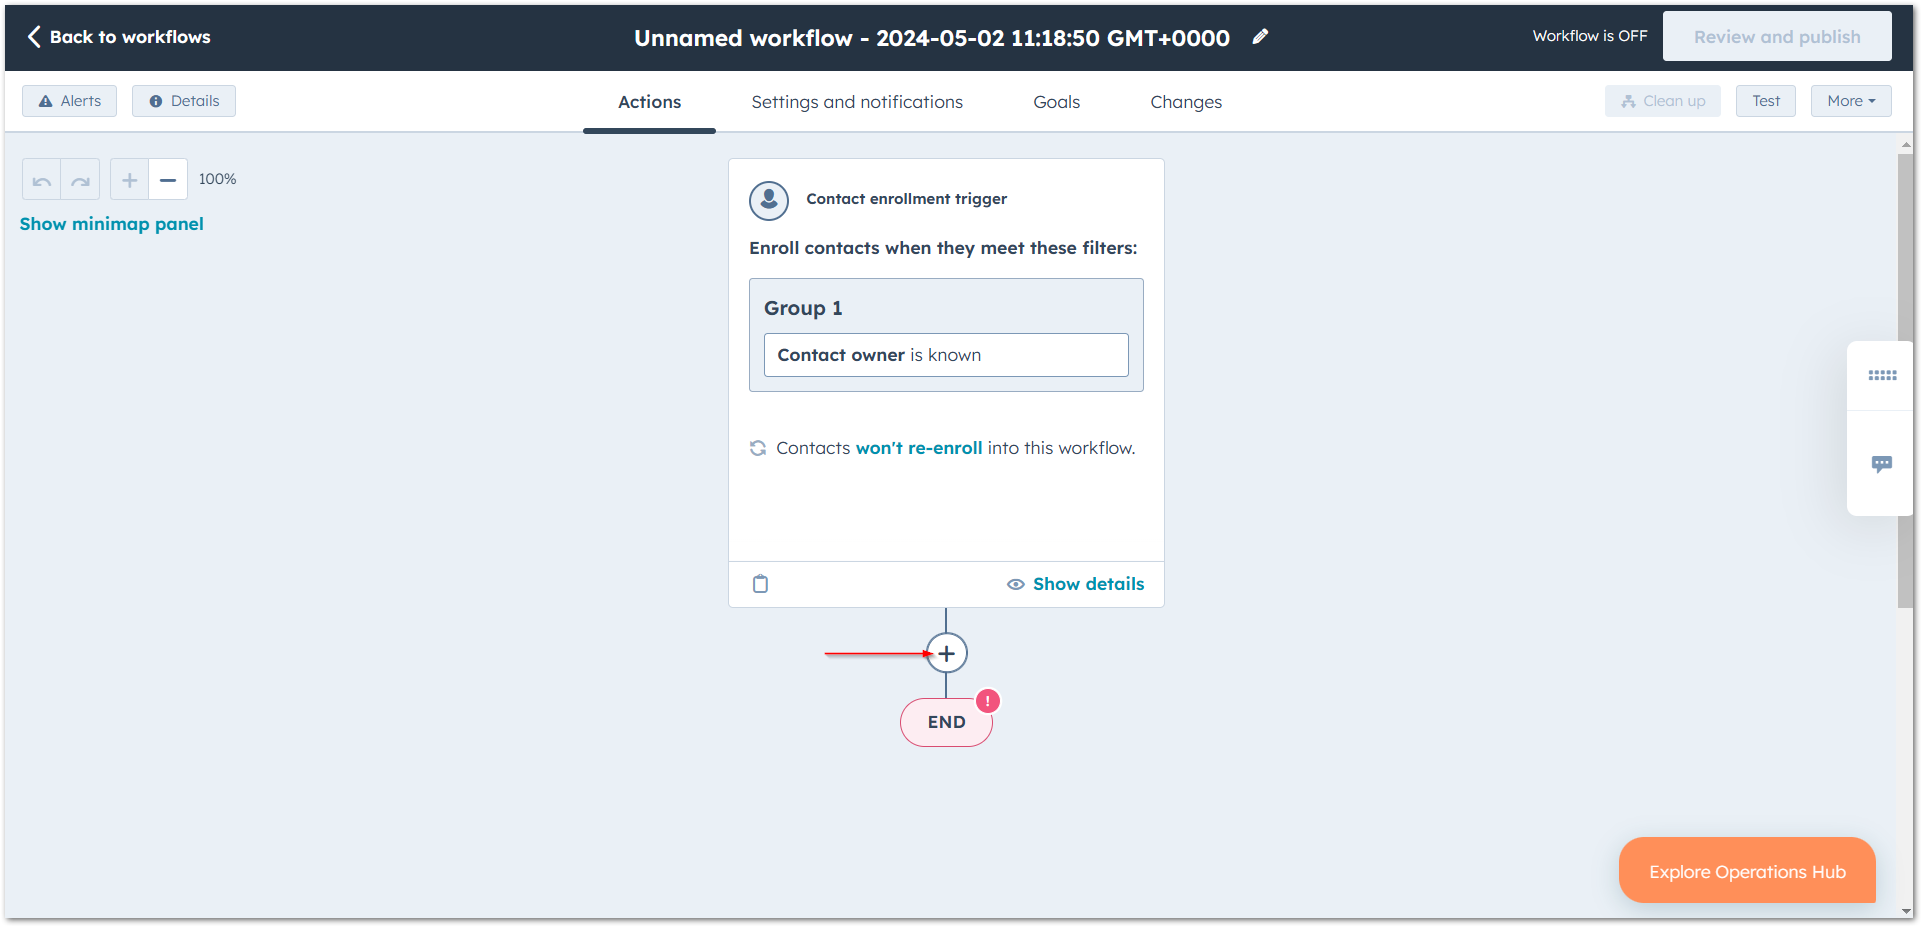
Step 3. Pick branch.
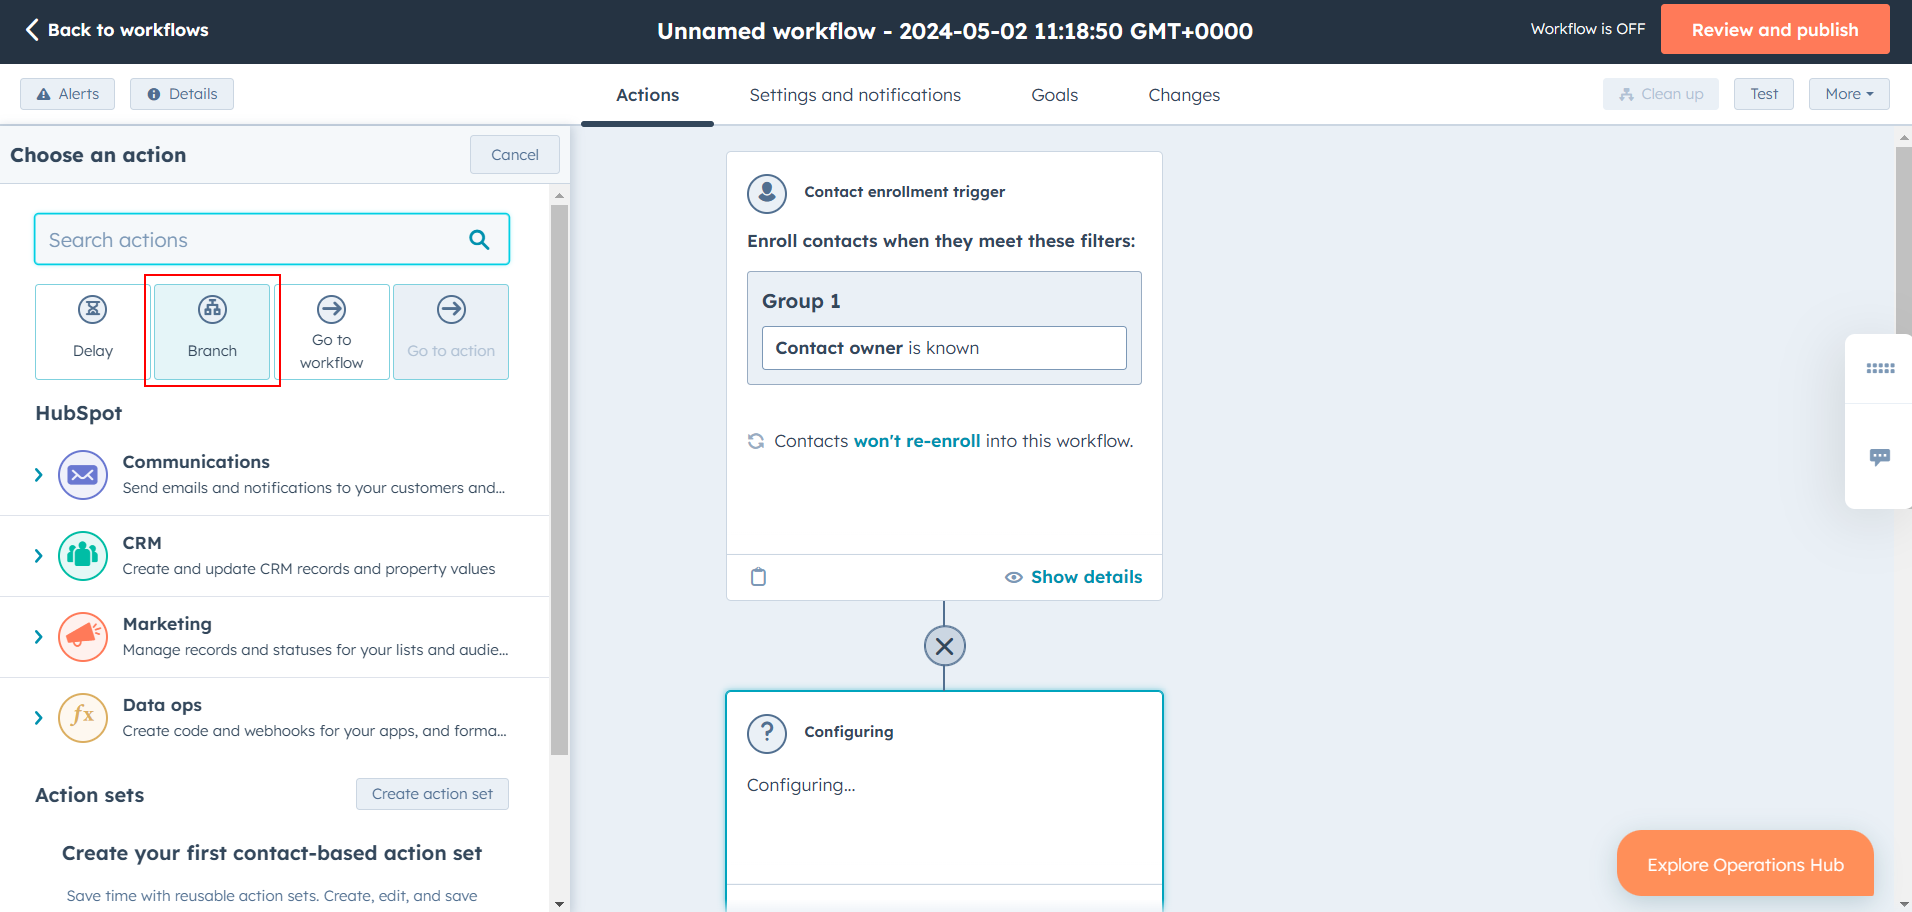
Step 4. Pick based on single property value.
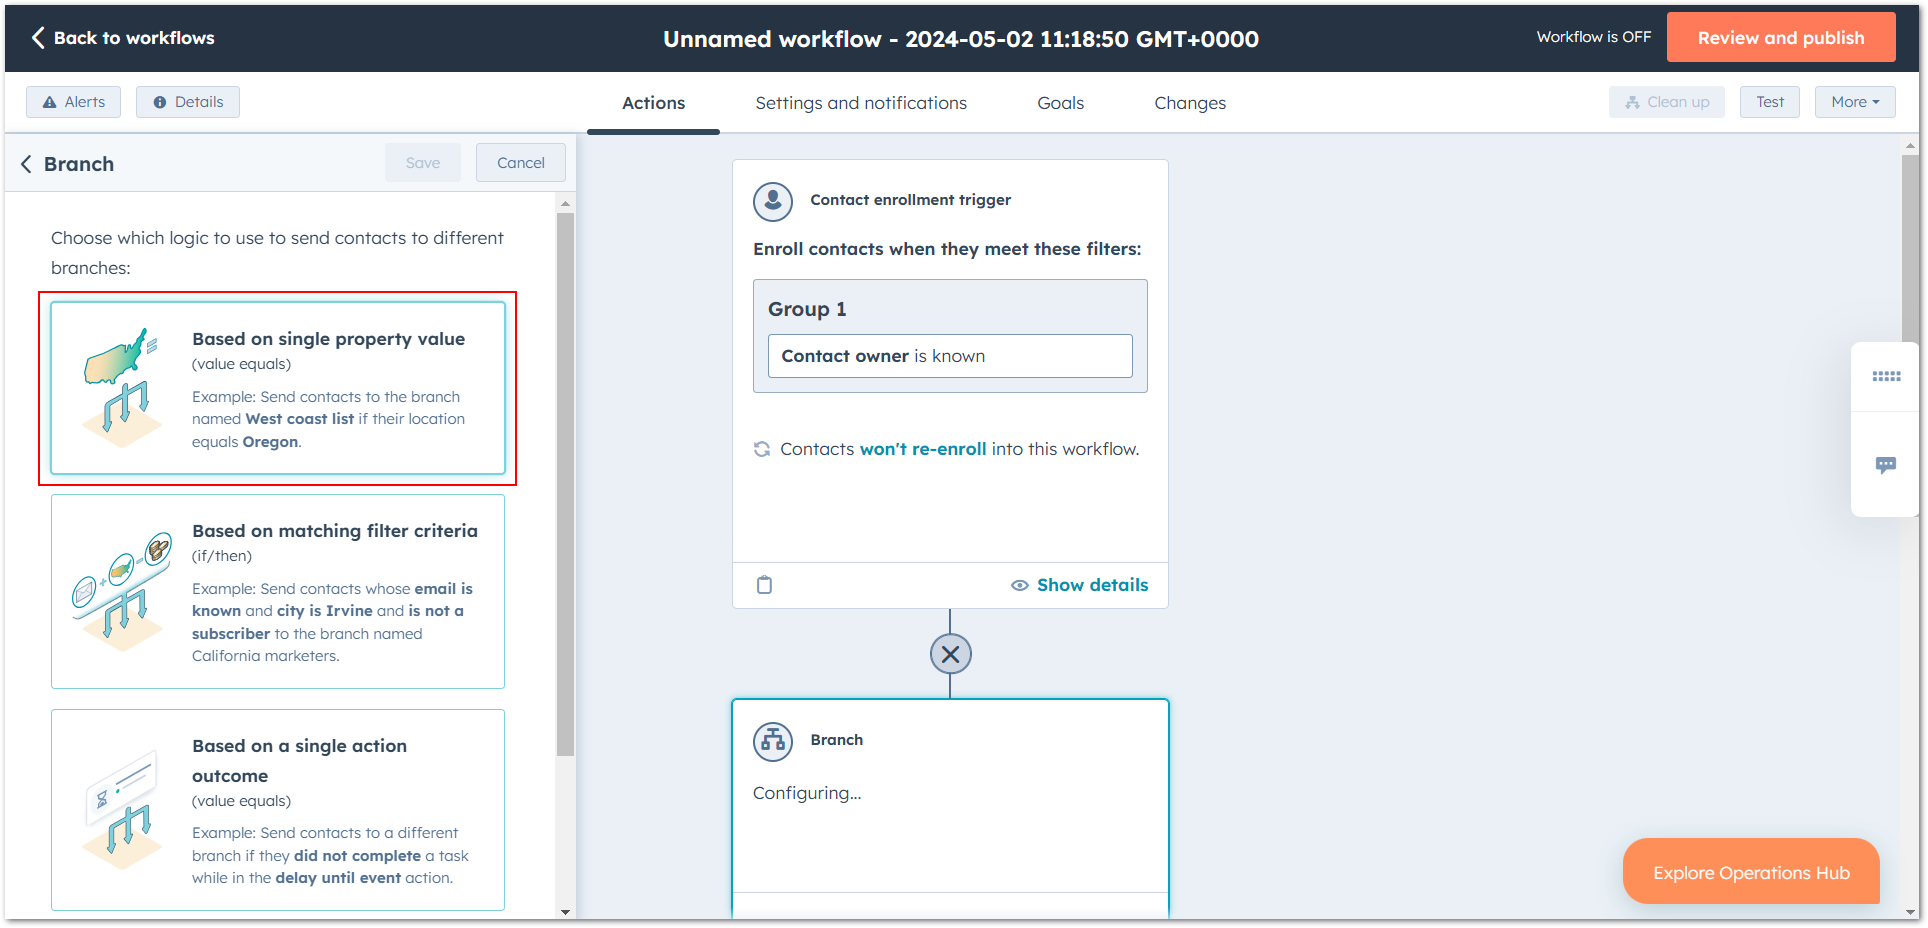
Step 5. Choose the property to branch on and add one branch per value. Each branch becomes the group of contacts for one user.
Step 6. Click Next.

5. Set the contact owner per branch
Step 1. Give each branch its contact owner. Use the delete icon to drop any user who isn't part of the routing.
Step 2. Click Save.

6. Add the power dialer action
Step 1. Click + to add an Aloware action.
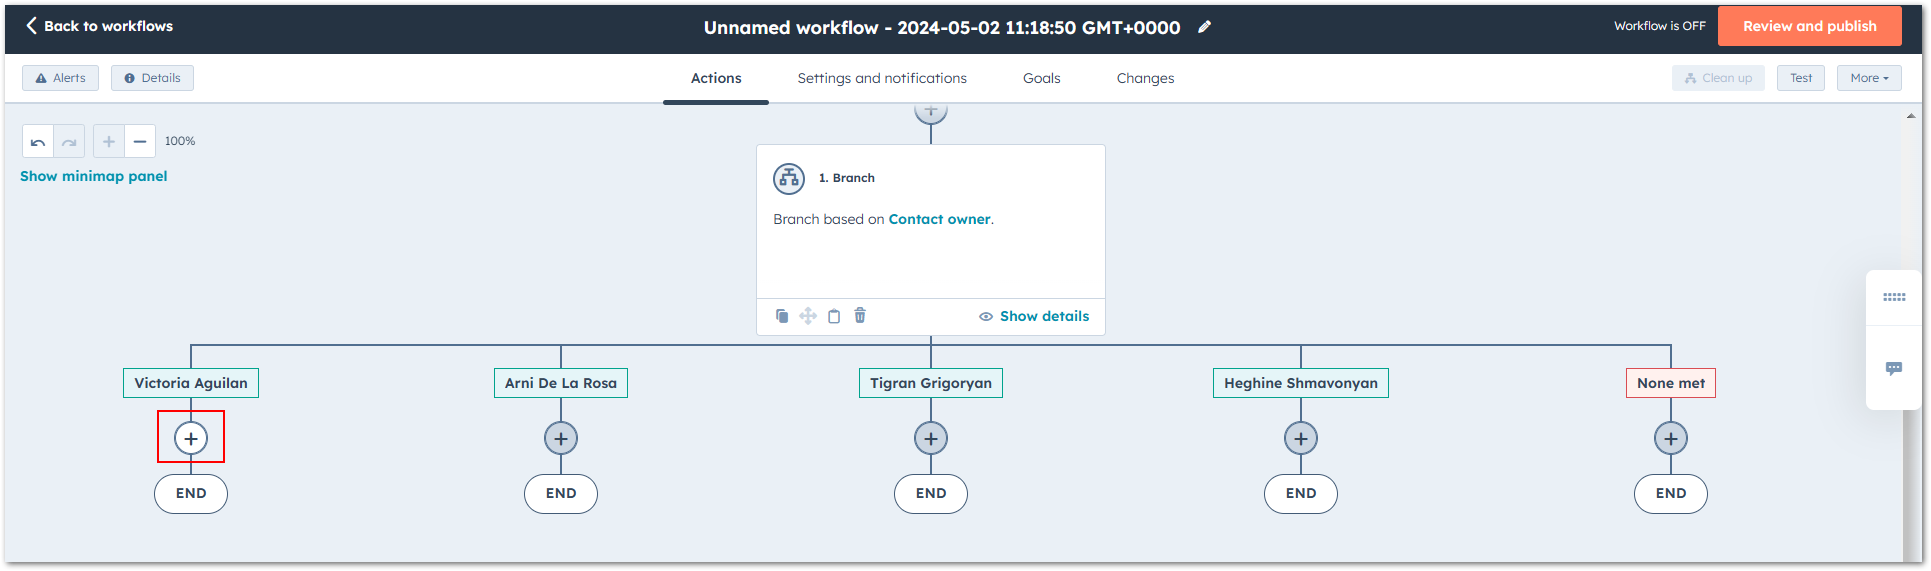
Step 2. Open Aloware Cloud Contact Center Actions and pick Add to the user's power dialer.

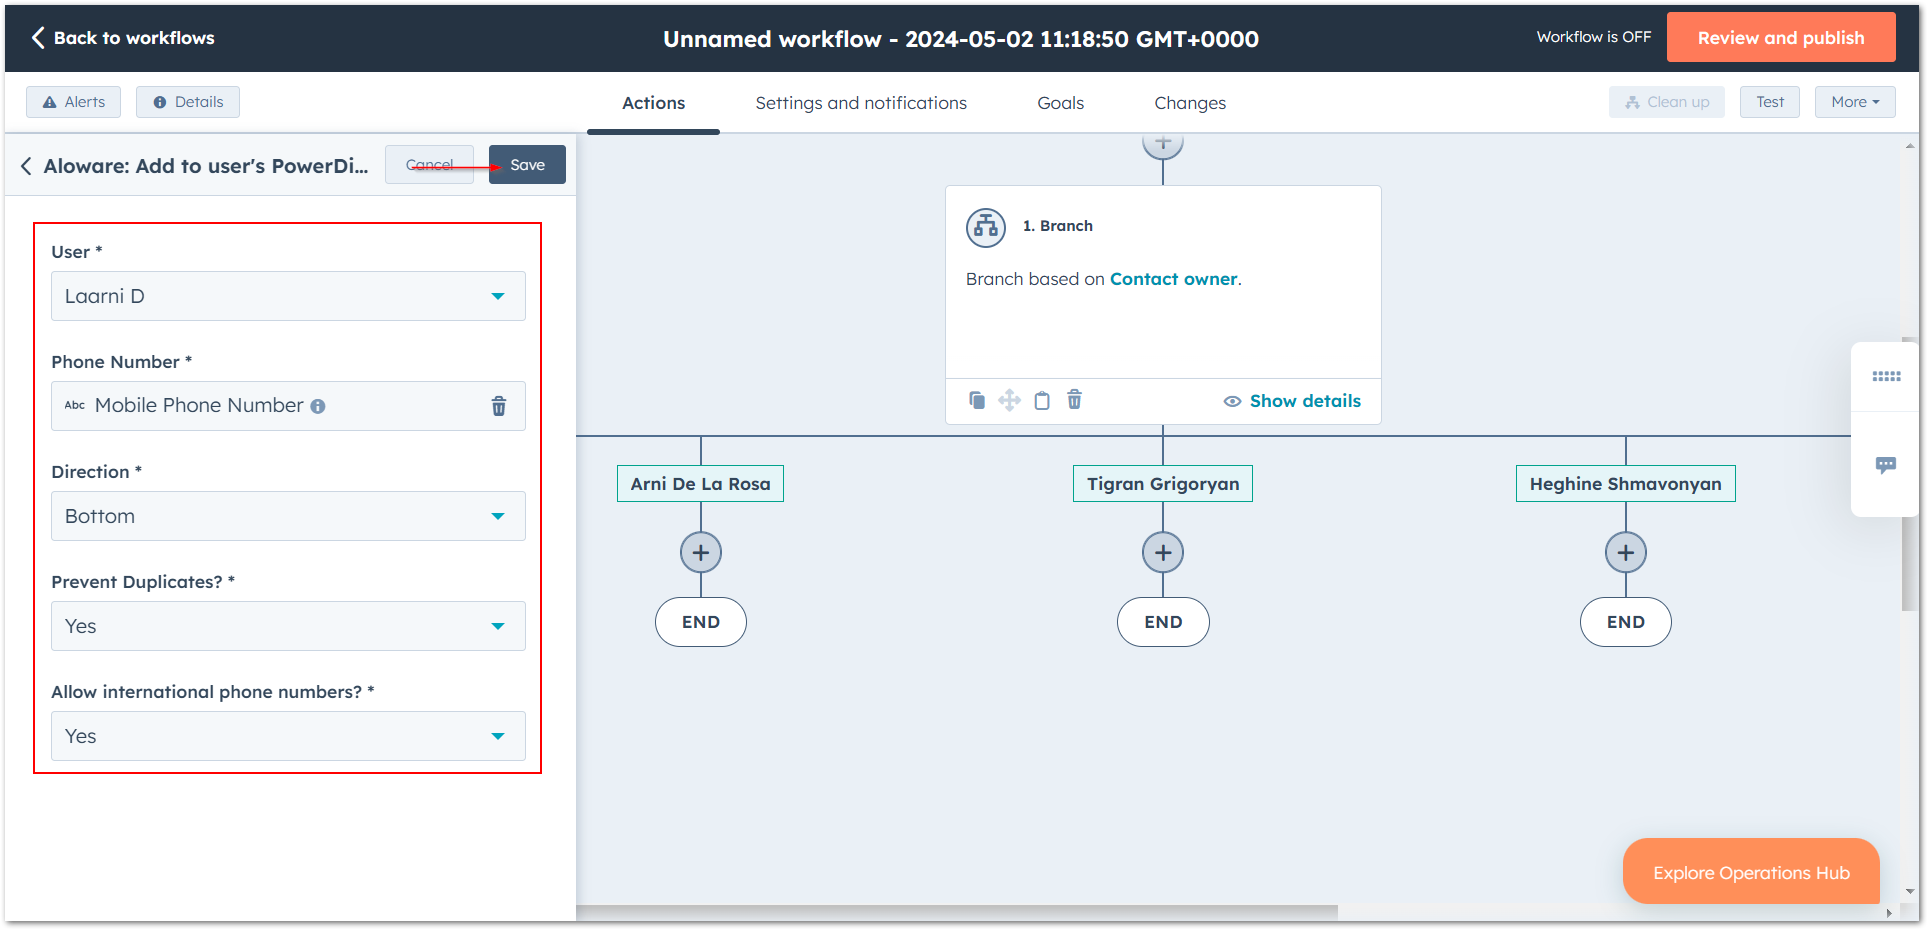
Step 3. Set the power dialer options, then click Save.
The workflow now looks like this:

The action has these settings:
- User – the user whose dialer gets the contacts.
- Phone number – the contact's phone number to dial.
- Direction – add the contact to the top or the bottom of the list.
- Prevent duplicates? – whether to skip contact numbers that are already in the list.
- Allow international numbers? – whether international phone numbers are accepted.
7. Test before you roll it out
Run the workflow on test deals first and confirm each one ends up in the power dialer it should.
Our support team can help you set this up.