Form-to-call workflow
Dial HubSpot form fills automatically.
Set up HubSpot and Aloware so a website form submission starts an Aloware sequence that calls the lead: first through the preview dialer, then through the progressive dialer. Use it when you want every form lead called back fast without anyone watching the inbox.
What the setup gives you:
- Automatic response - the Aloware and HubSpot integration reacts to each form submission, so you reach the customer right after they submit.
- Sequence on submit - the form starts a pre-built Aloware sequence, so follow-up is immediate.
- Preview dialer - Aloware's preview dialer puts an available agent on the line with the customer quickly.
- Progressive dialer - interested customers move to Aloware's Progressive Dialer, which hands the call to other agents when needed so the conversation continues.
- Ongoing contact - customers keep hearing from you, which improves their experience and your odds of converting them.
Before you start
Aloware and HubSpot need to be connected.
How the flow runs
A form submission sets off this chain:
- Form submitted - the customer completes a form on your site.
- Enrolled in HubSpot - the submission puts the customer into a HubSpot workflow.
- Sequence starts - the workflow enrolls them in an Aloware sequence.
- Preview dialer - the preview dialer picks an available agent and connects them to the customer.
- Interest check - if the customer presses '1', the progressive dialer takes over.
- Progressive dialer - the call goes to a second group of agents, who carry on the conversation.
The customer is never left waiting between steps, which keeps the experience smooth and gives you a better shot at the sale.
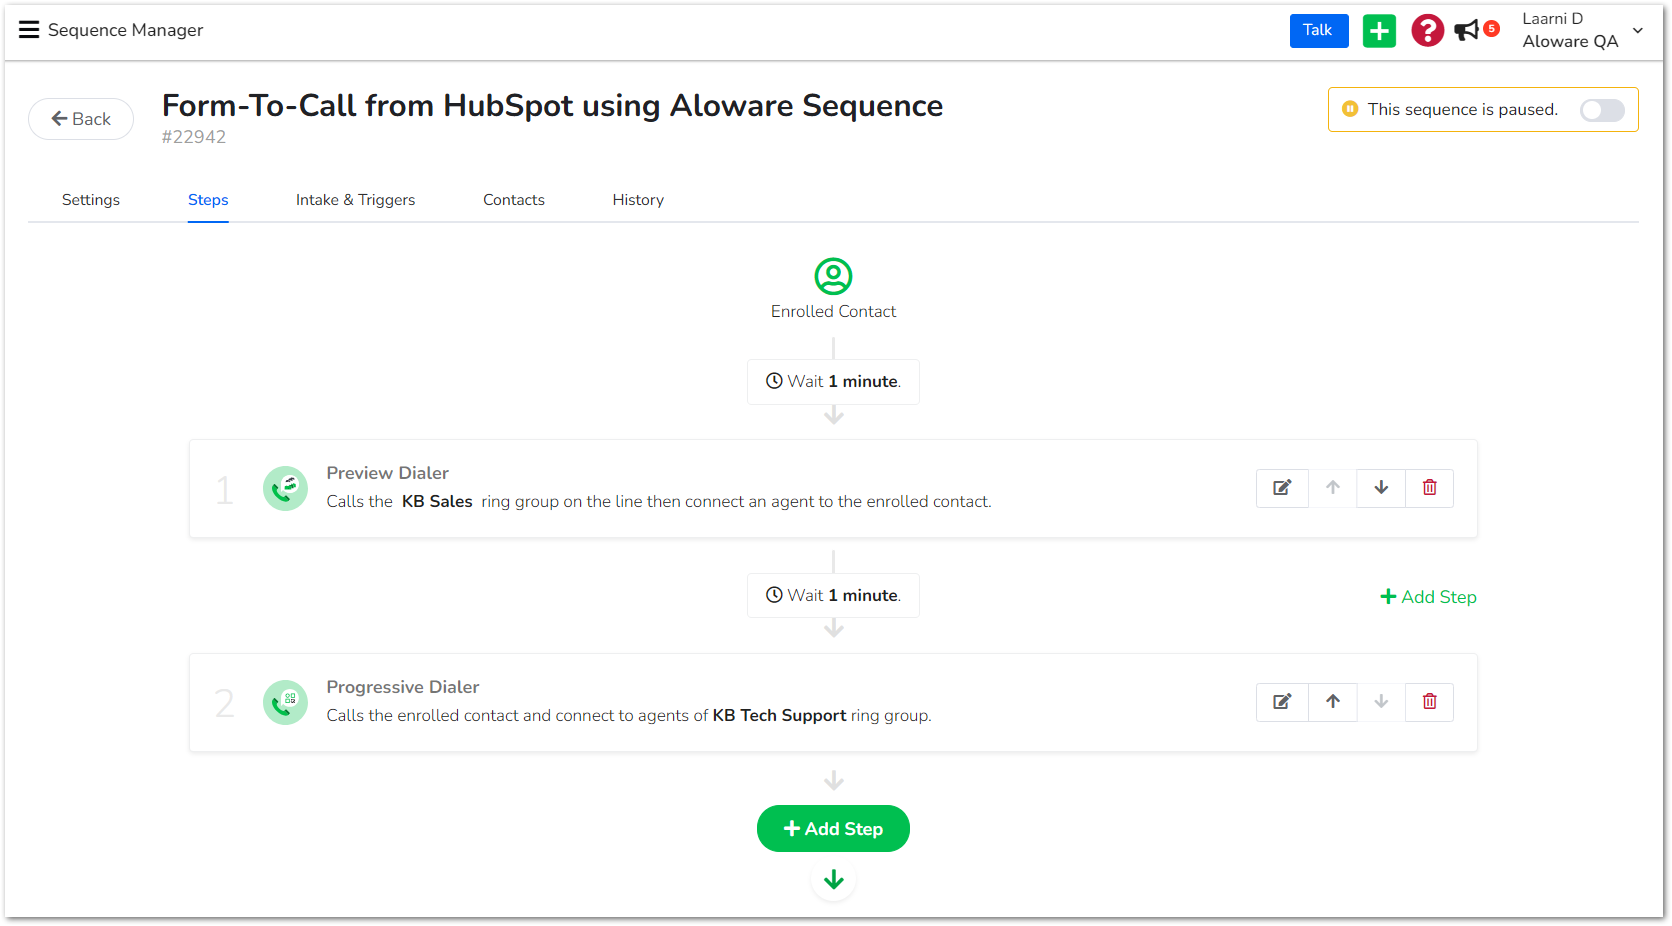
Step 1: Build the sequence in Aloware
Add the preview dialer step first, then the progressive dialer step. Follow this sequence setup article to build it.
Step 2: Build the HubSpot workflow
Start a new workflow
1. Sign in to HubSpot.
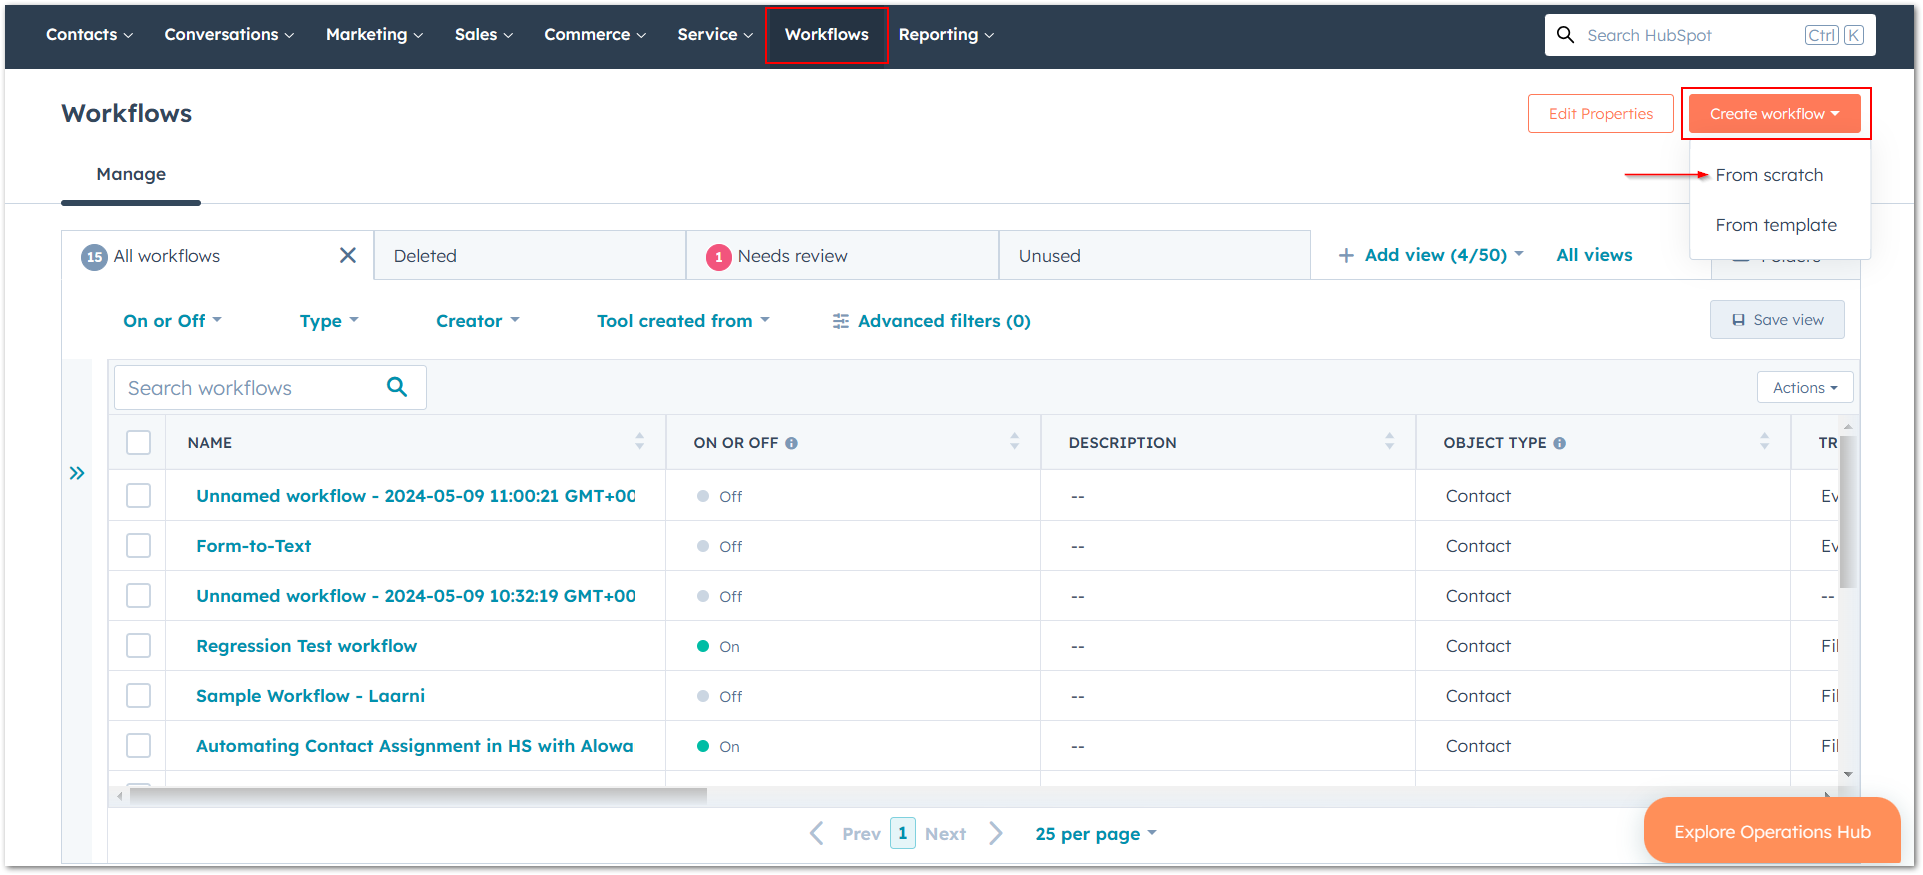
2. Open the workflows section.
3. Click "create workflow", then "from scratch."
Pick the type and trigger
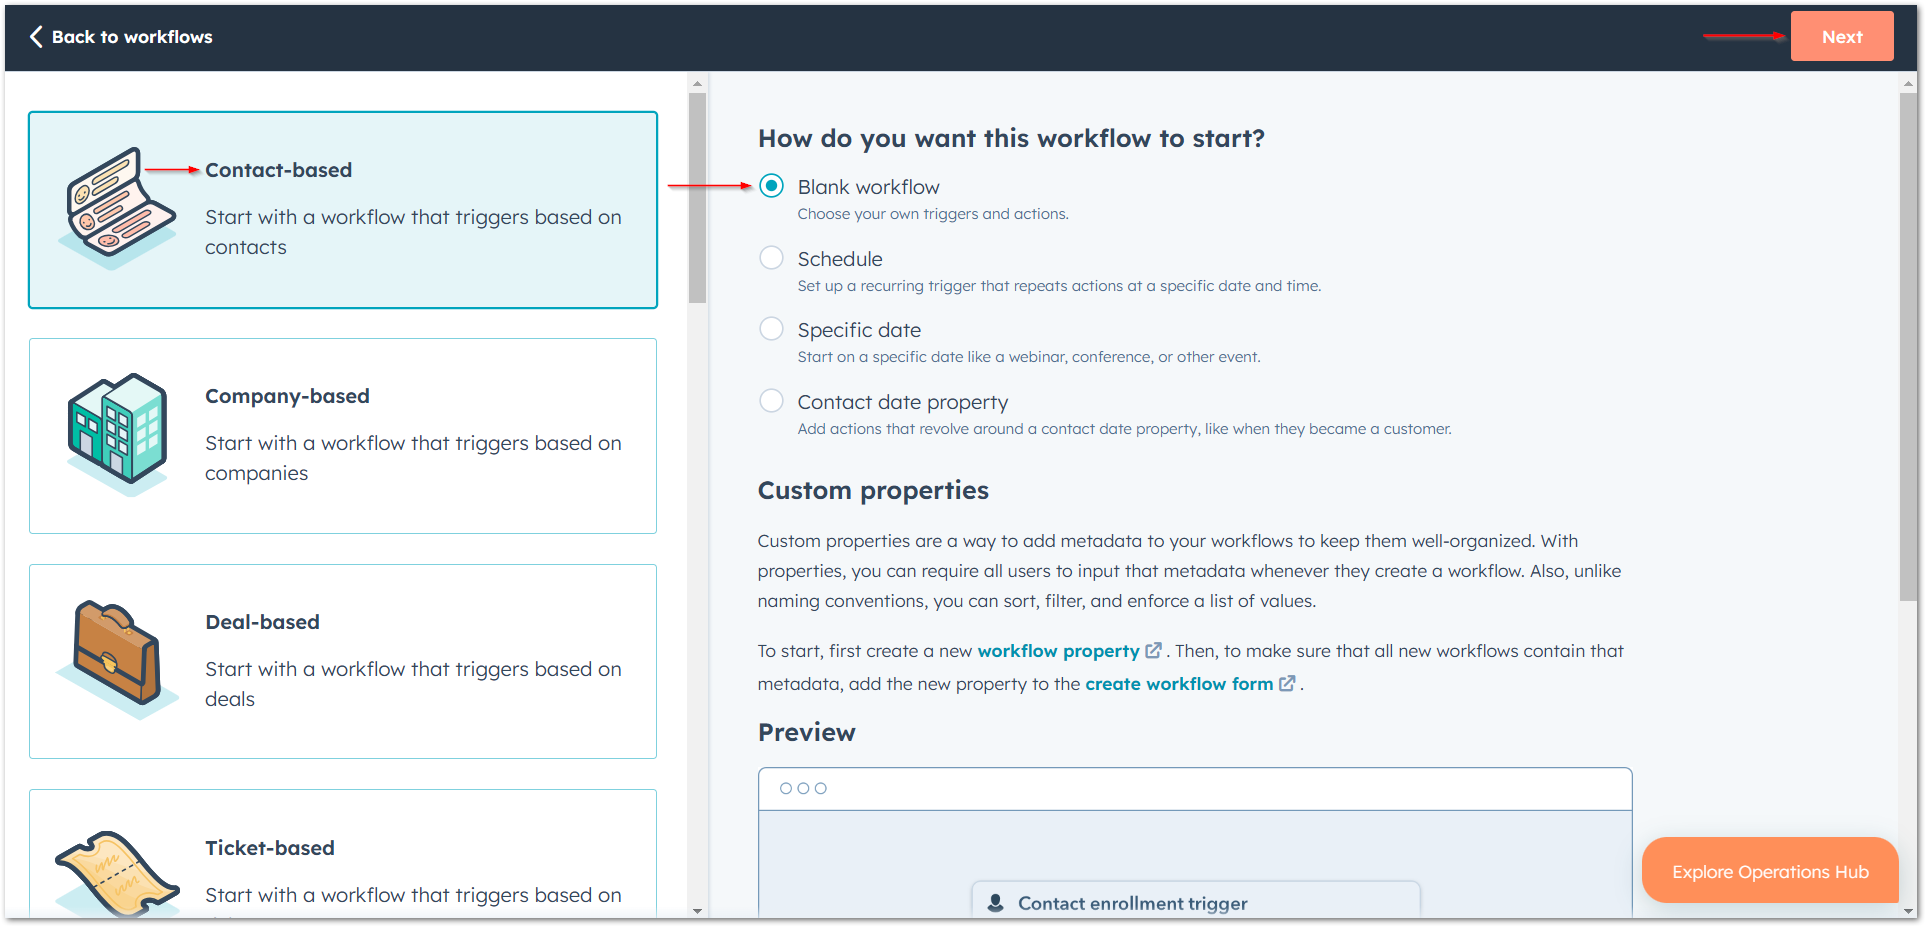
1. Pick "contact-based", then "blank workflow." Click "next."
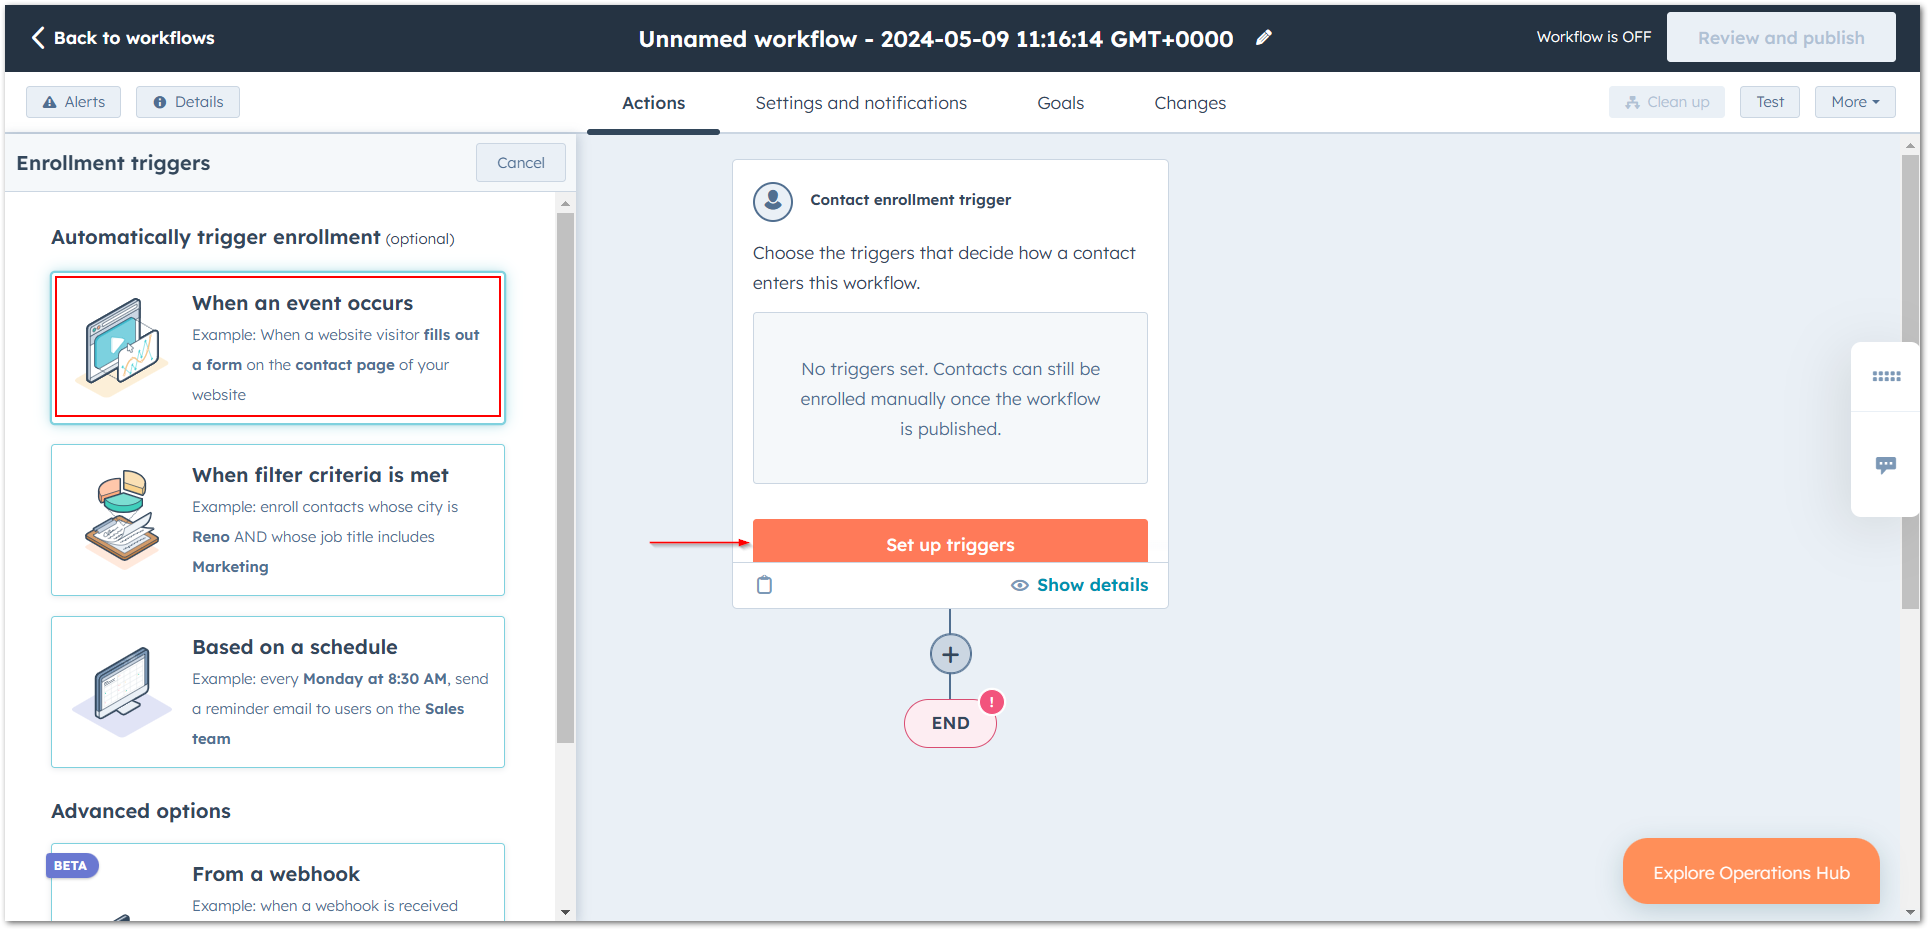
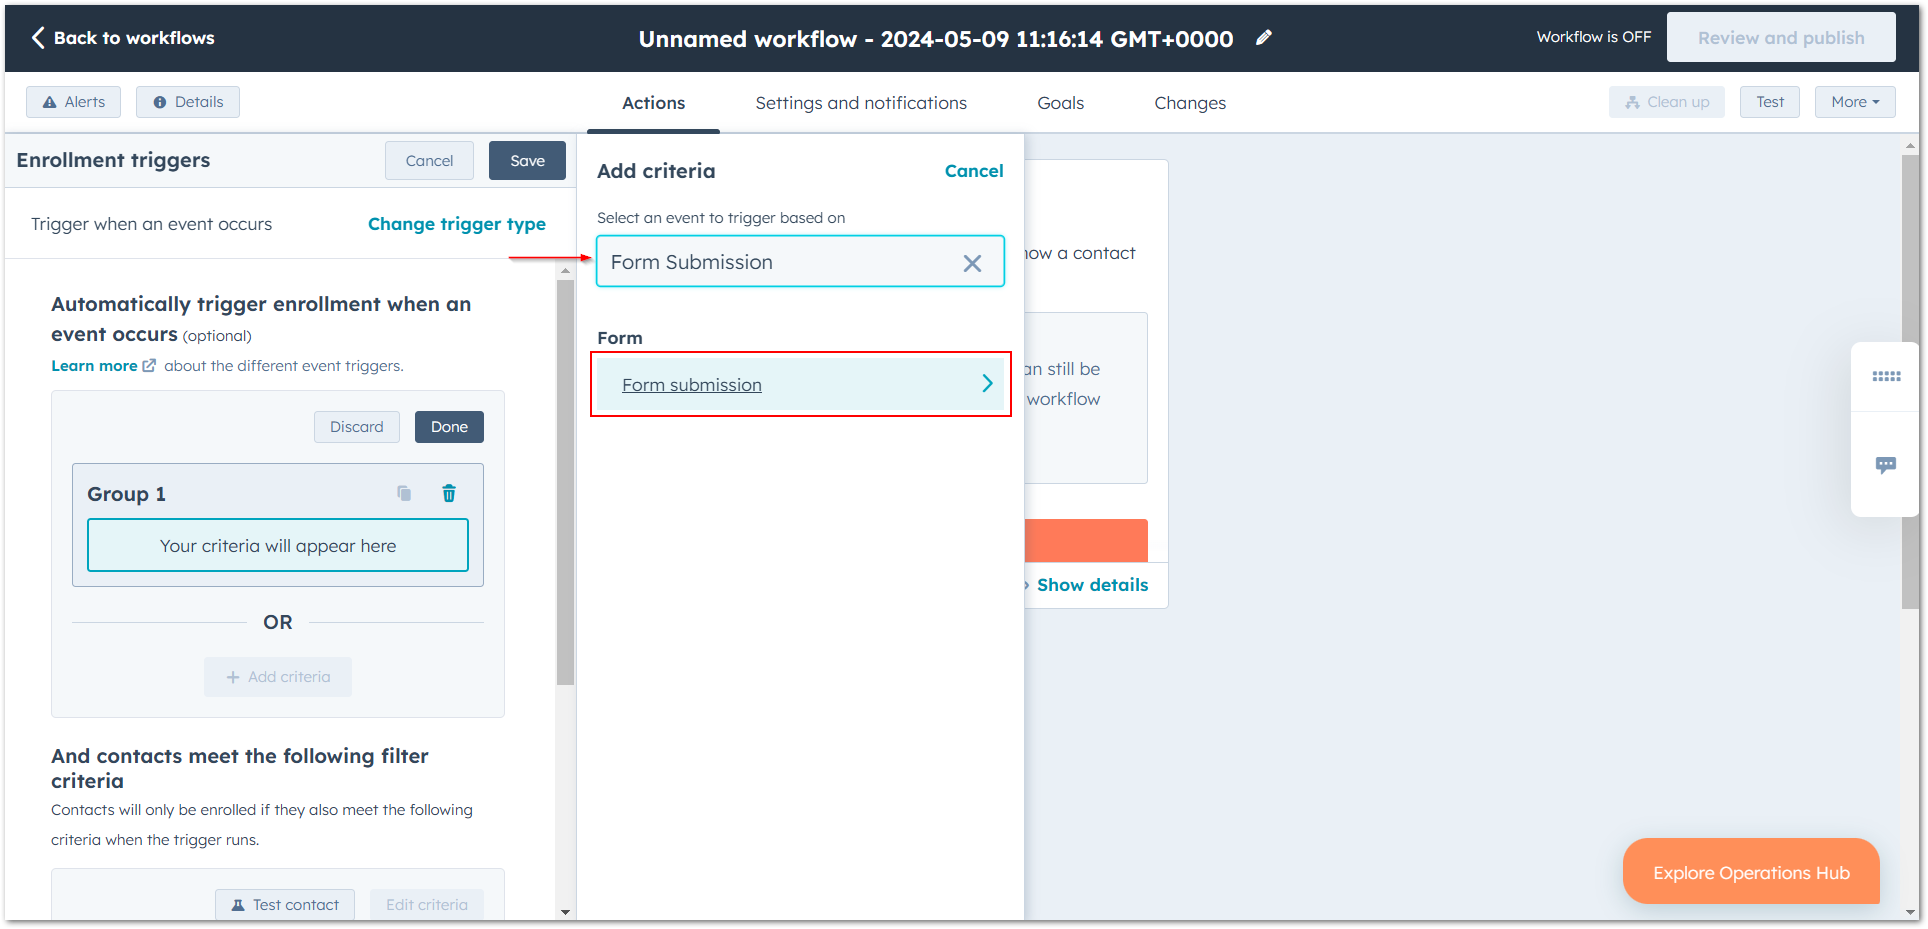
2. Click "set up triggers" and pick "when an event occurs."
3. Use "form submission" as the criteria, so contacts who submitted the form get enrolled.
Choose the form
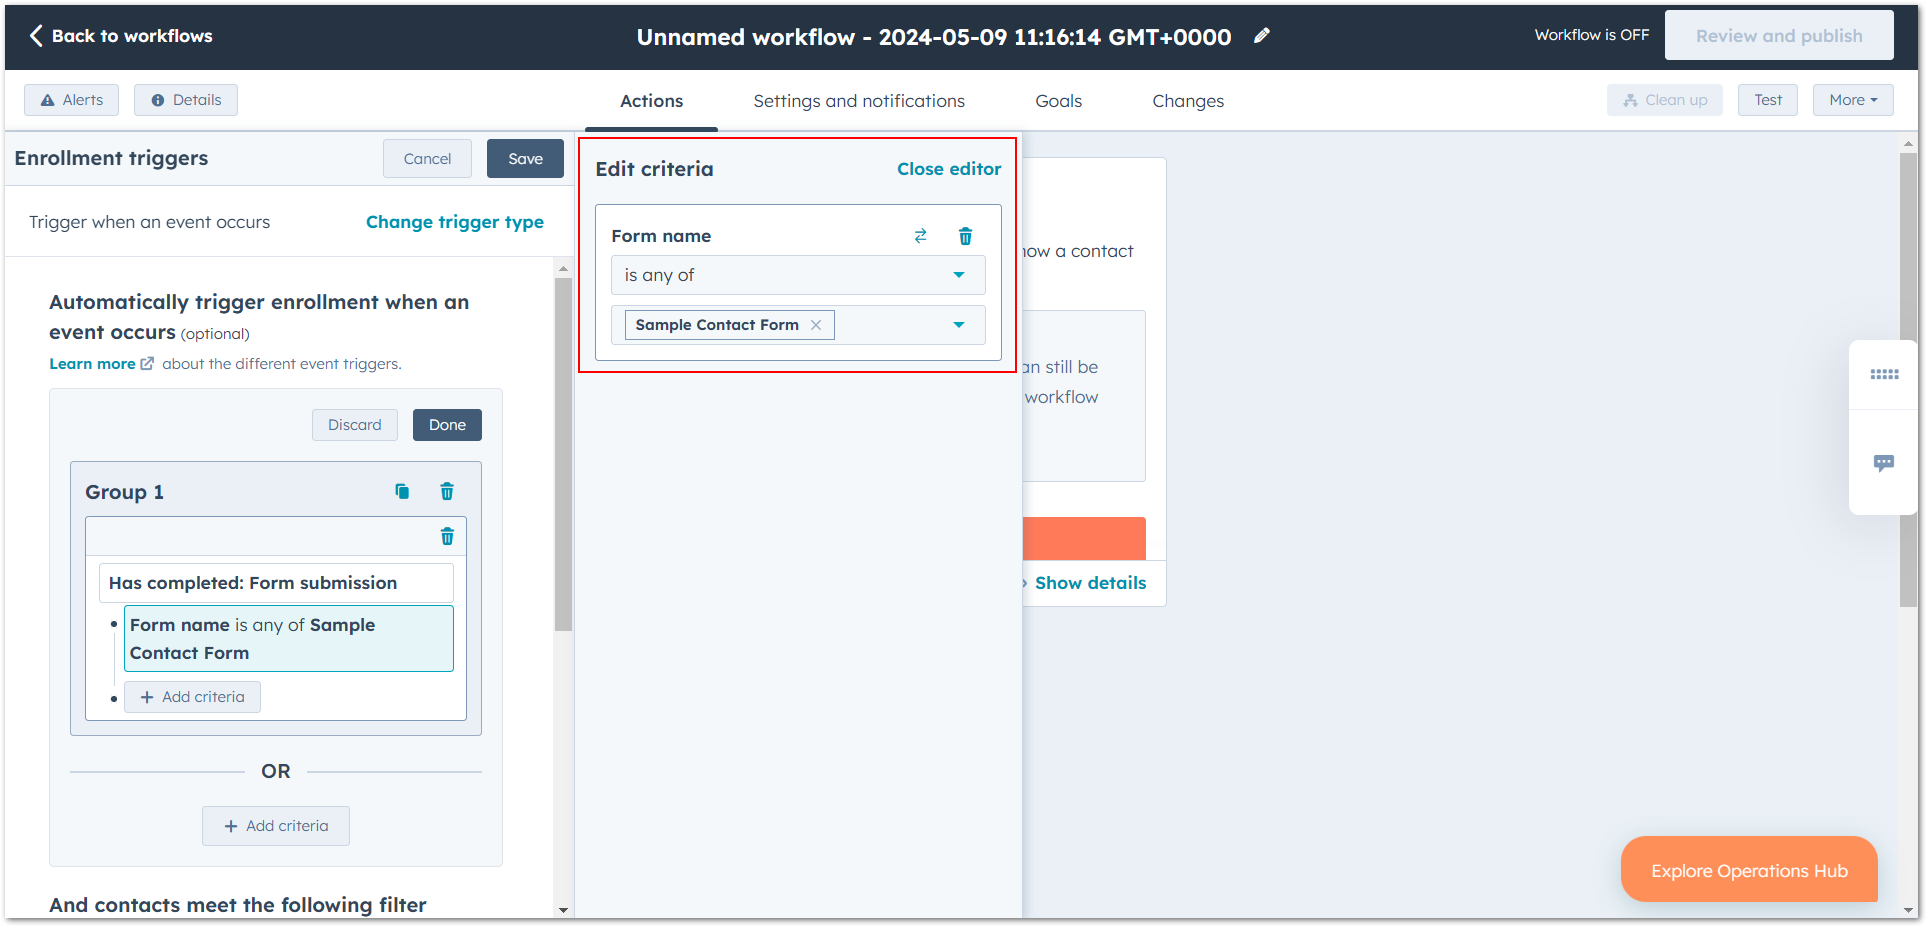
1. Click "+add criteria", then "form name."
2. Select the form that should start the workflow.
3. Click "save."
Add the enroll action
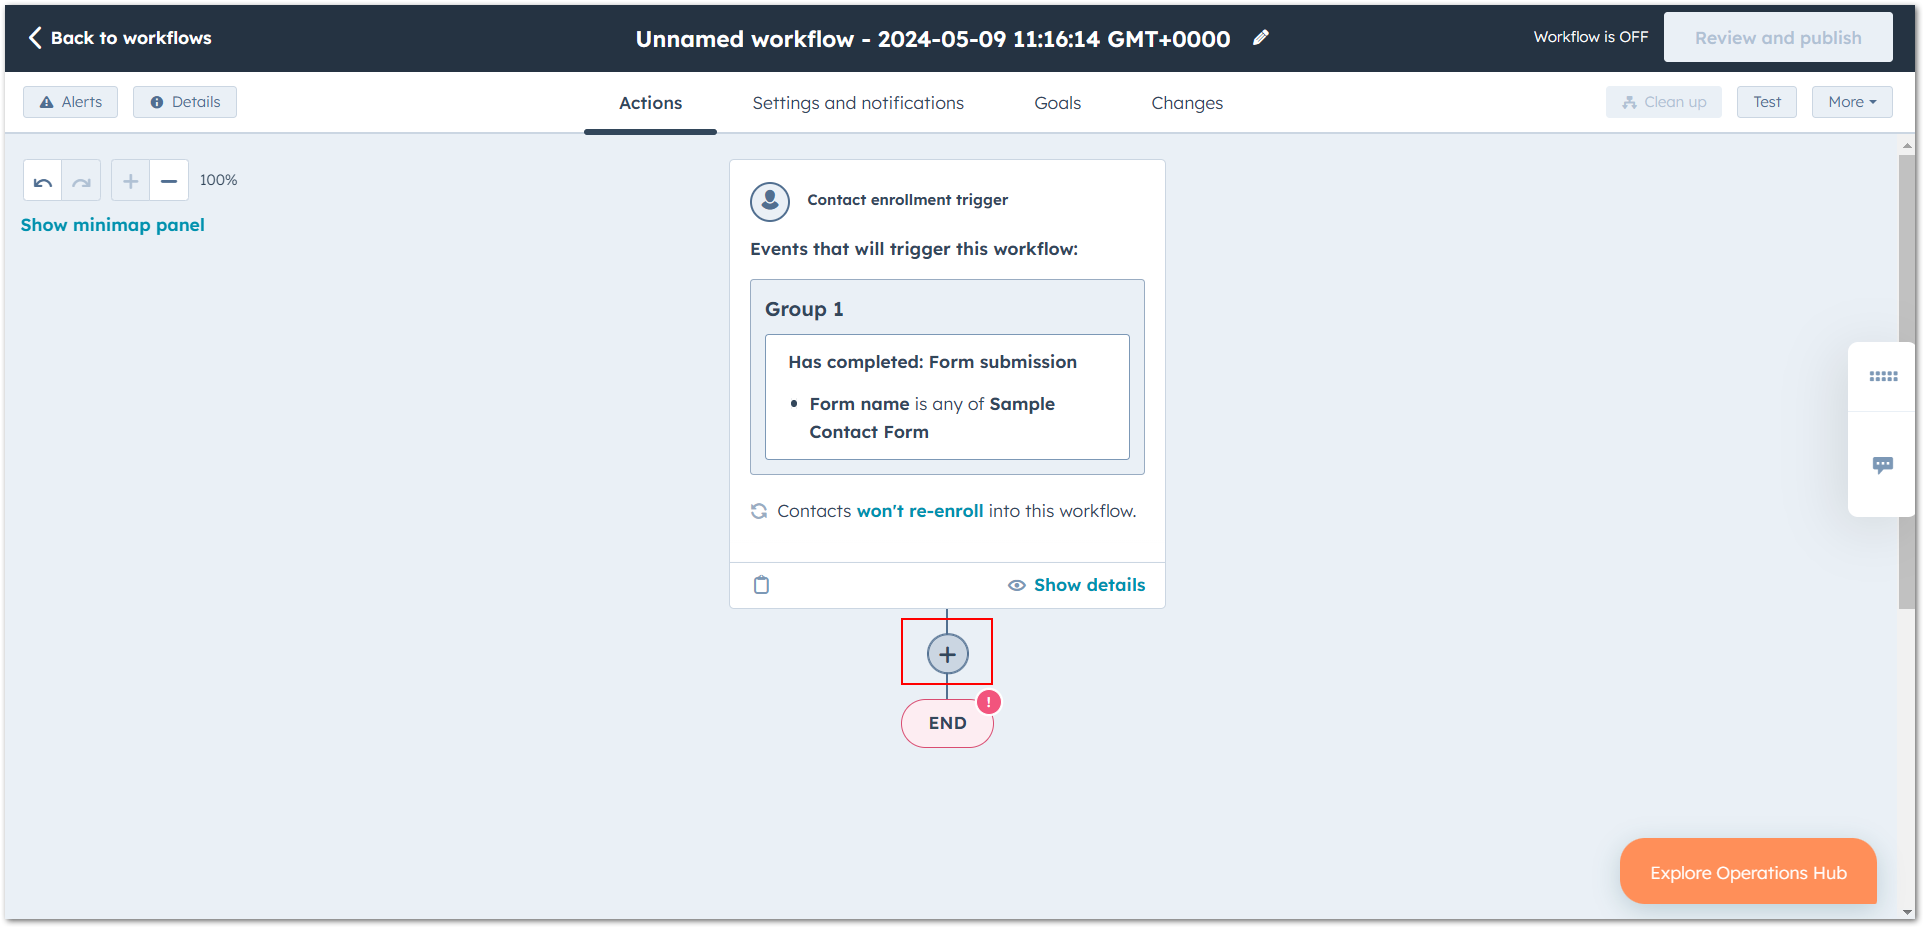
1. Click "+" to add an action.
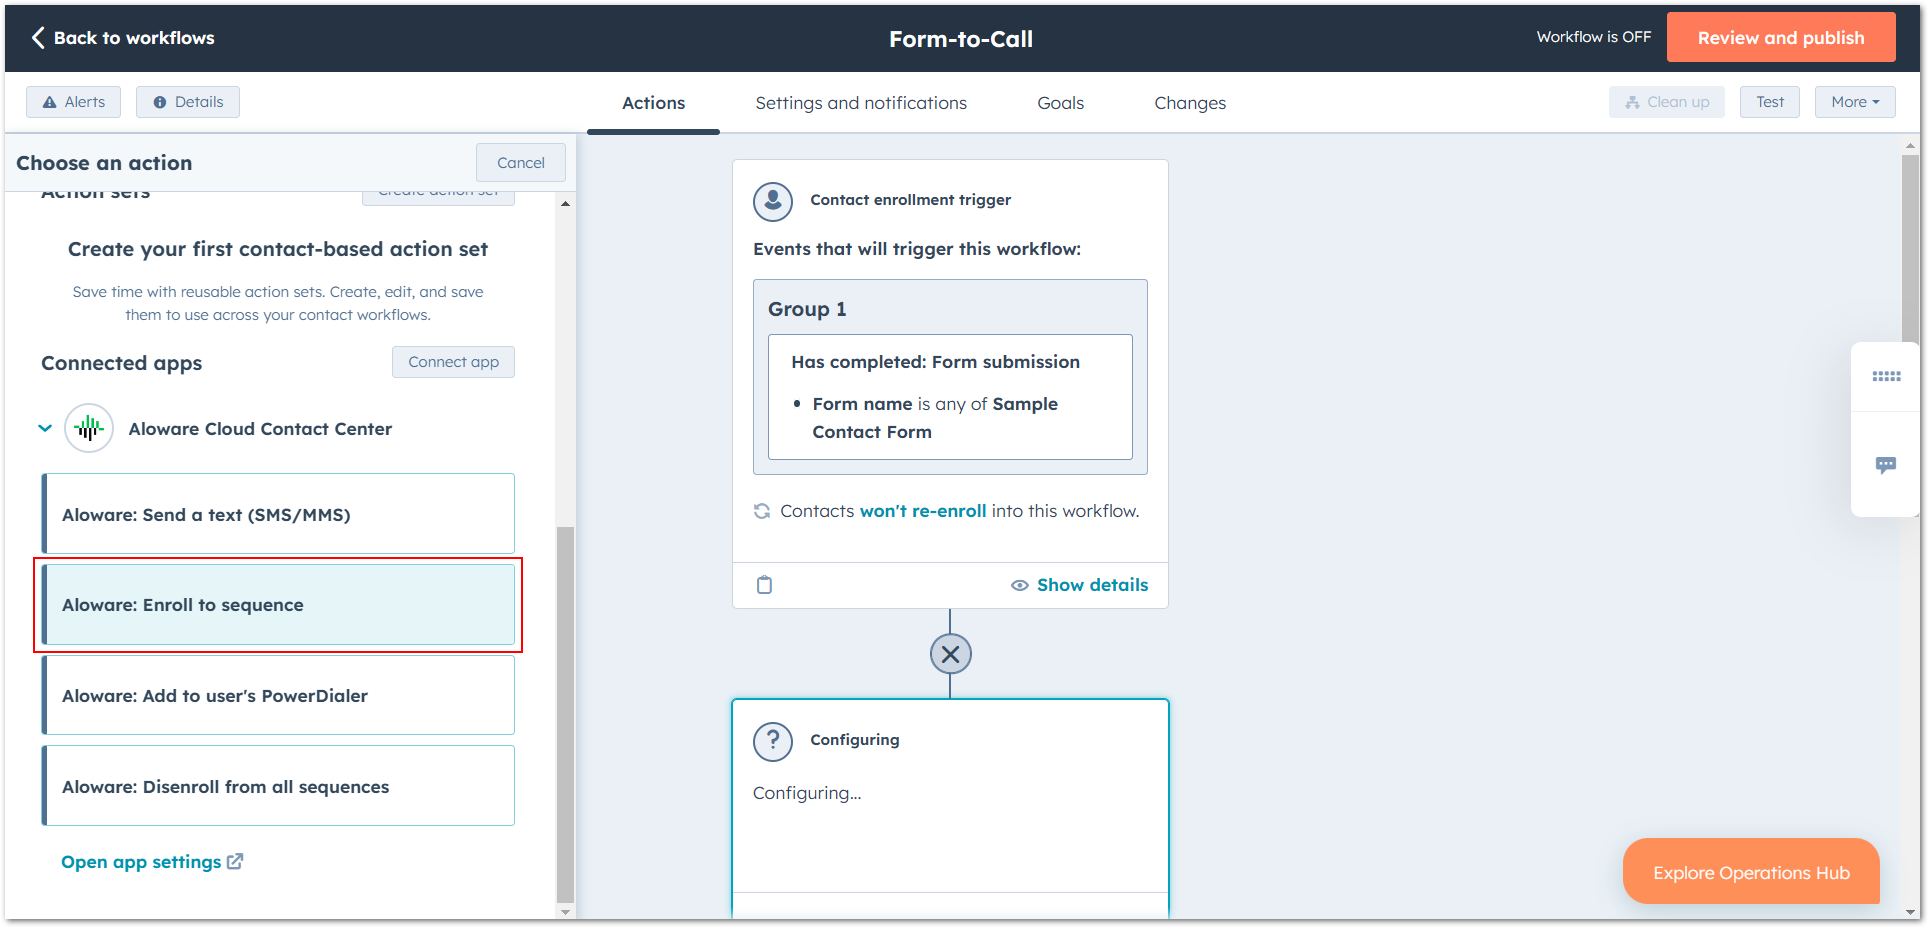
2. In the side panel, open "Aloware cloud contact center."
3. Pick "Aloware: enroll to sequence."
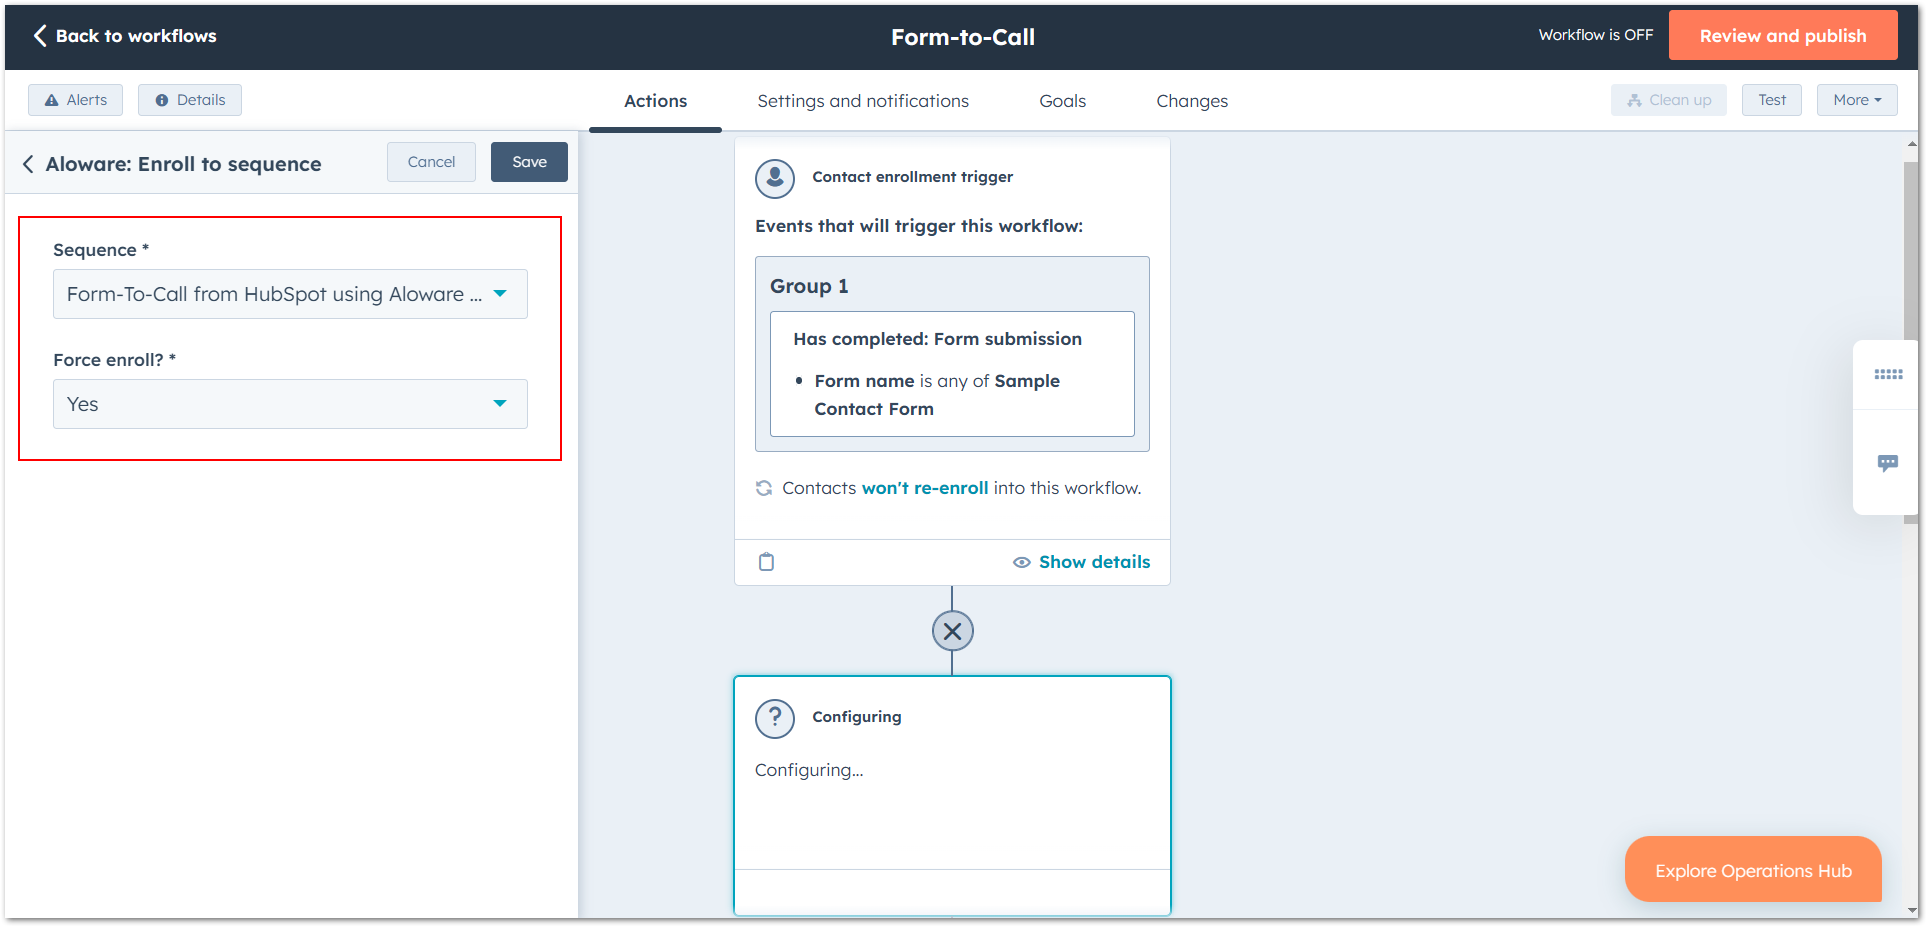
Set the sequence options
1. Put your Aloware sequence in the sequence field.
2. Decide whether to allow force enroll.
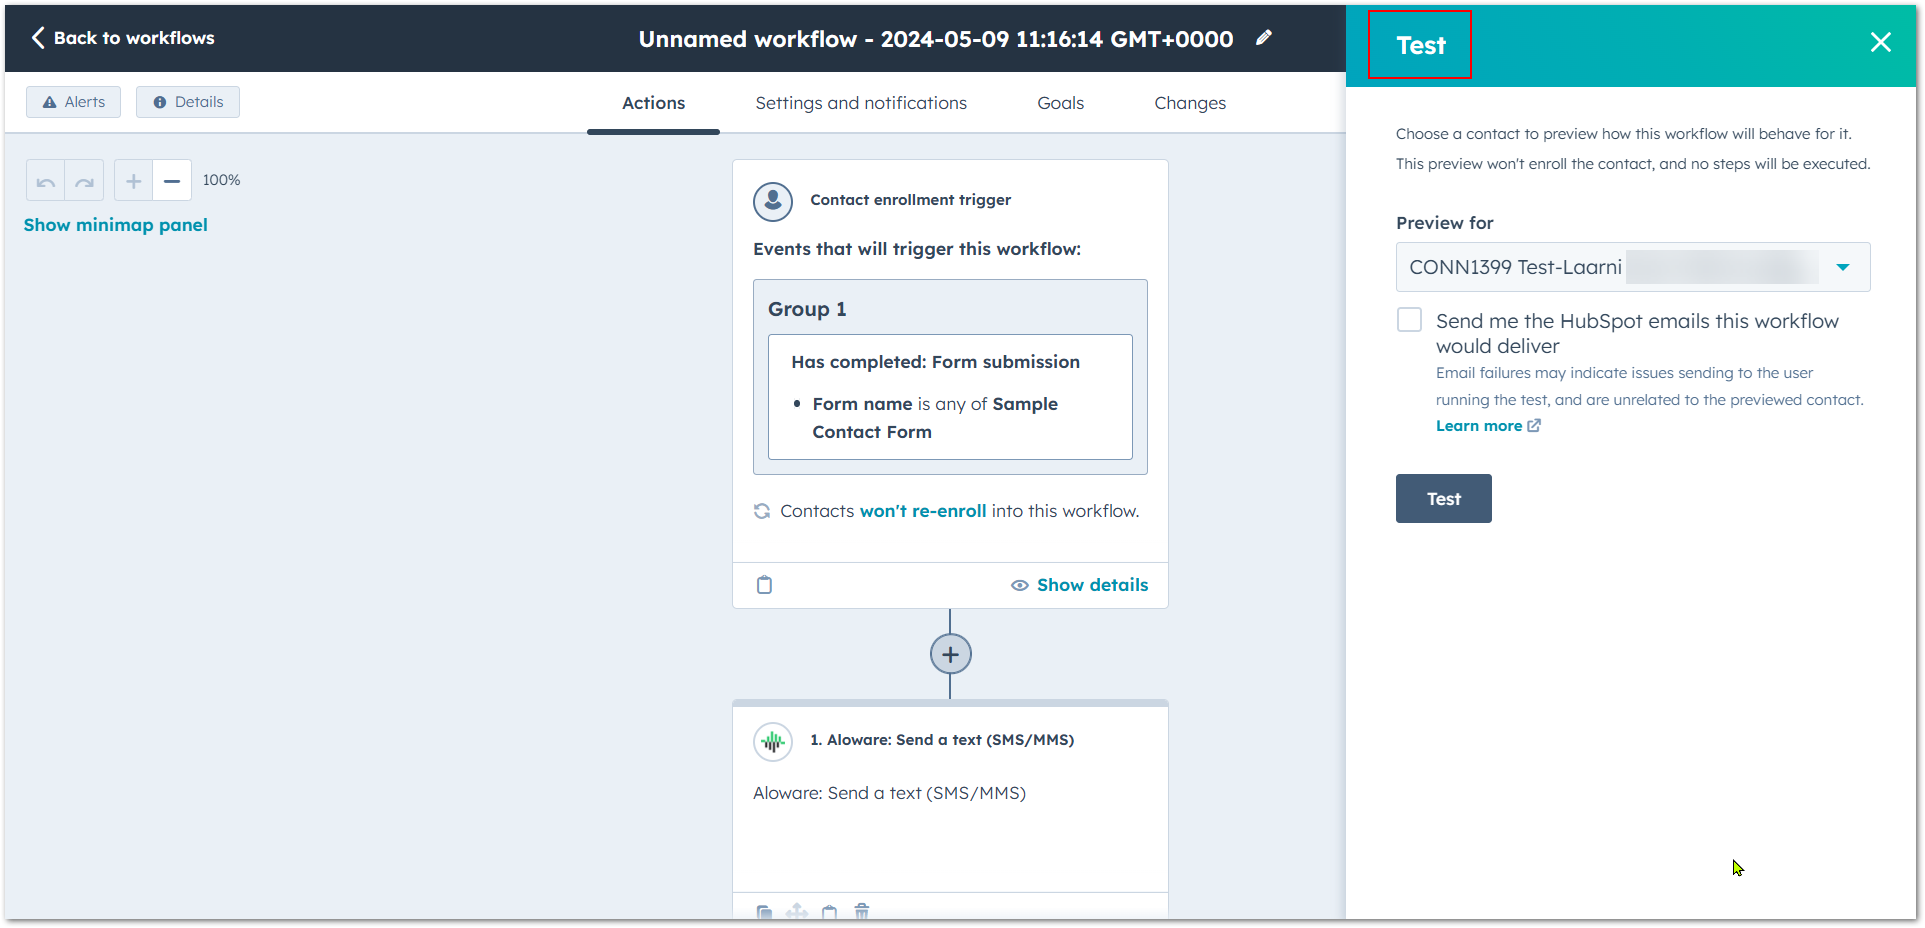
Test and publish
1. Enroll a test contact to try it.
2. Look over the workflow settings.
3. Publish the workflow so leads are engaged as soon as they submit the form.
Check the result
The finished workflow looks like this:
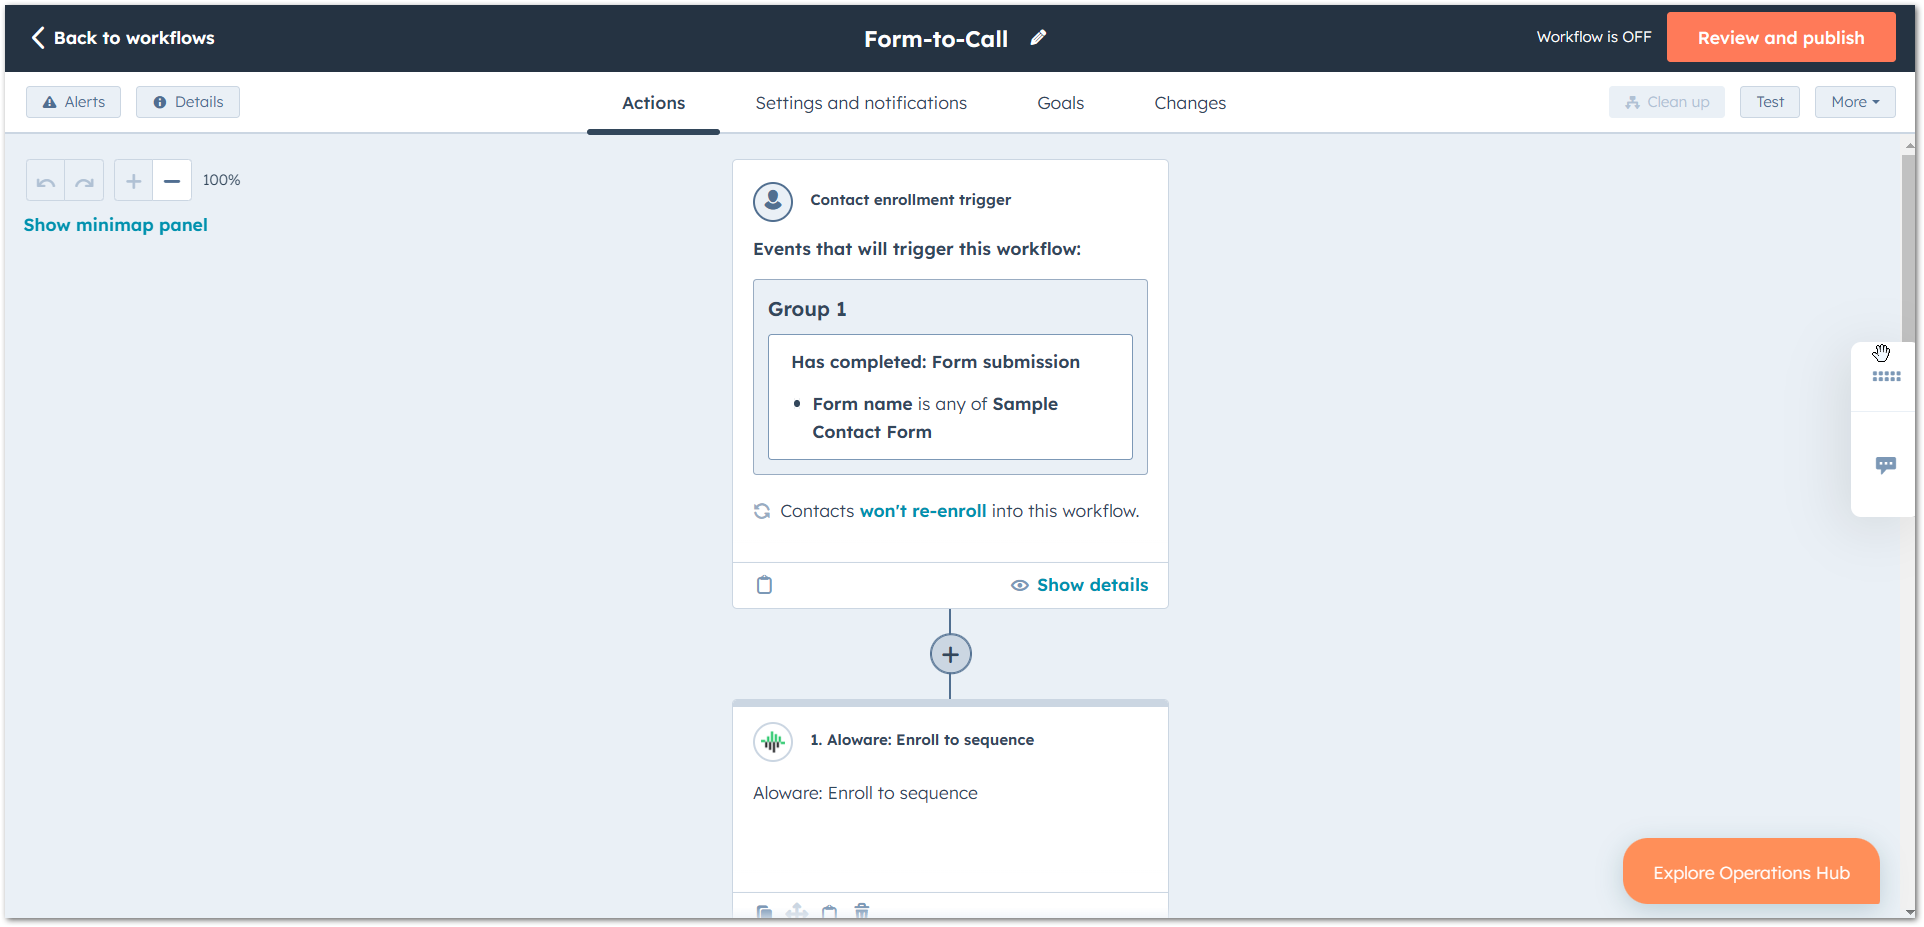
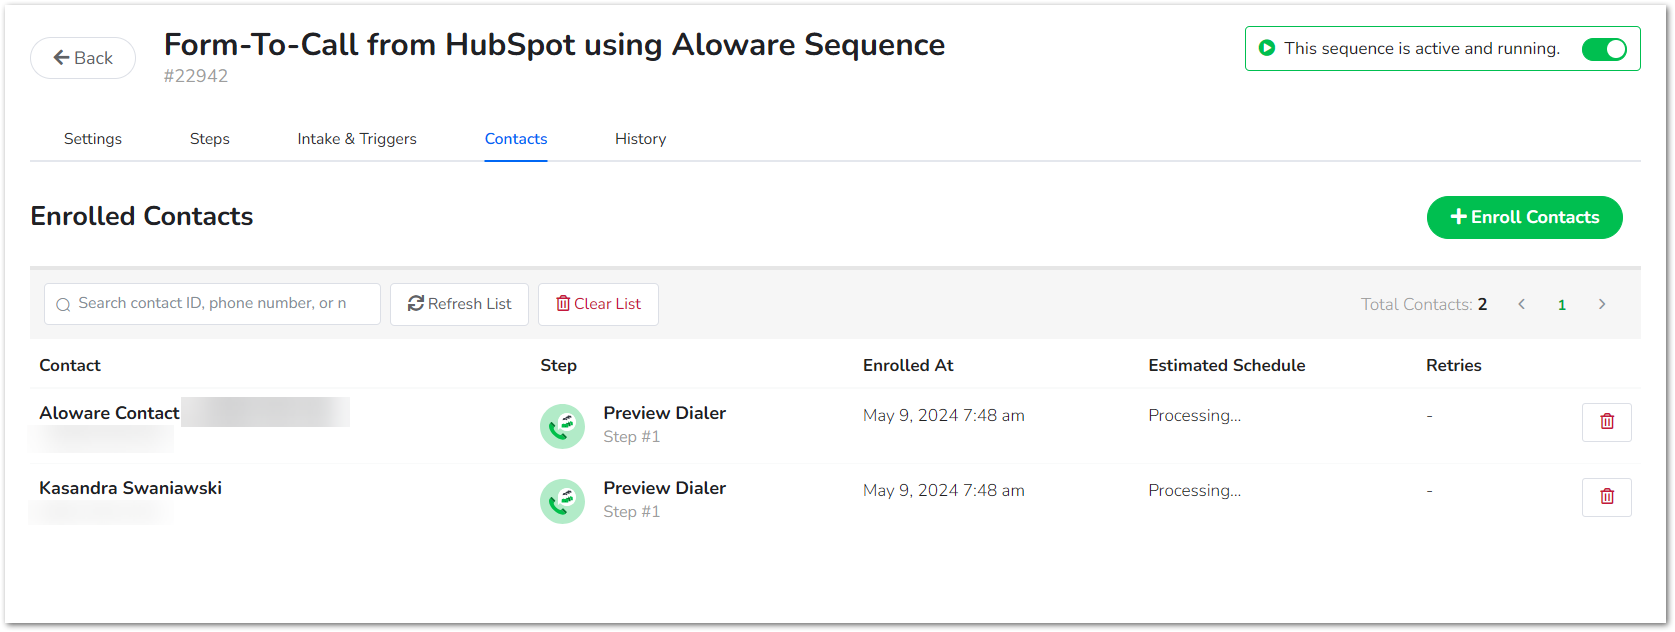
From now on, each form submission triggers the workflow and enrolls the lead in your Aloware sequence. To see who's enrolled, open the contacts tab and go to the sequences+ menu.
Our support team can help you set this up.